Ages 6-8 Epistles,Feasts,Sacraments Overview
EPISTLES, FEASTS, AND SACRAMENTS
AGES 6-7
This sample schedule is provided for Church School directors. Feel free to fill in your dates and teachers.
Teachers:
Schedule of Classes:
|
Date |
Lesson/Activity |
Teacher |
Special Notes |
|
September 7 14 21 28 |
Nativity of the Theotokos Elevation of the Cross Romans Romans |
|
Memory Work: New Testament Books |
|
October 5 12 19 26 |
I Corinthians I Corinthians II Corinthians Galatians |
|
|
|
November 2 9 16 23 30 |
Ephesians Philippians Colossians Entry of the Theotokos I and II Thessalonians |
|
All Saints Party after Church School |
|
December 6 7 14 21 28 |
Tentative I and II Timothy Titus/Philemon Christmas Pageant Nativity of our Lord |
|
St. Nicholas Party?
Parish and Nursing Home Painting of Holy Water jars |
|
January 4 11 18 25 |
Theophany Hebrews Hebrews James |
|
Three Kings Party after Church School
|
|
February 1 8 15 22 |
Meeting of the Lord I Peter II Peter/Jude I,II,III John |
|
Memory Work: 12 Major Feasts
Make Homeless bags
|
|
March 1 8 15 22 29 |
The Revelation Baptism Chrismation Annunciation Confession |
|
|
|
April 5 12 19 26 |
Palm Sunday Pascha No Church School Eucharist/Liturgy |
|
Candle Decorating Workshop
Pascha! Prosphora Workshop |
|
May 3 10 15-17 17 24 31 |
Marriage Orders Camping Trip ages 6-12 No Church School Ascension Pentecost |
|
Theme: Journeys of St. Paul
Make “Kneel-upons” Birthday Cake for the Church |
|
June 7 14 20 21 |
Holy Unction Requiem/Burial Play Rehearsal Closing Exercises |
|
Koliva Workshop After vespers, with overnight Play performance |
|
August 2 3-7 9 |
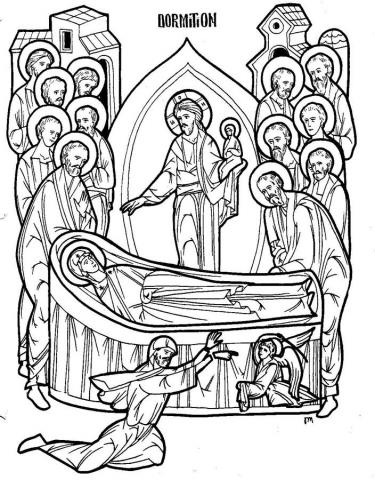
Transfiguration Vacation Bible School Dormition |
|
|
General notes:
Classroom supplies: Each class is supplied with the following items:
Paper plates, small and large Scissors Stapler/Staples
Paper, plain and construction Tape and dispenser Paper bags
Glue or glue sticks Crayons and/or markers Cotton Balls
Popsicle sticks Chenille (colored pipe cleaners) Sharpies
If you use the last of something, please either replace it or let me know so I can replace it. If you need special craft supplies for your lesson, submit the receipt to me for reimbursement.
Books are available for class use. While each child in the younger classes will have a copy of the Beginner’s Bible, and it’s always fun to start out in your very own Bible book, many times we must supplement with the teacher’s copies of the Children’s Bible Reader, Read with Me Bible, Golden Children’s Bible, Child’s First Bible, or other books. Watch the lesson plan for page numbers and details. Each has strengths and weaknesses: Children’s Bible Reader is Orthodox but no longer in print, First Bible has great pictures but not much content, Golden Bible has the most content and lovely pictures but way too long, etc. And not a one has ALL of the stories we need.
Curriculum: This year we take a look at Epistles, Feasts, and Sacraments. Feast lessons should be scheduled to fall the week before the
feast to prepare for the celebration. The other lessons, Epistles in the order they are found in the New Testament, followed by the Sacraments, move through the year, breaking for a feast when necessary.
Teaching Schedule: We all know that there will be last-minute needs; trade with someone if you cannot teach on your assigned day and let the director know!
Insurance: Each of us must “apply” each year for our volunteer position of teacher. Please be sure not to send small children to the bathroom unattended and accompany your charges back to the Social Hall after class.
Opening Exercises: The Church School director will supervise this time, or delegate it when she is absent. Church School children and teachers are dismissed first from Liturgy; children come straight across for snack during opening exercises. These are an integral part of the curriculum – reviewing material from previous weeks, presenting additional Old Testament characters, rehearsing plays, hearing memory work, and playing quiz games.
Hand-Outs: There will be weekly hand-outs from the Parents’ Guide if it wasn’t given to each family at the beginning of the year. These should be sent home with the children to continue the lesson through the week.
Workshops: We have 5 workshops planned this year learning traditional Orthodox ethnic “skills” that coordinate with our curriculum: baking prosphora, making koliva, decorating holy water jars, making kneeling cushions, and decorating Palm Sunday candles. These will take place after Church School in the Church Hall.
Movie Nights and Parties: We will have supper after vespers on Saturday night while showing a small children’s movie. Older children should bring a sleeping bag for a lock-in with “feature” presentation; we must have at least 2 adults at each overnight.
RECIPES
CLAYS PAINTS
SALT DOUGH FINGER PAINT (4 WAYS)
2 cups flour Use pudding with food coloring!
1 cup salt Mix liquid starch and food coloring.
about 1 cup water Mix 3 T sugar, ½ cup cornstarch, and
food coloring 2 cups cold water. Cook over
bath oil, vegetable oil, peppermint oil low heat, stirring, till thick.
Mix flour and salt. Add water Pour into muffin tin. Add
slowly and mix with your fingers until food coloring to each cup.
it makes dough. Knead in a few drops
food coloring and a splotch of oil (if SAND PAINT
desired). Store in air-tight container. Add dry tempera paint to corn meal.
Sprinkle over areas “painted” with thinned white
SELF-HARDENING CLAY
1 cup sand glue for sand effect. Shake off excess.
½ cup cornstarch
1 tsp powdered alum PASTES
¾ cup hot water PRIMARY PASTE
Food coloring if desired Mix ½ cup water and 1 cup flour
Mix sand, cornstarch and alum in a bowl. Spoon into a jar
in large pot. Add hot water and stir or squeeze bottle to store.
vigorously. Add food coloring if
desired. Cook over medium heat PAPIER MACHE PASTE
until thick, stirring constantly. 3 cups water
After cooling, store in airtight container. 1 ½ cups flour
Mix flour with cold water until lumps are gone.
SAWDUST CLAY
2 cups fine sawdust Dip strips of newsprint in paste and mold around
1 cup flour surface to be shaped. Air dry.
Mix sawdust and flour in bowl
or bucket. Add a little water at a time,
stirring till it is stiff but pliable. Knead
till it’s elastic and easy to shape. Store
in airtight container. Air dry.
CORNSTARCH DOUGH
2 cups cornstarch
4 cups baking soda
2 ½ cups water
Mix cornstarch and soda in large
pot. Add water. Cook, stirring, over medium
heat until thick like mashed potatoes. After
cool, knead on wax paper for 5 minutes. Store
in an airtight container. Air dry.
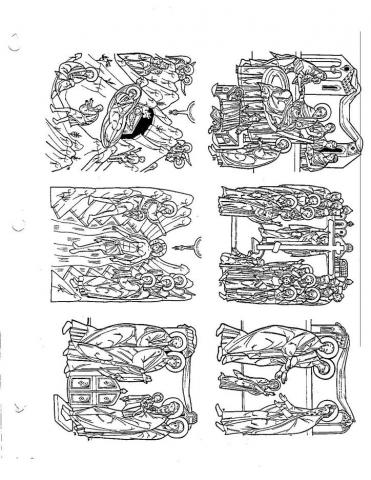
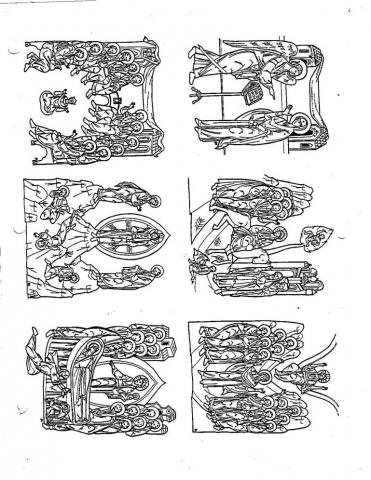
Small pictures of the major feasts of the church can be used in many crafts:
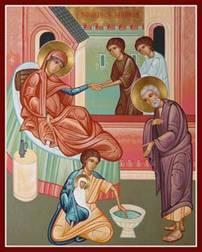
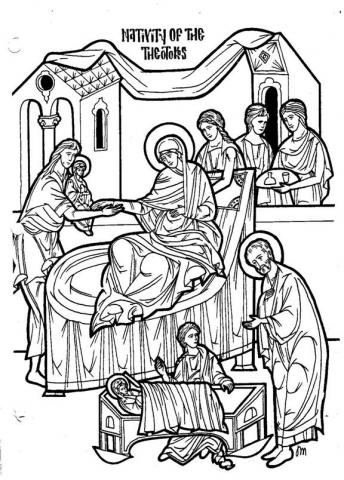
Nativity of Theotokos
NATIVITY OF THE THEOTOKOS
Objectives:
- Children should know that Mary is the Theotokos and her parents were Joachim and Anna.
- Children should recognize the figures in the icon and be able to tell the story of the Nativity of the Theotokos with their icon picture.
Possible Lesson Plan:
- Open with prayer.
- Tell the story of the Nativity of the Theotokos:
Long ago, in the land of Israel, there lived a righteous couple named Joachim and Anna. They were descended from the great Jewish kings, David and Solomon. But there was one thing that made Joachim and Anna very sad – they were very old and had not been able to have any children.
Among the Jewish people, a family was worthless if there were no children. Remember the stories in the Old Testament of Abraham and Sarah and of Hannah and her son Samuel. So, Joachim and Anna were very sad. But they loved God very much and went every day to the Temple to give gifts. Finally, one day, the Temple servants refused to accept their gifts and told Joachim and Anna that they were cursed since they could have no children.
Anna cried and went home. But Joachim was so sad that he went out to a mountain. There he fasted and prayed for forty days. At the end of the forty days, God sent an angel to Joachim and Anna. The angel had wonderful news: even though they were so old, they would have a baby girl. And this little girl would be the one spoken of by the prophets many years before – the one chosen by God to be the mother of His own Son. The angel told them to dedicate the daughter to the service of God.
And so, Joachim and Anna had a baby girl and named her Mary. And Mary is known to this day as the Theotokos – the Mother of God. We remember Joachim and Anna every liturgy when the priest names them for us at the very end. Listen for their names next week in church.
- True or False:
True False
Mary’s parents were Joachim and Anna. Mary’s mother was named Elizabeth.
God sent an angel to speak to Joachim. Joachim and Anna had many children.
Mary is the Theotokos. Theotokos means friend of God.
Nativity means birth. God spoke to Joachim in a bolt of lightning.
On the Nativity of the Theotokos, we Joachim and Anna named their baby Naomi.
celebrate the birth of Mary.
- Craft idea: copy the icon picture onto heavy paper and cut out Anna, Joachim, and each Mary with nurse on the heavy lines. Have the children color the figures and the background: Anna with a blue robe and white hair, Joachim with white hair, Mary in her traditional deep red. Use glitter to color the haloes gold. Then the children can use their icons as puzzles, naming each figure as they are placed in the icon. They can take home the “puzzle-icon” to use this week in their icon corner.
- Bake a cake the night before. Let the children decorate it and put candles on it. Maybe blue icing or blueberries, to remind the children that blue is the color for the vestments for feasts of the Theotokos? Then have a birthday party for Mary.
6. Begin your Major Orthodox Feasts coloring book. Adjust size to fit two of each icon pair on top of each other portrait direction of paper. Print duplex, flip on long edge, and you should have two copies for each printing. Be sure to leave space in the middle to cut the two books apart.
7. End with prayer.
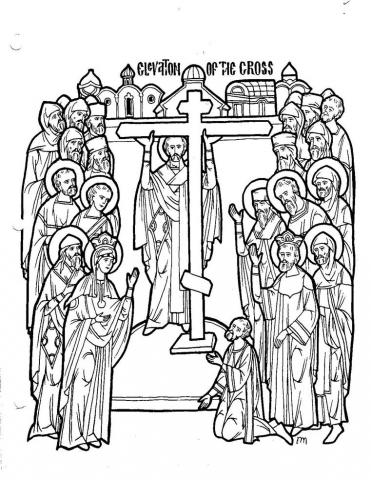
Elevation of the Cross
THE ELEVATION OF THE HOLY CROSS
Objectives:
- Children should recognize a cross and how to make the sign of the cross.
- Children should know the story of St. Helen and the finding of the Holy Cross.
- Why is the cross important to us as Christians? Christ died on the cross.
The cross shows us how much Jesus loves us.
Possible lesson plan:
- Open with prayer. Practice making the sign of the cross as you pray.
- Tell the story of St. Helen and the finding of the Holy Cross, using the icon as a picture to illustrate the story for the students:
The Empress Helen, mother of the great Emperor Constantine, was traveling to the Holy Land, the land where Jesus had lived and died and risen from the dead. All the palace was in an uproar. The servants prepared food for the journey, packed the clothing, and made everything ready for the royal family to travel. The Empress was a Christian – one who believed that Jesus was the true God. She was going to the Holy Land to find the places and things the Bible told about.
Soon, the royal party – the empress, her ladies, her soldiers, and her servants – reached the Holy Land. The royal ship, with its sails of purple silk trimmed with gold, landed at the port of Joppa on the Mediterranean Sea. There, camels and horses and donkeys waited to carry them inland. The road was hot and dusty; the sun beat down on them. Finally, they reached the city of Jerusalem. They could almost feel the presence of Jesus. These were the very streets He had walked about 300 years before.
Empress Helen had the servants put up silken tents on a hill outside the city. The hill was called Golgotha, a dusty mound with a few bent and twisted old olive trees growing nearby. What was special about this hill? The Bible says that Golgotha was where Jesus was crucified. No one had seen the cross on which the Lord died, but, somewhere on that dusty hill, Empress Helen was sure that she would find three crosses. The Lord had given her many dreams and visions that had started her on this journey. He would surely show her how to complete her task. Helen Prayed. Then, she told her men to begin digging, not on top of the hill, but in a little gully to the side. As they dug, the men became more and more excited. Suddenly, one of them found something wooden. It was a cross! Soon, there were three wooden crosses uncovered. But, which one was the cross of Jesus Himself?
The Bishop of Jerusalem, Macarius, suggested a way to find out. He know of a woman who was sick, so sick she was about to die. He had his servants carry the woman out to the hill. The woman was tired and wondered what was happening. Then, the bishop asked the sick woman to touch the first cross; nothing happened. She touched the second cross; nothing happened. Then she touched the third cross; suddenly she was full of energy and life and was well again. Surely this was the true cross of Christ!
The Empress Helen sent word to her son, the Emperor Constantine, that they had found the true cross of Jesus Christ. There was rejoicing in all the Christian Churches. The emperor ordered that a church be built there on the Mount of Olives. He reminded all the people that, wonderful though it was to find the wooden cross on which Jesus was crucified, we do not worship the cross but the Lord who died on it. And so it is to this day.
- True or false (As we discussed in the first part of the book, use these as a quiz or game with the older:
True False
Helen was the mother of Constantine. Constantine found the cross of Jesus.
Helen traveled to Jerusalem. Helen found the cross in Constantinople.
The cross was on a hill called Golgotha. The cross was in the Garden of Gethsemane.
A church was built where the cross was The bishop threw dice to choose the true
found. Cross.
Constantine was the Emperor of Rome. The Bishop of Jerusalem was Constantine.
- Why is the cross so important to Christians? Tell the story of the crucifixion from the Children’s Bible Reader. Talk about how a cross can look. Show examples of different styles of cross. Think about places where we see a cross, or take a “field trip” to the sanctuary to “hunt” for crosses.
- Teach and sing, complete with prostrations:
Before thy cross, we bow down in worship, O Master,
And thy holy resurrection we glorify.
7. Why “basil” at the Feast of the Cross? The herb, basil has long been associated with the feast of the Exaltation of the Holy Cross. The word “basil” is derived from “Vasileios,” the Greek word for a king or person of royal lineage.
According to the liturgical tradition, the Holy Empress Helena, Mother of the Saint and King Constantine, found the location of the True Cross by digging for it under a large growth of basil. Basil plants were reputed to have sprung up at the foot of the Cross where the Precious Blood of Christ fell, along with the tears of the Mother of God. On the Feast of the Exaltation of the Holy Cross it is customary in the East to rest the image of the Holy Cross on a bed of basil before carrying it out for the veneration of the faithful. Also, in some areas, branches of basil are used throughout the temple as a festive decoration as well as to provide a heavenly scent in honor of the Feast. Blessed basil leaves may also be arranged in a bouquet at the foot of the “Golgotha” cross. Dried leaves taken from the feast can also be used by the faithful as a sweet incense to burn at home as a blessing.
Why not plant some basil today in an egg carton to take home and water? Plant it next spring in the yard and have a lovely plant for next year’s feast. Or, if you planted it last year when we studied the finding of the Holy Cross, it's time to bring it to church.
8. Conclude with prayer, again practicing the sign of the cross.
R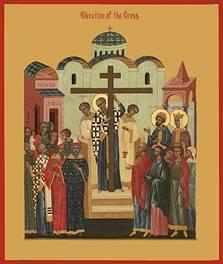
Romans -- Members of the Body
Romans 12: 4-5-- Members of the Body
Scripture Verse: For as we have many members in one body, but all members do not have the same function, so we, being many, are one body in Christ, and individually members of one another.
Objectives:
1. Students should be able to name several parts of their physical bodies and what they are used for.
2. Students should be able to name several "ministries" within the body of Christ and what their use is. They should be able to state that the Church is the body of Christ.
3. Older students should memorize the verse.
Possible Lesson Plan:
1. Open with prayer. Introduce the idea of Paul’s writing letters to the churches he’s started in different cities, pg. 291 in the Children’s Bible reader. This letter was to the church in Rome; find Rome on the map.
2. Discuss physical bodies and the parts of them -- draw a body on a piece of paper, adding the parts as you discuss them, or let the children draw in each part one by one.
3. Discuss the wonderful things Jesus did when he was physically present on earth -- could use His miracles, teaching parables, etc. as examples.
4. Discuss the concept that we are the body of Christ on earth today -- what things can we do as members of that body? With older children, you can discuss the concept of talents -- that each part of the body does not do all things equally well -- and let the children think about their own talents and where they may fit into the whole. You could even briefly discuss disabilities; how does it hinder a person to be blind, deaf, etc., and what might be the equivalent in the Church.
5. Sing: Father Abraham
Father Abraham had many sons
Many sons had Father Abraham.
And I am one of them, and so are you,
So let's all praise the Lord RIGHT HAND!
LEFT HAND!
RIGHT FOOT!
LEFT FOOT!
HEAD!
Sing the chorus again and again, each time adding one more part of the body to the marching motion until the whole body is marching in time to the music.
6. Do the Members of the Body craft on the next page.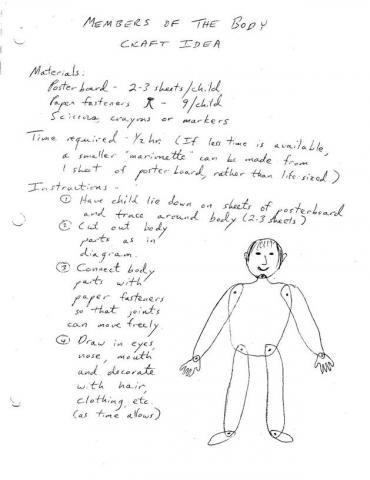
7. Close with Prayer.
Romans: Obey Civil Authorities
Romans 13:1 – Obey the Civil Authorities
Scripture verse: "Let every soul be subject to the governing authorities. For there is no authority except from God, and the authorities that exist are appointed by God."
Objectives:
1. Students should be able to identify our country and its flag; older students could discuss the government of Rome in the days of Paul and the type of government we have today.
2. Students should be able to say that we should obey the laws of our country; older students should be able to recite the verse.
Possible Lesson Plan:
1. Begin with prayer.
2. Discuss our flag, preferably with a flag to look at, the meaning of the stars and stripes. The story of Betsy Ross would fit in well here, especially since she was a woman with basically one skill, sewing, who put it to use when needed. You could also show a map or pictures of the places of our government (from the library) -- the Capitol, White House, etc.
3. Discuss the Ten Commandments (Romans 13:9) (How did Moses get them? It’s in your Children’s Bible Reader) and the laws of our country -- many similarities.
4. Sing a patriotic song like "America the Beautiful":
Oh, beautiful for spacious skies,
For amber waves of grain,
For purple mountains majesty
Above the fruited plain
America, America, God shed His grace on thee,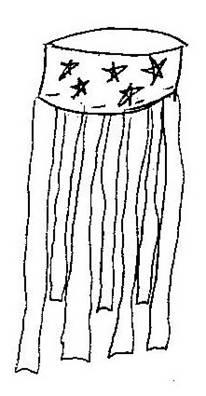
And crown thy good with brotherhood from sea to shining sea.
5. Make a patriotic wind-sock: Cut a strip of blue poster board
or construction paper about 6 inches wide and 18 inches long.
Staple, glue, or tape this into a ring and decorate with white
stars, either stickers or cut from construction paper. Staple
or glue streamers of red and white crepe paper from the ring
and staple a string for hanging across the top.
6. Close with prayer. Pray especially for our President and all civil authorities.
1 Corinthians: Christ Crucified
I Corinthians 2:2-- Christ Crucified – Use this lesson on years when there’s an extra week
Scripture verse: "For I am determined not to know anything among you except Jesus Christ and Him crucified."
Objectives:
- Students should be able to state that Jesus was crucified for our sins.
- Students should know that the cross is an important symbol of Christianity and why.
- Older students should be able to recite the verse.
Possible Lesson Plan:
1. Open with prayer.
2. Review the events of Holy Week leading up to Jesus's crucifixion; Children's and “Read with Me” Bibles have great pictures to tell the whole story
3. Discuss sin (disobedience, "doing bad things") as appropriate to the age of the students; what are some sins that they have committed?
4. Discuss what mommy and daddy do when they are naughty; are they punished? Jesus was punished for our sins on the cross. Do mommy and daddy forgive us when we are disobedient? So God forgives us also, through His Son, Jesus.
5. Remind the students that the story does not end with the cross, but with the empty tomb!
6. Do a cross necklace: Cut a cross (plain or 3-bar) out of construction paper for each child. Glue on a small paper plate. Decorate with flower stickers. Punch a hole in the top and tie a piece of yarn to hang the necklace.
7. "Review" the great hymn, "Before Thy Cross" that we sang for the Feast of the Elevation of the Cross, or the Troparion of the Holy Cross that we sing every Sunday. Both songs with music are in the Liturgy Book:
Before Thy Cross Troparion of the Holy Cross
Before Thy Cross Oh, Lord, save thy people
We bow down and worship And bless thine inheritance.
O, Master. Grant victories to all Orthodox Christians
And thy Holy Resurrection Over their adversaries.
We Glorify! And by virtue of thy Cross
Preserve thy habitation.
8. Close with prayer.
1 Corinthians: Run the Race
I Corinthians 9:24-- Run the Race
Scripture Verse: "Do you not know that those who run in a race all run, but one receives the prize? Run in such a way that you may obtain it."
Objectives:
1. Students should know that winning requires hard work and perseverance.
2. Students should want to strive for the "heavenly crown".
3. Older students should memorize the verse.
Possible Lesson Plan:
1. Open with prayer. Review the verse. Paul was writing to the church in Corinth. Find Corinth on the map.
2. Begin with a discussion of athletics -- the early Olympics and today; there are lots of great library books with pictures of athletes.
3. Discuss the discipline of an athlete: be sure the children are led to remember diet, exercise, practice, etc. Many of them already play sports and know what is required by their coaches.
4. Discuss earthly prizes (laurel wreath of early Greeks, medals and ribbons today).
5. Discuss the kingdom of heaven -- the heavenly crown of the saints and martyrs. This would be a great time to talk about one or two of your favorite saints -- the hard work, suffering, perseverance, etc. of that person.
6. Now for the fun -- run relay races ( or individual races if there are only 3 or 4 children in the class). Make sure there are different types of races so that everyone will have a chance to "win". Either make crowns for the winners in class, or have them made by the teacher ahead of time; write the scripture verse on the crown as a reminder!
Ankle Race: Each child grabs both his ankles with his hands and runs toward the mark.
Feather Race: Each child starts with a feather on a paper plate and races toward the goal. The winner is the first to finish without losing the feather off the plate. If the feather falls off, the player must begin over.
Peanut Race: Each player has 3 peanuts at his starting line and a bowl at his finish line. The goal is to pick up one peanut, run to the bowl, put the peanut in the bowl, return for the next peanut, until all three peanuts are in the bowl.
Balloon Ball Race: Each player races across the room, batting a balloon (of different colors, if possible) with their hands or feet.
7. Close with prayer.
1 Corinthians: Sharing and Caring
I Corinthians 13: 5 -- Sharing and Caring
Scripture reference: "Love... does not seek its own.”
Objectives:
1. Even the youngest student should be able to recite the verse and say in his own words what it means.
2. The students should be able to tell the Stone Soup story and how it pertains to the lesson.
3. Each student should be able to list one thing he will share with someone (brother, sister, friend) this week.
Possible Lesson Plan:
1. Open with prayer.
2. Introduce the Scripture verse and have the children repeat until all know it. If you have time, read the whole chapter; it's beautiful and will at least sound familiar in the future even if the students are too young as yet to understand it all.
i
3. Ask if they understand what it means. Allow for discussion if students are old enough.
4. Tell the story of the Stone Soup. Have a big pot in the center of the class circle or table and give each student an item mentioned in the story for the soup. As that item is added to the pot, have the student holding the item actually put it in the pot and give the pot a stir. If you are a budding chef, you could make a pot of soup from the "recipe" the night before and a pot containing only stones and let the students taste each!
5. Have each student decide on a specific course of action for the following week -- a toy he will share with someone, a chore he will "share" with his mother or father, etc.
6. Do the sharing and caring mobile -- the teacher can write in the children's ideas. Have the pieces cu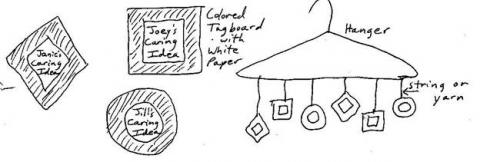 t out in advance for younger children -- larger size from colored tagboard or construction paper and smaller in plain white.
7. Close with a prayer -- be sure to ask Jesus to help the students carry out their planned "sharing" during the week.
Stone Soup: A Lesson in Sharing
Many years ago three hungry soldiers were returning home from the wars. One day, as they came out of the forest, they saw a small village. Along the village lane they saw three shops: there was a bakery, a carpenter's shop and a tailor's shop.
The eldest of the three soldiers, the sergeant, told the soldiers to be cheerful. He was sure the kind people of the village would share their dinner with them. The soldiers knew their sergeant was a wise man. They were not worried. They knew he was right and they would soon have something to eat.
The sergeant knocked on the first door. It was the tailor's shop. The door was opened and a woman stood before them. "Can I help you?" she asked.
The soldiers replied, "Can you spare us some food? We have not eaten for some time and we are still far from home."
The woman told them that the harvest had been bad and that she had no food to spare.
The soldiers turned to the next door. They hoped that they would have better luck there. But instead, the baker's wife told them she was sorry to see them hungry but that everyone had to look out for himself in days like these.
Even in the third shop, they were turned away by the carpenter. And he told them that he did not believe in sharing.
"What selfish people these are!" said the sergeant. "They do not know how to share. We must teach these people a lesson."
"Shall we steal from them?" asked the soldiers.
"No, no. We shall only teach these people how to make "stone soup."
Soon they built a fire in the middle of the lane. They hung their kettle over the fire and filled it with water. They gathered some stones, washed them and put them in the water. Then the sergeant stirred the water, so that the stones rattled in the pot. He took a taste of the new soup and said, "This is good but some potatoes would surely bring out the flavor of the stones."
Just then the baker said that there were a few potatoes in his shop. He would run and get them.
"Oh, thank you. And bring a bowl so that you may join in our dinner," called the sergeant.
Once the potatoes had been added to the soup, the soup was tasted again. This time one of the soldiers thought a carrot and some onions might make the soup more colorful. The tailor ran at once to get them and when he returned he had even found some salt to add to the pot. He was delighted as he added his offerings to the soup. He too was asked to join them for dinner.
"Now," said the soldiers, "we shall have the final taste. Mmm-it is good, but perhaps a piece of meat would make it extra good."
The carpenter scratched his beard and thought. Then he remembered a piece of meat he had been saving for a special dinner. He went back to his shop and returned with the meat.
When the "stone soup" was ready, it was so good, that the carpenter asked for the recipe.
The sergeant answered by saying, "You have fine stones to cook with in this village. But the real secret of good stone soup is the sharing that everyone does to make it good."
As they sat together and enjoyed their meal they knew that the soldiers and their wise sergeant had taught them a lesson about sharing. It was a lesson they would never forget.
Have you made any stone soup lately?
2 Corinthians: Light of the World
II Corinthians 4:6 – Light of the World
Scripture verse: “For it is God Who commanded light to shine out of darkness, Who has shone in our hearts.”
Objectives:
- Know that Jesus is the Light of the World.
- Think of some ways they can show His light to others.
- Know how to light a candle in Church.
Possible Lesson Plan:
- Open with Prayer.
- First begin to appreciate darkness: Close your eyes. How does it feel? Turn out the lights. Sit quietly in the dark for a minute.
- Light a candle in the center of the circle. Remind the children that Jesus is the light of the world. Then have each child light a candle. See the light it gives. As each child sits quietly holding his candle, reflect on how Jesus is the light of the world and His light “reflects” in our faces. Remind them that, in their Chrismation, Jesus gave us His light. Repeat with the children, “The light of Jesus is in me.” Now, blow out the candles and remember the darkness. Then turn on the lights.
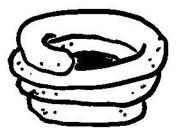
- Decorate a candle to be used next Sunday at Liturgy. Have one candle for each child and various tiny Christian stickers, dried flowers, flowers cut from wrapping paper, etc. Use a glue stick (not Elmer’s) to attach the decorations to the candle. Give each child his candle the next Sunday just as he enters the sanctuary. He can then light it and place it in front of the icon of the Lord, remembering that Jesus is the light of the world. Or make from clay a votive candle holder, again to use in church the next week.
- Sing: “This Little Light of Mine”
This little light of mine, I’m gonna let it shine. (3x)
Let it shine, let it shine, let it shine.
Hide it under a bushel, No! I’m gonna let it shine. (3x)
Let it shine, let it shine, let it shine.
Won’t let Satan (blow) it out, I’m gonna let it shine. (3x)
Let it shine, let it shine, let it shine.
- Close with prayer.
Galatians: Fruit of the Spirit
Galatians 5: 22-23a – Fruit of the Spirit
Scripture Verse: “But the fruit of the Spirit is love, joy, peace, longsuffering, kindness, goodness, faithfulness, gentleness, self-control.”
Objectives:
- Student should be able to name the fruit of the Spirit, and discuss how this can be reflected in his own behavior with others.
- All students can memorize this verse
Possible Lesson Plan:
1. Open with prayer. Find the region of Galatia on the map.
2. Discuss fruit -- pass around some real fruits from the supermarket or garden -- discuss their qualities (sweetness, juiciness, nutritional value, etc.); have the children describe them in their own words.
3. Now pass around some "bitter herbs" -- chicory, horseradish, hot peppers, etc.-- find out how they are like fruit and how they are different. Which one leaves a sweet taste in the mouth of the eater and which one a bad taste?
4. Discuss the fruit of the Spirit, as listed in the text; do those qualities in a person leave a good "taste" with others; what sorts of behavior leave a bad taste? For the smallest children, make a group of construction paper “peanuts” and on some write the good fruit and on some the names of some bad “fruit” (lying, stealing, hate, anger, etc.) and have them each choose a peanut in turn; feed it to the classroom elephant if it’s good and stomp on it if it’s bad.
5. Do the fruit of the Spirit craft activity.
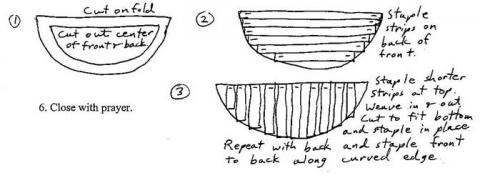 Make a basket. With small children, just fold a paper plate in half and staple the curved edge. With older children, use the plate as a frame, cutting out the middle. Staple strips of brown paper in one direction on the back of the plate. Weave the vertical strips in and out of the horizontal ones, basket-style, and cut to fit and staple. Cut out (or cut in advance for toddlers) the fruit patterns and label with the fruit of the Spirit. Glue fruit into basket and decorate with Easter grass if desired.
Or a mobile? The Holy Spirit appeared as a dove...when? Yes, Theophany. Make a paper plate dove and hang the fruits of the spirit by strings as a mobile.

Ephesians: Armor of God
Ephesians 6:11 – Armor of God
Scripture Verse: “Put on the whole armor of God, that you may be able to stand against the wiles of the devil.”
Objectives:
1. Student should be able to name our adversary -- Satan or the devil
2. Student should be able to name the pieces of armor for battle.
3. Older students should recite the verse.
Possible Lesson Plan:
1. Open with prayer. Find the city of Ephesus on the map.
2. Discuss with the students the enemy -- the devil -- how Lucifer, the brightest of the angels, was thrown out of heaven by the armies of God for daring to claim he was as great as God. Discuss briefly (don't scare the children!) his sneaky ways in tempting us to disobey God. This would be a good time to review the stories of Adam and Eve, the tower of Babel, Jonah and the "whale", as well as Judas Iscariot and the betrayal of Jesus. All of these are in your children’s Bibles. Remind the children that Jesus has already defeated the devil with the resurrection, but that we must stand strong against his temptations with the weapons Jesus has given us.
3. Discuss the pieces of a knight's armor; a picture of a knight with a helmet, shield, breastplate, etc. would be great! (There are lots of pictures in a vast array of library books). Discuss what part of the body each protects and why.
4. Discuss the armor of God -- what does each piece mean? Loins of Truth, Breastplate of Righteousness, Shoes of Peace, Shield of Faith, Helmet of Salvation, Sword of the Spirit
5. Do the Armor of God craft.
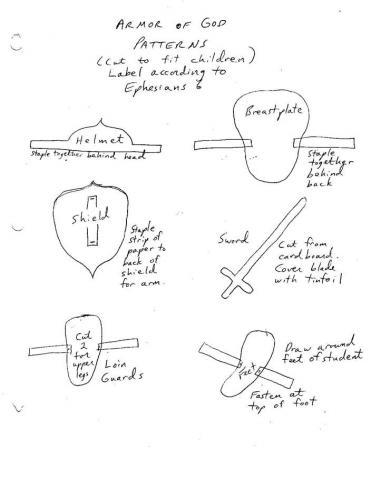
6. Close with prayer.
Philippians: Prayer
Philippians 4:6 – We pray to God
Scripture verse: “Be anxious for nothing, but in everything by prayer and supplication, with thanksgiving, let your requests be made known to God..”
Objectives:
- Each student should begin to say prayers, however simple, at the family icon corner each day; a specific focus each week is especially good.
- Older students should memorize the verse.
Possible Lesson Plan:
1. Open with prayer – the Lord’s Prayer would be a good one. Find Philippi on the map.
2. What is prayer? Prayer is talking to God and listening to God. When do we pray? How do we pray? Where do we pray?
3. Discuss with students types of prayer – prayers of asking, prayers of thanks, prayers of praise. With older students, review the lines of the Lord’s Prayer, asking for opinions as to what type of prayer each line represents. With younger students, ask them to suggest things they would like to ask God for, things they would like to thank God for, and things they would like to praise God for.
4. In church, we pray certain phrases over and over. What are some of them, and which type of prayer do they represent? E.g., “Glory to God” (praise), “Lord have mercy” and “Grant it, O Lord” (asking). Review a litany; can the students understand and reword what is being prayed for?
5. We pray for each other. Have students share with each other special concerns they have – for themselves, their family, their friends, etc. – and promise to pray for each others’ concerns this week.
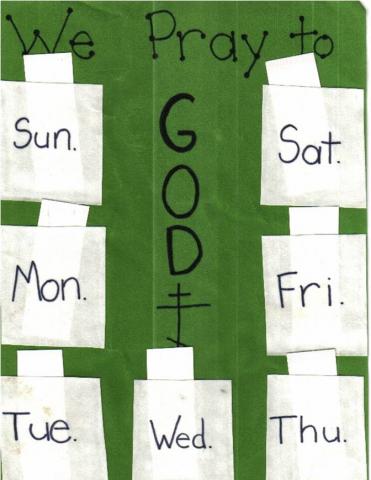
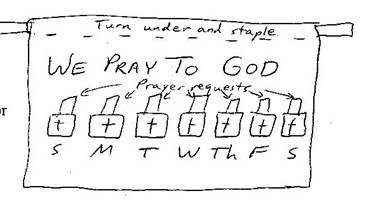 6. Make a prayer banner for each child to hang at home to remind them of prayer: begin with a piece of felt, 8”x12” or 12”x 18”. Cut out letters for younger children; older children can do their own cutting. Glue letters in place. Staple on small felt pockets for each day. Turn over top 1 inch and staple around a hanger or a dowel (dowel will need yarn or string for hanger). You can include felt crosses or tiny icons or stickers for decoration. Insert cards for prayer requests. On the next page is a sample copied from one of our teachers.
Time limited? Print the Litany Prayer Wheel on cardstock and color. Show the children how to personalize each prayer to their own family, parish, country. Take home and use in daily prayers.
7. Close with prayer: this time ask the children for suggestions and have them pray.
Colossians: Forgiveness
Scripture verse: “forgiving one another, if anyone has a complaint against another; even as Christ forgave you, so you also must do.”
Objectives:
- Children should know what forgiveness means and remember the lines from the Lord’s Prayer about forgiveness.
- Children should know that Jesus forgave us from the cross.
- Children should recall Forgiveness Sunday – what it means and what we do.
Possible Lesson Plan:
- Open with prayer – again use the Lord’s prayer.
- Review the line about forgiveness; what does it mean? Have anyone ever done anything mean or nasty to us? Have we ever done anything mean or nasty to others? Try to get specific examples. Have we forgiven that person? Have we said we are sorry when we do something that hurts someone? How many times do we forgive someone?
- We begin Great Lent with Forgiveness Sunday. On this day, the Church teaches us to ask forgiveness of each other. Sometimes we have done something that hurt or upset the other person on purpose; sometimes we don’t even know it. Demonstrate for the children how we circle the sanctuary, each asking the other for forgiveness; teach them how to ask forgiveness and forgive in sign language.
- Jesus forgave us from the cross. Review the story of the crucifixion in the Children’s Bible with the children. Remember how He prayed, “Father, forgive them for they know not what they do.” Review the Lord’s Prayer: “Forgive us our trespasses as we forgive those who trespass against us.” Repeat these important lines with the children.
- Are there other Bible stories of forgiveness? How about Joseph and his brothers? Read this in your children’s Bibles.
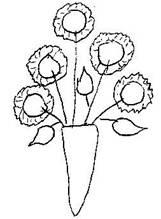
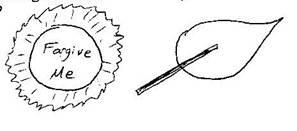
- Make a forgiveness bouquet. Use stems of pipe cleaners, and flowers of cupcake papers. First write “Forgive me” or “I forgive you” in the bottom of each flower cup. Poke the pipe cleaner through the bottom and bend it over to secure. Make several and put them all together in a bouquet with tin foil or a paper cone. Leaves can be made from two layers of green paper glued around a pipe cleaner. Remind the children to keep the bouquet handy. During the week, whenever they need to ask forgiveness for something (disobeying, yelling, angry words, etc.), they should take a flower from their bouquet and give it to the other person and ask him or her to forgive them.
 Doesn’t forgiveness give you a wonderful feeling?
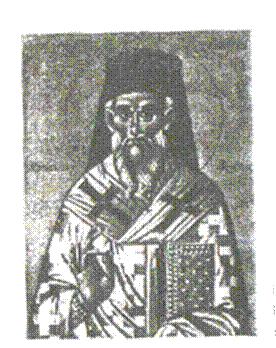 7. Another craft option would be to take the story of St. Dionysios, cut it out, and glue to a piece of construction paper:
Dionysios was born in a rich family, but became a monk when he was a teen. He was known for his forgiving spirit. One day, at the monastery, a stranger ran up to Dionysios. The stranger had killed a man, and that man’s family was hunting him down. Would Dionysios hide him, please? Dionysios found out that the man had killed Dionysios’s own brother. He was very sad, but forgave the man right away. And, when his family arrived, he told them that the stranger had already left by another road. The forgiven man later became a monk, a brother in the same monastery as Dionysios.
8. Close with prayer.
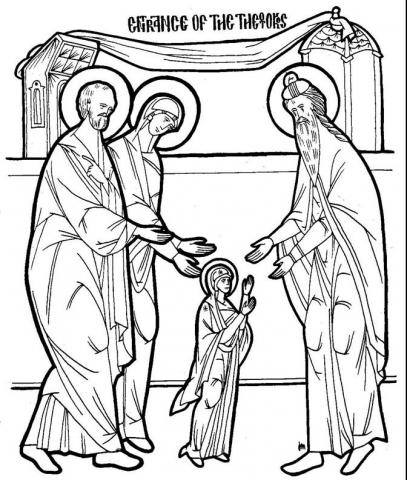
Presentation of Theotokos
THE PRESENTATION OF THE VIRGIN
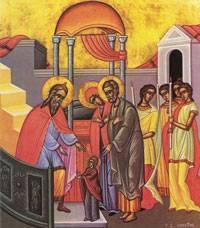 Objectives:
- Student should identify the Presentation of the Virgin in the Temple as one of the twelve major feasts of the church.
- Student should be able to identify the major characters in the icon.
- Student should be able to simply tell the story of the feast.
Possible Lesson Plan:
- Open with prayer.
- Tell the story of the feast, using the icon as a guide:
All of you remember that Mary was the daughter of Joachim and Anna. Remember how they had prayed and prayed for a child? They promised God that, if He would give them a child, they would dedicate the life of their baby to Him. And God blessed them with a very special baby girl. They named her Mary.
On Mary’s first birthday, Joachim called all the priests of the Temple to his home and there they all thanked God for this little girl. But then, when she was three, Joachim and Anna brought little Mary to the door of the Temple itself. Mary was such a little girl! Would she be able to climb the 15 steep steps by herself? But, as soon as little Mary was placed on the bottom step, she confidently climbed to the top. Other girls met Mary at the door, carrying candles. And the High Priest, Zachariah, met the family. He took Mary and led her into the Holy of Holies, where even the priest could only enter once a year. This was because Mary was God’s special child, chosen from before she was even born to be the mother of His Son. Mary lived in the Temple until she was twelve years old, learning the life of holiness and the teachings of God.
- True or False:
True False
Mary went to the Temple at 3 years old. Mary’s parents were Moses & Ruth.
Joachim & Anna were Mary’s parents. Mary went to the Temple at 12 years old
Mary lived in the Temple until she was Caiphas the high priest took Mary
12 years old. Into the Temple.
Zachariah was the high priest. Mary lived in the Temple until she was 50 years old.
Mary entered the Holy of Holies. Joachim and Anna left Mary at the
Temple because they hated her.
- Introduce the children to the people in the icon: Mary, Joachim, Anna, and Zachariah.
5. Remember the Old Testament story of Hannah and Samuel; reread it now in your Children’s Bible Readers. What is similar? What is different?
- Craft Idea: Living Mural
Before class with small children, or during class with elementary school age children, draw the icon with life-size characters on a huge sheet of mural paper (school supply or office supply stores sell these). If you have more children than characters, make village girls and boys to accompany Mary standing behind Joachim and Anna, or other temple virgins with the priest. Have the children color the characters. Then cut out the faces and hold up the mural. The children can take turns standing behind the mural with their faces in the places of the saints. Leave the mural on the classroom wall for all to enjoy. In the end, cut it up so each child receives his character.
Too big a project for your space and time? Then take a piece of blue foam and cut the center out to be a frame. Why blue? Decorate with flower stickers; we honor Mary with flowers especially at her Dormition. Color the icon, or use a printed one, and keep the frame for icons of the other feasts of Mary later in the year.
- Close with prayer.
1 Thessalonians: Giving Thanks
I Thessalonians 5:18 – Giving Thanks to God
Scripture reference: “in everything give thanks”
Objectives:
- Even the youngest should be able to memorize this short verse; older students can give the reference as well.
- Each student should be able to list many things in his life for which he personally can thank God.
Possible Lesson Plan:
- Open with prayer, asking God to open the eyes of the children so that they can see all of His wonders.
- Review the Scripture reference and have each child recite it. Find Thessaloniki on the map.
- Begin by asking the class to name some things they are thankful for; list them or draw a picture of them on the board. Help them if ideas are not forthcoming – e.g. my family, my church, Jesus, food to eat, clothes to wear, my friends, good health, my teddy bear, etc.
- Ask the children how they celebrate the holiday of Thanksgiving. Do they eat turkey? Does the whole family get together? Other special foods? Why do we celebrate this holiday? Tell the story of the Pilgrims and the Indians. Does their family say grace before each meal?
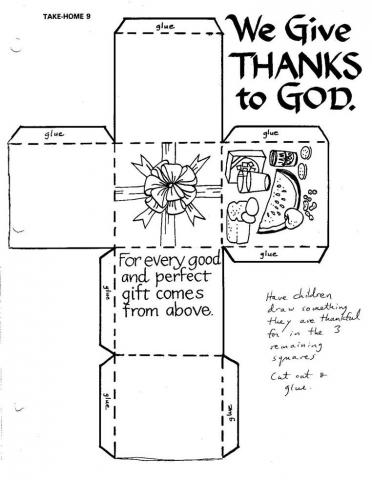
- Do the thanksgiving craft, either drawing the things one is thankful for on the empty squares or cutting pictures from magazines; your first Christmas ornament for the tree at home!
- Close with prayer – spend longer this time, giving each student the chance to thank God for something, and finishing up with a prayer of thanksgiving.
Timothy: God is Our Shepherd
II Timothy 2:10 – God Cares for Us as a Shepherd
Scripture reference: “Therefore I endure all things for the sake of the elect, that they may also obtain the salvation which is in Christ Jesus…”
Objectives:
- Children should be able to discuss how a shepherd cares for his sheep.
- Children should know that Jesus is the Good Shepherd.
- Children should understand that our priests, deacons, etc. are also shepherds, given by God to help Him care for us.
Possible Lesson Plan:
- Open with prayer.
- First, talk about sheep. If you have a sheep puppet or stuffed animal, bring it in and introduce it to the children. Have it talk to the children. What are sheep like? (soft, woolly, also helpless, easily lost, easily frightened). What dangers do they face? (wild animals, cliffs, hunger, storms, floods, etc.) Who cares for them? How? Why? Review with the children the story of David, the shepherd boy and of the Nativity (who visited the baby Jesus first?). These stories are in your children’s Bibles. The shepherd knows every sheep in his flock and cares for each sheep.
- Jesus called Himself the Good Shepherd. What does that mean? What dangers do we, His sheep, face? How does He protect us? Remind the children of many people in the Bible saved from danger by the Lord – the three children in the fire, Daniel in the Lion’s Den, etc. Review these stories in the Children’s Bible Reader. The Good Shepherd even was willing to protect His sheep by dying for them on the cross. Who should we run to when in danger? (Jesus) How? (in prayer). Read Psalm 23 to the children.
- God gives us men to be our earthly shepherds, helping us and teaching us. Who are these people? Who is your priest? Timothy was a young man, chosen by God and ordained by St. Paul to be a priest, a shepherd. Paul spoke in his letters to Timothy about how to be a good shepherd to God’s people and how important it is to love them as Jesus Himself does.
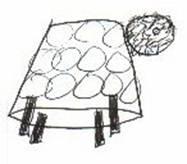 Make a sheep: Take a plastic 8-10 oz cup, white or clear color, short and fat. Glue on a black 2 inch pompom with 2 wiggle eyes near the bottom of the cup. Attach 4 small clothespins as legs and decorate with white cotton balls.
Prefer a paper craft or don't have all the supplies for this one? Take a paper plate and let the children color the bottom half green for grass and top blue for sky. They can draw sun, clouds, or add cotton ball clouds. OR print the circular background on cardstock. Fold the plate in half with green in front and sky up. Print Jesus and the sheep on cardstock and cut out. Bend the feet of Jesus forward with the tab and tape or glue to the plate in the grass. Bend the feet of the sheep back, as if they were lying down, and tape or glue on either side of Jesus. A DIORAMA!
- Close with prayer.
Philemon: Slave or Brother?
Philemon 16: Slave or Brother?
Scripture verse: “no longer as a slave but more than a slave – a beloved brother…”
Objectives:
- Student should be able to define slave and brother.
- Student should be able to state that “we are all brothers in Christ”
Possible Lesson Plan:
- Open with prayer.
2. Discuss slavery—the buying and selling of people – use examples from the Bible (e.g. review the story of Moses, of Joseph, of Daniel and the 3 men in the fire), from ancient Rome in the days of Paul, and from our own American history. Explain the story of Onesimus and Philemon:
In the days of Paul, there lived a slave named Onesimus in the city of Colossae. His master was named Philemon. Philemon heard the teachings of Paul and became a Christian; his name means “Affectionate”. But, Onesimus was a useless slave, who finally stole his master’s money and ran away to the big city of Rome. There, Onesimus also heard the teachings of Paul about Jesus and became a Christian. He knew he had done wrong in running away from his master and returned to Philemon with a letter from Paul himself. In the letter, Paul told Philemon how much Onesimus had served him in Rome, and he hoped that Philemon would receive his slave back with love and forgiveness. This Philemon did, and he sent Onesimus back to Paul to serve the Lord. Later, Philemon became bishop of Colossae and Onesimus bishop of Ephesus.
- Discuss the love of Christ; did Jesus love some people more than others? Should we? What should Onesimus do when Philemon returned. What did the father do when the Prodigal Son returned? All of these Bible stories are in the children’s Bibles for review.
- Learn the song, “A New Commandment”; Jesus teaches us to love all as brothers, just as He loved us:
A new commandment I give to you (2 times)
That you love each other (2 times)
Even as I have loved you.
By this all men will know (2 times)
That you are my disciples (2 times)
If you have love for each other.
- Make paper chains as a craft; these can be used also as Christmas decorations, either in the church or at home.
- Close with prayer.
Nativity
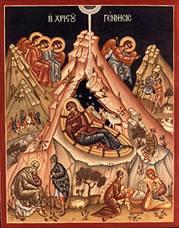
THE NATIVITY OF CHRIST
Objectives:
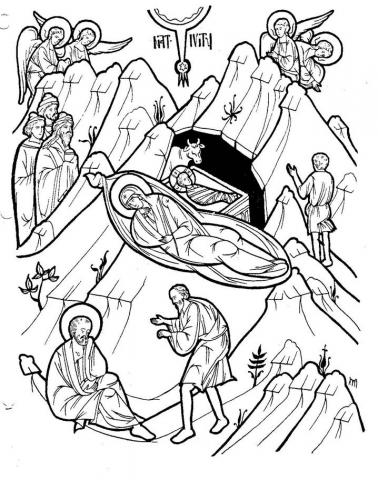
- Children should be able to recognize the figures in the icon of the nativity and retell the story with the icon as a guide.
- Children should be able to say, “Christ is Born!” and respond “Glorify Him!”
Possible lesson plan:
- Open with prayer.
- Tell the story of the nativity. Read the story of Christmas in the Beginner’s Bible, pages 271-281, the Children’s Bible Reader, pages 168-170, or the Read with Me Bible, pages 256-265. You can supplement with the Golden Children’s Bible, pages 351-352. Bring a crèche from home and have the children identify the figures and add/move the figures as you tell the story. Then, have the children identify the people and animals in the icon of the Nativity.
- With small children, have a small birthday cake and celebrate!
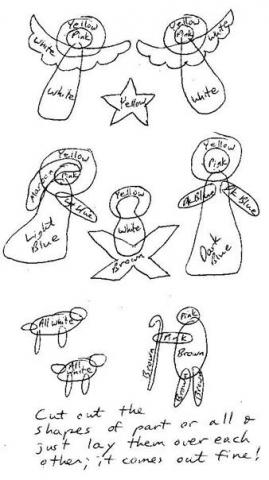
- Make a stained glass icon for each
child to take home. Give each child an 18- inch
piece of wax paper. For small children, have
the shapes of the figures already cut out from
colored tissue paper; older children can draw
and cut them themselves. Arrange the figures
on the piece of wax paper. Cover the wax paper
with another piece of wax paper and iron lightly.
Hang in a window for full effect. Of course,
There are hundreds of other possible craft ideas
for Christmas – colored stars with gold glitter,
small paper plates decorated with illustrations
from Christmas cards with a string to hang on
a tree, all manner of crèche scenes with figures
made of clay, pipe cleaners, toilet paper tubes,
etc.
Another option: Make little finger puppets to retell the story. Print on cardstock and cut out ahead of time. Let children color them, tape behind to fit the little fingers, and retell the story.
Another option? Print the scene on cardstock, cut out, color, and fold between sections so it will stand up.
- Close with prayer. Learn “Christ
Is Born!” “Glorify Him!”
Theophany
THEOPHANY
Objectives:
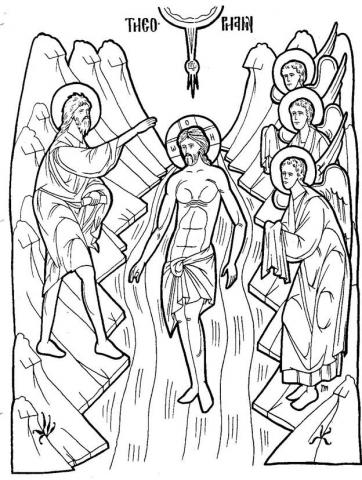
- Students should be able to say the word “theophany” and know that the feast of Theophany celebrates the baptism of Jesus.
- Students should be able to identify the figures and elements of the icon.
- Students should be able to say God is Father, Son, and Holy Spirit and older students should understand how each figured in the baptism of Jesus.
Possible Lesson Plan:
- Open with prayer.
- Ask the children if they know what “Theophany” is? Have each repeat the word. Who was John the Baptist? Remind them of the story of Elizabeth and the birth of John and how Mary the Theotokos visited Elizabeth before Jesus was born. Reread the stories in your children’s Bibles; it’s in the Beginner’s Bible, pages 303-307, or the Children’s Bible Reader, pages 178-179. Holding the icon, tell the story of the baptism of Jesus, identifying the characters. Show them the Spirit descending like a dove and tell them the God, the Father, spoke from heaven saying, “This is my beloved Son in whom I am well pleased.” With older children, point out the three persons of the Trinity and how they are all represented at this feast.
3. True or False:
True False
Jesus was baptized by John. Jesus was baptized by Mary.
Jesus was baptized in the Jordan River. The Holy Spirit descended as a snake
The Holy Spirit descended as a dove. God said, “This sure is a wet man.”
John was Jesus’s cousin. Jesus was baptized with sand.
- Sing the Troparion of the feast; rehearse it a few times since the children should know the troparion for their own house blessing:
When Thou, O Lord, was baptized in the Jordan,
The worship of the Trinity was made manifest,
For the voice of the Father bare witness to Thee,
And called Thee His beloved Son,
And the Spirit, in the form of a dove, confirmed the truthfulness of His word.
O Christ, our God Who has revealed Thyself,
And has enlightened the world, Glory to Thee.
- Discuss the child’s up-coming house blessing. On Theophany, the priest blesses the water and each family brings some home in a jar. Father will come to each home to bless the home with holy water. What can the child do to prepare? Show the children how to set up the white cloth, candle, icon, and bowl for Holy water.
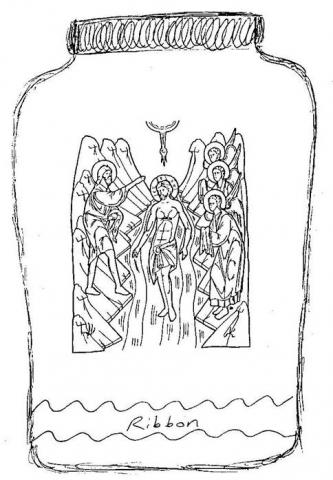
6. Decorate jars to use for Theophany: Each child should have a small glass jar, a tiny icon print to color, and some ribbon or glitter glue to decorate his jar. Bring the jar to church on Theophany for Holy water and use the water for the house blessing.
Decorating the jars as a Sunday School workshop with all of the classes? THen try this Theophany craft for the craft lesson. Make a paper plate baptism. Take a plate and color the bottom blue, top white or light blue. Draw in dove or cut one from the icon print. Cut a slit for the waves. Then decorate one popsicle stick to be Jesus and another John the Baptist OR cut out the figures from the icon and glue THEM to the popsicle sticks. Glue John in place. Slide the Jesus popsicle stick into the slit to "baptize" it in the Jordan.
7. Close with prayer.
Hebrews: Angels
Hebrews 1:4 – Angels
Scripture reference: “having become so much better than the angels…”
Objectives:
1. Children should know that angels are the messengers of God.
2. Children should be able to name at least the 2 archangels, Michael and Gabriel.
3. Children should be able to remember some instances where angels have appeared in the Bible.
Possible Lesson Plan:
- Open with prayer. This book was written to the Hebrews. Who are the Hebrews? Where did they live? Find Israel on the map.
- Show a picture or icon of an angel (the Annunciation will do nicely). Do you know who this is? Tell the students that angels are the messengers of God. Do they know what a messenger does? Illustrate by whispering a message to one student and have him tell another student. The second student can tell the class the message. Who was the messenger? Repeat for each student.
- Need a snack this week? How about angel food cupcakes or sugar cookies shaped like angels? OR, with the children, make marshmallow angels, with a large marshmallow for head and another for the body, clove eyes, pretzel stick arms, yellow lifesaver halo, and either pretzels or chocolate bars for wings attached with a dab of any sort of icing.
- Who is Gabriel? To whom did he take what message? (He told Mary that she would be the mother of Jesus and Zachariah to name his son John.) Reread these in the Children’s Bible Readers. Show this in the icon of the Annunciation. Who is Michael? What is his role? (He is the leader of God’s army.) Reread the story of Balaam and his donkey in the Children’s Bible. Who is Raphael? Reread his story in the book of Tobit in the Old Testament. Review: Which archangel is usually pictured with a scroll? with a sword? with a fish?
- God gave each of us a guardian angel. He watches over us and protects us, even though we cannot see him. He is with us at all times. Sing the old spiritual, "All Night, All Day"
- During Liturgy we speak of certain types of angels: seraphim and cherubim. Can you think of any such times? (e.g. Cherubic Hymn, Megalynarion) Listen closely in church next week.
- Angels and people are alike in some ways, and different in others. Fill in the blanks below with “Angels”, “People”, or “Angels and people”:
______________were created by God. ___________never die.
______________have bodies. ___________have names.
______________have spirits. ___________think and do things.
8. Most angels are good, but some sinned and were cast out of heaven. The greatest of these was Lucifer, who thought he was equal to God. He is now known as Satan and the other fallen angels are called demons.
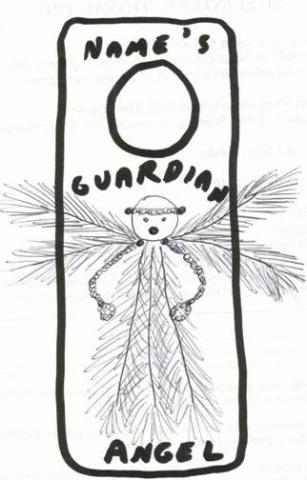
9. Make an Guardian Angel Doorknob hanger: Cut a piece of foam 10 inches by 3 inches, with a hole for doorknob. Print the name of the child and the words “Guardian Angel.” Punch 4 holes: use top two for gold chenille halo and lower two for white chenille arms. Use 7 feathers as illustrated for body and wings. Glue on white foam or felt circle for face; it can be left blank or use wiggle eyes and red sequin for mouth. Use yarn for hair if desired.
Alternate craft idea: No foam and feathers too messy for your space? Print the 3 most famous archangels on cardstock, cut out, color, and add popsicle stick to the back. Use the newly made puppets to retell their stories.
OK, a class full of boys? Feathers and cute little angels not going to make it. How about an Archangel Michael paper bag puppet. Take a standard lunch bag, brown or white, and turn it over so the bottom of the bag will be the head of the puppet. Cut a circle for the face and glue to the bottom of the bag. Glue a yellow circle behind the bag for the halo, and glue wings behind the bag as well. Turn the bag over and add helmet, shield, and sword from aluminum foil. This is so easy, you can just cut the pieces from construction paper, or size them for your bag and use the pattern pieces:
10. Close with prayer.
Hebrews: Faith and Hope
Hebrews 11: 1 -- Faith and Hope
Scripture reference: "Now faith is the substance of things hoped for, the evidence of things not seen."
Objectives:
1. The older student should be able to recite the verse; the younger student should be able to say that faith is trusting God.
2. The students should be able to tell the stories of several Old Testament men and women who acted in faith.
Possible Lesson Plan:
1. Open with prayer.
2. Review the Scripture reference and what it means.
3. Begin reading the chapter in Hebrews; as an Old Testament saint is mentioned, ask if anyone remembers the story of that saint. Review the story; the Beginner's Bible, Golden Children's Bible or Children’s Bible Reader contain all the stories with pictures for easy telling. Continue... Abel, Noah, Abraham, Sarah, Joseph, Moses, Joshua and Jericho, Samson, David, etc.
4. Do a class art gallery -- have each student select a different one of the above "cloud of witnesses" (Each can be drawn or are available in the Old Testament coloring book to color.) Make a frame for each picture out of construction paper; decorate with glitter glue, crayons, macaronis, lace, etc. Make a huge cloud out of poster board covered with cotton balls and mount all on the wall of the classroom as a mural.
5. Close with prayer that we will also be faithful to God as He is faithful to us.
James: The Mighty Tongue
 James 3:5 – The Mighty Tongue
Scripture reference: “Even so the tongue is a little member and boasts great things. See how great a forest a little fire kindles.”
Objectives:
- Even tiny students should be able to say “the tongue is a fire”, while older students should be able to recite the verse.
- Students should be able to give examples of times they have hurt someone with something they have said.
- Student should express repentance for these bitter words.
Possible Lesson Plan:
- Open with prayer. This letter was written by James. Who was James? James was a half-brother of Jesus and the bishop of the church in Jerusalem. Where is Jerusalem? Find it on the map.
- Review the verse and discuss its meaning. Practice reciting to each other.
3. Stick out your tongues and look at each others’. What does a tongue look like? What does it do? Taste, swallowing, and talking are all functions of the tongue. Try to talk with your tongue stuck out. Funny!
 Discuss examples of people hurting each other with the tongue – try to get the students to come up with these from their own experience. Be sure lying, bragging, gossiping, and anger are included, with an example appropriate to the age of the child. What about Pinocchio? Any stories from the Bible? How about Joseph’s brothers lying to their father Jacob and Potiphar’s wife lying to Potiphar? Review the story in your children’s Bibles. Were people hurt by these tongues? How do you feel when someone says hurtful words – words of lying and anger? Do you feel as if you have been burned? So the tongue is a fire, burning other people.
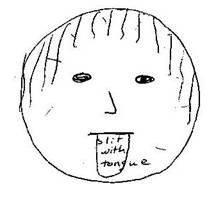
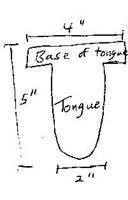
- Do the “Mighty Tongue” craft: Begin with a 10-12-inch paper plate. Cut a slit for the mouth 2 inches wide. Cut a tongue 5” long from red paper 2” wide, with a base 4” wide. Decorate the plate as a face. Slide the tongue into the mouth from behind the plate. Children can waggle the tongue by pulling on the base behind the plate. Add some interest by cutting out paper flames in yellow, red, and orange and gluing them around the plate.
Alternatively, use a party blower, cut out some tiny flames and glue along the length of the blower. Insert the blower through the mouth, add the flames if desired, and blow to make the flaming tongue appear!
- Close with prayer – be sure to ask God’s forgiveness for the sins of the tongue described by the children and for His help in at least one specific area for the next week.
Meeting of the Lord
THE MEETING OF THE LORD
Objectives:
- Children should be able to name the feast and the major participants in the icon and their role.
- Children should know what “churching” is and how that relates to the feast.
Possible Lesson Plan:
- Open with prayer.
- Tell the story of the Meeting of the Lord, using the icon of the feast as a guide:
When Jesus was a little baby, only 40 days old, Mary, His mother, and Joseph, His father, took Him to the Temple in Jerusalem. The Temple was the greatest and holiest church of the Jewish people. They bought 2 young pigeons to give to the priests of the Temple as an offering in thanks for the little baby, as was the custom of the Jewish people. Now at that time, there lived in the city of Jerusalem a very old man whose name was Simeon. Simeon had been told by God that he would not die until he saw God’s Son. On this day, Simeon woke up very early; God told him to go to the Temple and wait. There was also in the Temple a very old woman named Anna who was also waiting for God’s Son. Suddenly, Simeon saw Mary and Joseph coming into the Temple, carrying the baby Jesus and the cage with the birds. Simeon came right up to Mary and took the baby in his arms; he know that Jesus was the long-awaited Son of God. Simeon thanked God with a special prayer that we use in vespers to this day; “Lord, now lettest thou thy servant depart in peace, according to thy word, for mine eyes have seen thy salvation, which thou hast prepared before the face of all people, a light to lighten the Gentiles, and the glory of thy people Israel. Anna also spoke God’s words to Mary, telling her of the pain and suffering to come.
Read the story of the meeting in the Beginner’s Bible, pages 282-285, the Children’s Bible Reader, pages 173-174, or the Read with Me Bible, pages 266-269. You can supplement with the Golden Children’s Bible, pages 352-353. Review the story with the icon, identifying each character. What is the role of each? Why were Simeon and Anna there? Why were Mary, Joseph, and Jesus there? What is Joseph holding and why?.
- True or False:
True False
Mary & Joseph took baby Jesus to Mary & Joseph took Jesus to Rome.
Jerusalem.
Simeon was waiting for God’s Son. Simeon was a young man.
Anna was a holy old woman. Joseph bought a cow to offer.
Jesus was 40 days old when he went to God had told Simeon that he would
The Temple. be hit by a bolt of lightning.
The Temple was in Jerusalem. Jesus’s parents were John and Anna.
- Sing St. Simeon’s Prayer with the children; have them listen for it at vespers.
- Make stick puppets of the story of St. Simeon and St. Anna. Print the figures on cardstock. Have the children color the figures. Use gold glitter glue for the haloes. Cut out the figures. Glue or tape a small wooden skewer or a Popsicle stick to the back of each figure. Can you act out the story?
- Bring an infant baby doll, wrapped in a blanket. Tell the children that each baby is brought to the church when he or she is a few weeks old. Just as in the days of Jesus, the mothers and fathers thank God for their new child and ask Him to take care of their baby and help him to grow up as a good member of God’s family. This is called churching. Act out a churching, with the teacher as priest, and a little girl holding the baby, a little boy as father.
Priest: Let us pray to the Lord. O Lord God Almighty, Father of our Lord Jesus Christ, purify this woman, (name), from all sin and bless thou the child, (name), who is born of her. (Make the sign of the cross over the child.) As Thou, O Lord, wast brought on the fortieth day as an infant in to the Temple according to the Law by your mother, Mary, and wast carried in the arms of Simeon the Just, do Thou, O Master, bless this baby who is brought here. For unto thee are due all glory, thanksgiving and worship. Amen.
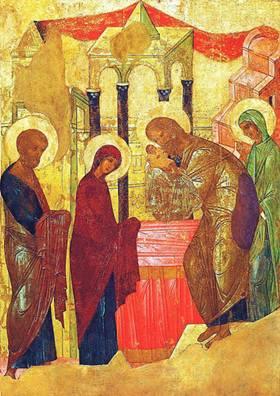 7. Close with prayer.

1 Peter: The Cornerstone
I Peter 2 – Jesus, our Cornerstone
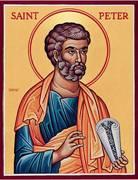
Scripture reference: “you also, as living stones, are being built up a spiritual house…the stone which the builders rejected has become the chief cornerstone.”
Objectives:
1. Children should be able to repeat, “The Lord is my Rock”.
2. Children should understand what a cornerstone is and compare Jesus to a cornerstone.
Possible Lesson Plan:
- Open with prayer. This letter was written by St. Peter. Who was Peter? Help the children remember him as a fisherman, one of Jesus’s disciples.
- Bring a large rock to class. Have the children discuss the characteristics of the rock: it is strong, it is heavy, we can stand on it, it is hard. Play the game paper, scissors, rock: the rock breaks the scissors, and even when covered by paper, is it still there? So God is like a rock – strong, trustworthy, doesn’t change or go away, etc.
- Go on a field trip, weather permitting. Have each child pick out a rock that seems special to him. Look at the rocks in the classroom; in what ways are they the same and in what ways different? Sizes, shapes, colors, textures – so we are all different even though we are all people. How are we alike and how are we different?
- Take a set of wooden blocks. Begin with the largest; explain how this is the cornerstone – the first stone and the strongest – of the building. Build a tall building now, using the cornerstone as the base and all sorts of other blocks. Peter is saying the church is like this building, with Jesus as the cornerstone and us as the “living” blocks.
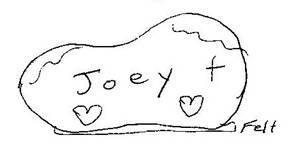 Make a pet rock: Have each child take his special rock (or, if weather is bad, bring some rocks from home and let them choose). Put on old T-shirts or smocks. Paint the rocks with poster or other washable paint. Glue a piece of felt on the smoothest side; this will be the bottom. Paint the child’s name on the top or side of his rock; remind him that he is a living rock in God’s Church.
- Painting doesn’t work in your space? Then try printing the church building on cardstock and cut out. Children can color the church and themselves as “living stones.” Fold in half at the “cornerstone” (Who is that?) and stand your church up tall and straight.
- Close with prayer.
2 Peter: Second Coming
II Peter 3:10 – The Second Coming
Scripture reference: “But the day of the Lord will come as a thief in the night…”
Objectives:
- Older students should be able to recite the verse and tell what it means.
- Students should be able to list several examples of Christian behavior.
- Each student should have a personal plan of action for the following week.
Possible Lesson Plan:
- Open with prayer.
- Discuss the Scripture verse and have each student recite it.
- From II Peter 2 and Jude, tell several stories of obedience and disobedience and God’s punishment. The Children’s Bible has the stories of Sodom and Gomorrah, of Noah, of Balaam and the donkey, of the golden calf and Moses, and of Cain and Abel. Can the children help you with these stories, as they remember them?
- Ask for examples of things we can do to obey Jesus; see if the children can come up with the examples in the parable of the Last Judgment.
- Tell the parable of the Last Judgment: Jesus said, “When the Son of man comes, he will be like a king sitting on a throne. All around the throne will be angels and in front of the throne will be all the peoples of the earth. Then the King will judge the people. He will separate the good people from the bad people. He will have the good people stand on his right side and he will say to them, ‘ Come, O good children of my Father. Receive the beautiful Kingdom that God created for you in the beginning. You have lived as my Father wanted you to live, for when I was hungry, you gave me food to eat, when I was thirsty, you gave me something to drink, when I came as a stranger, you welcomed me, when I was naked, you clothed me, when I was sick, you visited me, when I was in prison, you came to see me.’ Then the people will answer the King: ‘ Lord, when did we see you and do all these things for you?’ And the King will answer, ‘If you were kind or helped anyone who needed help, you helped me. The good things you did to them, you did to me.’ Then the King will say to those at his left side, ‘Because you didn’t help anyone, or weren’t kind or generous to anyone, you didn’t show kindness to me.’ Therefore the King will send them away to be punished forever, but to the good people, he will give life forever in his kingdom.”
6. Make a Wise Virgins Door Hanger: Take a rectangle of foam and cut hole near top for doorknob, or buy ready-cut foam doorknob hangers, usually about 5-6 inches wide and 12 inches long. Cut out Jesus and the wise virgins and glue to one side. To the other glue the foolish virgins with the closed door. You can use any icon, but the one provided divides them up nicely for the craft. While doing so, review the parable of Jesus (Matthew 25: 1-13), again reinforcing the idea that we should always be prepared. This Gospel is read on Holy Tuesday and also during the sacrament of Holy Unction. On the “front” side, write “The Bridegroom Comes!” and on the back side “The door was shut!” When you hang the doorhanger, be sure the front side is visible! Place it perhaps on the door to the dining room, your home chamber of feasts.
No foam? Just print the doorknob hanger, decorate, fold, staple or glue front and back, cut out circle for doorknob.
- Make food bags for the homeless – have each child take 3-4 lunch bags, decorate the outside with stickers or an icon picture, and add cheese crackers, raisins, oatmeal cookies, juice boxes, or other healthy, individually-wrapped snacks. Keep them in your car to give to those who are pan-handling or begging.
- Have each child select something to do this week – collect food for the food pantry, write a get-well card to someone in the hospital or a nursing home, etc. and pray at closing specifically for these intentions.
1 John: God is Love
I John 4:16 – We abide in Christ’s love
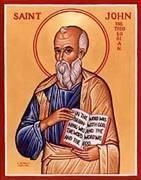 Scripture reference: “God is love, and he who abides in love abides in God, and God in him.”
Objectives:
- Children should know that only in God’s love can we live.
- Children should have a plan to show God’s love to someone this week.
Possible Lesson Plan:
- Open with prayer. This letter was written by the apostle John. Who was John? Help the children remember him as also a fisherman, a disciple of Jesus. See pg. 292 in the Children’s Bible Reader.
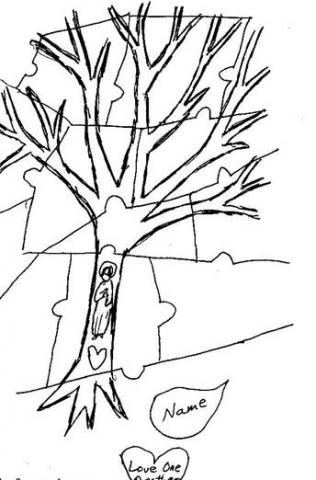 Make a picture of a tree, no leaves,
on a large piece of poster board. Color the
trunk and branches brown or black. Cut it
into enough puzzle pieces for the members of
the class. Hide the pieces around the room.
Have the children hunt until each has found
one and only one piece. Can you tell from one
piece what the picture is? How can we find the
whole picture? Put the pieces together to make
the tree. Ask how the Church is like a tree?
Who is the trunk and root of the tree? Jesus!
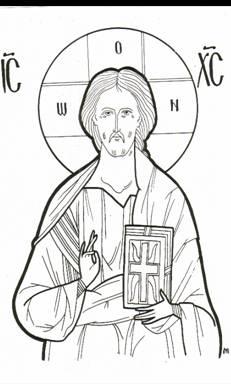
How did Jesus show he loved us? Glue a small
icon of Jesus on the trunk with a red paper heart
under it that says, “God is love”. Now what’s
missing from the tree? Leaves! John in his
gospel told us that Jesus said that we live in Him;
He is the vine and we are the branches. We
cannot live without the roots and trunk that give
us life, and we cannot live alone either. What
happens if a branch is torn off? It dies and is just
a dead stick. So we are all part of Jesus’s church
and all united with each other in Jesus’s love.
Cut out green leaves and write each student’s
name on one. Cut out red hearts and write “love
one another” on each one. Glue leaves onto tree,
each bearing a red paper heart like an apple
hanging from it.
- Sing “A New Commandment”, learned a few weeks ago.
- Discuss some way each child can show love for someone, in his family, at school, etc. this week.
- Close with prayer, praying especially for each child’s special love project.
Revelation: Jesus Knocks at the Door
Revelation 3:20 – Jesus Knocks at the Door
Scripture Reference: “Behold, I stand at the door and knock. If anyone hears My voice and opens the door, I will come in to him and dine with him, and he with Me.”
Objectives:
- Children should understand that Jesus is right near us all the time.
- Children should have an opportunity to sit quietly with the Lord this week, listening for His voice in prayer.
Possible Lesson Plan:
- Open with prayer. This book was also written by John. See pg. 294 in the Children’s Bible Reader.
- Play with the classroom door today. First the teacher should stand outside and knock. What do the children do? Do they ask the teacher to enter? Do they open the door. When the door is opened, have a snack or treat to give. Then reread the verse. Practice again with each student taking turns knocking and the others opening the door. Try a bit of discussion:
Why do we knock?
What would happen if we knocked and no one opened the door?
Does Jesus batter down the door?
How does Jesus “knock” on our doors?
What does He promise if we open the door?
- Review the parable of the wedding feast and of the bridegroom. Sing the song “I cannot come” (Invite Dr. Pat and her guitar if you don’t know it!):
I cannot come to the banquet; don’t bother me now.
I have married a wife; I have bought me a cow.
I have fields and commitments that cost a pretty sum.
Pray hold me excused, I cannot come.
 Even these small children can probably remember a time when they were “too busy” for Jesus – wanted to play or watch TV instead of going to church or evening prayers. Let each share such a time.
- Now, replay your door play. The teacher is Jesus. When he knocks on the door, each child in turn can open the door. Ask the child, “Will you come with Jesus to Church today?” or “Will you come to Jesus in prayer today?” or “Will you invite Jesus to bless your food today?” or something similar. Give the child the chance to say, “Yes” to Jesus.
- Make a Jesus Door craft: First copy and have the children color the small icon of Jesus.

Glue the icon of Jesus to a paper plate (gold?) that has a door cut in it, like shutters on a window. The icon can be cut out and glued to a contrasting piece of paper before gluing it to the back of the plate, facing forward.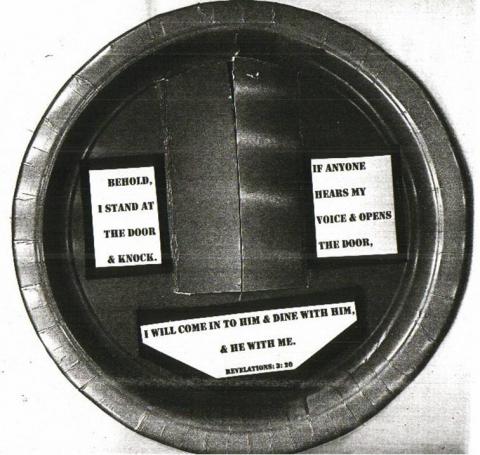 Copy the three parts of the Scripture verse above. They can be glued to contrasting construction paper or directly to the plate. Finally, a string or picture hanger or adhesive magnet strip will complete the mounting of the project.
- Close with prayer. Have the children work on sitting and listening for Jesus in class and at home in prayer thru the week.
Baptism
BAPTISM
Objectives:
- Students should know that we enter God’s church through baptism.
- Students should be able to name the objects used in a baptism.
Possible Lesson Plan:
- Open with prayer.
- Review with the students the story of Theophany, the baptism of Jesus. Where was he baptized? By whom? Who spoke and what appeared? Read it yet again in your children’s Bible.
- A baptism is a very special time. Ask the children if they have seen a baptism? Who is present? What happens? Take them to see the font. Show pictures of a baptism. Ask if they were baptized? Who are their godparents? Explain that their godparents held them and held a candle and promised to help them grow to be strong and love God. Explain that they were undressed and dipped in the water three times, then dressed in white, new clothes. Their hands, feet, chest, forehead, eyes, ears, mouth, and throat were all blessed with holy oil; with small children let them touch each part. With older children, explore why these parts were chosen. They were given a cross; are they wearing a cross today?
- Role-play a baptism – Dress an immersible baby doll in a blanket. Have a baptismal outfit ready. With younger children, the teacher will have to be priest and tell the others what to say; older children can read the “script”:
Priest (making sign of cross in water in tub): May this water be sanctified with the power of the Holy Spirit.
All: Amen.
Priest (with hand on head of baby): In the name of the Father, and of the Son, and of the Holy Spirit, I lay my hand upon your servant (name) who has come to be a part of your family. Since this baby cannot speak for himself, who will answer for him?
Godparents (1 holding baby and 1 a candle): We will.
Priest: Do you hate Satan, the devil, and all of his evil ways?
Godparents: We do.
Priest: Turn and spit on him. (Godparents do this.) Do you want to be baptized?
Godparents: I do.
Priest: Do you believe in Jesus Christ?
All: Recite the creed. (Godparents now remove the blanket)
Priest (anointing baby using cotton swab dipped in oil making sign of cross):
The servant of God (name) is anointed with the Oil of Gladness in the name of the Father and of the Son and of the Holy Spirit.
All: Amen.
Priest (taking naked baby and immersing 3 times in a tub of water): The servant of God (name) is baptized in the Name of the Father, and of the Son, and of the Holy Spirit.
All: Amen.
Priest (after godparents dress baby in baptismal robe): The servant of God (name) is dressed in the Baptismal robe in the name of the Father, and of the Son, and of the Holy Spirit.
All: Amen.
Note: Keep your “baby” for next week’s Chrismation.
- Sing “As many as have been baptized…” 3 times while the “baby” is marched 3 times around the room.
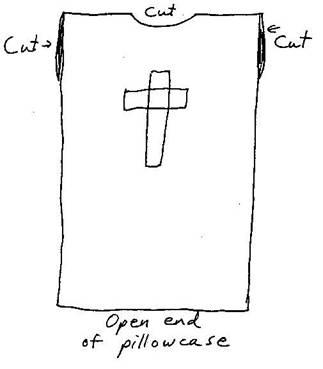
- Make a baptismal robe: take a pillow
case for each child. Cut holes for head
and arms. With red ribbon or fabric
paint decorate front and back with a
cross.
- Alternatively, make a baptism mobile; directions and sample cutouts below.
- Close with prayer. Ask parents to send pictures next week of the children’s own baptism.
Baptism Mobile
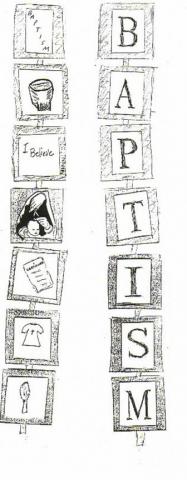 To make a baptism mobile, cut squares about 2-3 inches across from construction paper, 2 for each letter.. On one side of one set,, glue smaller white squares, each printed with one letter from the word, “baptism”. On the other set, glue smaller white squares, the top one titled “BAPTISM” and each subsequent one with a symbol or article used in the baptism. In the example on the right, there is a font, part of the creed, tonsuring, Chrismation, baptismal gown, and candle. Other ideas would be a dove, a godparent, a cross, etc., depending on your own traditions. Use a ribbon glued between the papers with the letters and the symbols to connect them, leaving enough at the top to tie a loop to hang the mobile.
Chrismation
CHRISMATION
Objectives:
- Children should know that we receive the gift of the Holy Spirit at Chrismation.
- Children should be able to respond “Seal!” during Chrismation services.
Possible Lesson Plan:
- Open with prayer.
- Review last week’s lesson on baptism. Have the children share their pictures of their own baptism.
- Review the story of the descent of the Holy Spirit at Pentecost and show the icon. (Story is also in the children’s Bibles.)
- Discuss our own personal “Pentecost” – Chrismation. Each of us receives the Holy Spirit at Chrismation. Have children repeat the word several times.
- Role-play a Chrismation – begin with the same baby doll, now in baptismal dress, from last week, godparent holding baby, other godparent with candle:
Priest (teacher or older student, dips cotton swab in oil and makes the sign of the cross on the baby’s forehead, eyes, nose, mouth, ears, chest, hands, and feet, each time saying): The Seal of the gift of the Holy Spirit.
All: Seal!
(Priest and godparents with baby march around the baptismal “font” three times while all sing as practiced last week “As Many as Have been Baptized”)
Priest (while wiping oil off baby’s forehead, etc. with small sponge): You are baptized! You have the ligh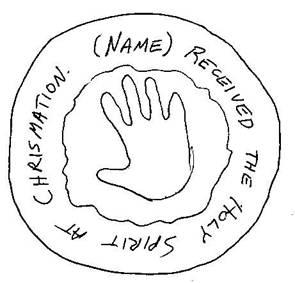 t of Christ! You have been Chrismated! You have received the Holy Spirit! You are made holy! You are washed in the name of the Father, and of the Son, and of the Holy Spirit!
All: Amen!
6. Sing:
Forehead, chest, hands, and feet, hands and feet
Forehead, chest, hands, and feet, hands and feet
And eyes, and ears, and nose, and mouth,
Forehead, chest, hands, and feet, hands and feet
7. Make a handprint flame:
Each child begins with a paper plate with self-hardening clay. Have the child make a handprint in the middle of the clay. Color the handprint with yellow, red, and orange markers, like a flame. remind the children of the tongues of fire that descended on the followers of Jesus at Pentecost. Title the project “(Name) received the Holy Spirit at Chrismation”
8. Close with prayer.
Annunciation
ANNUNCIATION
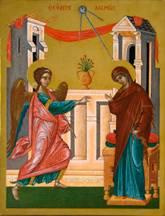 Objectives:
- Children should know what happened at Annunciation.
- Children should be able to identify the figures in the icon.
Possible Lesson Plan:
- Open with prayer.
2. Read the story of the Annunciation in Beginner’s Bible, pages 266-270, the Children’s Bible Reader, pages 164-165, or Read with Me Bible, pages 252-255. Supplement, if desired, with the Golden Children’s Bible, pages 348-349. Review the story with the icon, identifying Mary and Gabriel. What is Mary holding? She is shown holding a spool of thread because she was spinning thread when the angel appeared to her.
- True or False:
True False
Gabriel is an archangel. Gabriel is a demon.
God told Mary she would bear His Son. God sent Mary a message in a bottle.
The Annunciation is a special Mary told God to get lost.
Announcement.
Mary accepted God’s word. The Holy Spirit is seen as a dog.
- Have the children repeat the difficult word, “Annunciation”, until they have it straight.
- Review your lesson on angels: Who are some of the angels that appear in the Bible? What is their function?
- Make paper bag puppets, one of Gabriel and one of Mary. Use construction paper, yarn, crayons or markers, lace. For smaller children, cut out the wings, hair, etc., ahead of time. With the teacher holding one puppet and the child talking for the other, can you tell the story of the Annunciation?
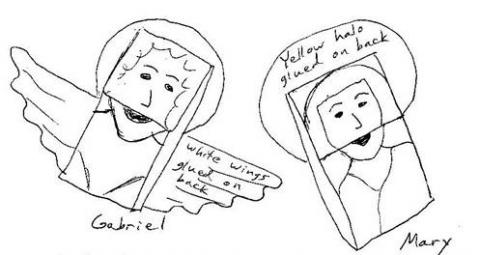
- Close with prayer.
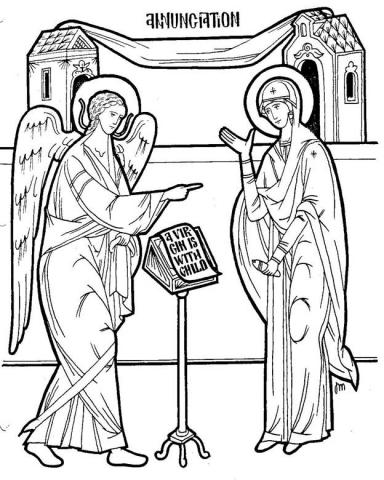
C
Confession
CONFESSION
Objectives:
- Children should understand the need to confess our sins and receive the Lord’s forgiveness.
Possible Lesson Plan:
- Open with prayer. Recite here the Lord’s Prayer with the children.
- Discuss the meaning of forgiveness. Review the line “Forgive us our trespasses as we forgive those who trespass against us” from the Lord’s Prayer. Discuss the concept of sin – have the children done things that they were sorry for? Did their parents forgive them if they were sorry? Common things for children to mention would be lying, fighting with a sibling, disobeying, etc.
- Review the story of the Prodigal Son, also in the children’s Bibles. Did the son sin? Was he sorry? Did the father forgive him? How did he show his forgiveness?
- Although all of these children are too young for confession, show them what occurs. You can role-play again, with teacher as priest and child as confessor:
(Confessor kneels before the icon. “Priest” lays stole over confessor.)
Priest: O holy Trinity, have mercy on us. O Lord, wash away our sins. O Master, pardon our transgressions. O Holy One, visit and heal our infirmities, for thy Name’s sake. For thou alone art without sin, and unto thee do we ascribe glory, to the Father, and to the Son, and to the Holy Spirit, now and ever and unto ages of ages. Amen. Behold, my child, Christ is standing here invisibly to receive your confession. Do you have anything to confess?
Confessor: I have (fill in with things the class discussed earlier).
Priest: May our Lord and God Jesus Christ, through his love towards mankind, forgive you, my child (name), all your transgressions. Amen.
- Make a “muddy picture”. Bring from home some mud from your yard or use brown finger paint. Have each child color a picture of his own face on a paper plate. Cover the plate with plastic wrap, taped securely on the back of the plate. Remind them that we are all to shine with the love of Jesus so everyone can see Jesus in us, just like the shiny face. Then have the children smear the face with “mud”, covering their face and making it unrecognizable. Can anyone see Jesus in us now? This is how we are when we are covered with sin. Now wipe off the mud. We are clean again! This is like confession; each time we get dirty, so people can no longer see Christ in us, we are forgiven and clean again.
- Close again with the Lord’s prayer, asking the Lord to let people see Jesus in each of us.
Palm Sunday
PALM SUNDAY
 Objectives:
- Children should know that Palm Sunday celebrates Jesus’s triumphal entry into Jerusalem.
- They should be able to identify the characters in the icon and tell the story.
Possible Lesson Plan:
- Open with prayer.
- Read the story of Palm Sunday in the Beginner’s Bible, pages 427-432, the Children’s Bible Reader, pages 230-232, or the Read with Me Bible, pages 358-361. Supplement with the Golden Children’s Bible, pages 428-430, or the Arch book, The Donkey Who Served the King. Use the icon and point out the characters and their roles. How did Jesus get the donkey? What were the people doing? What were they saying? Are there children?
- True or False:
True False
Jesus entered Jerusalem on a donkey. Jesus entered Jerusalem on an elephant.
The people were happy to see Jesus. The people shouted, “Crucify him!”
The people shouted “Hosanna!” The disciples stole the donkey.
The children waved palm branches. Jesus entered Rome on Palm Sunday.
People made a carpet for Jesus with People threw rocks at Jesus.
with their coats.
- Show pictures of palm trees. If you have them, show the children a palm branch and a pussy willow. Let them hold and touch.
- Make a palm branch from green construction paper with a thin dowel (or balloon stick): Fold the construction paper in half lengthwise. Cut into a semi-circle. Then cut strips not quite to the center. Tape dowel in the center. Use pussy willows instead of palms in your parish? No problem! Take the same thin stick. Use glue dots to attach small pompoms for pussy willows.
6. Very traditional Orthodox Palm Sunday craft: Make a cross from the palms from church: Take the long skinny palm leaf and fold the thick end down the length that you want your final cross to be. Now fold the long end down the back to where the crosspiece should lie and fold sideways at a 45 degree angle the length of one arm of the cross. Fold it across to make the other arm of the cross and back to the back. Then wrap the short end in figure X around the center to hold the entire cross together and tuck the final end into the back.

- March around the room waving the palm branches and throwing coats on the floor, shouting over and over, “Hosanna in the Highest! Blessed is He who comes in the name of the Lord!”
- Close with prayer.
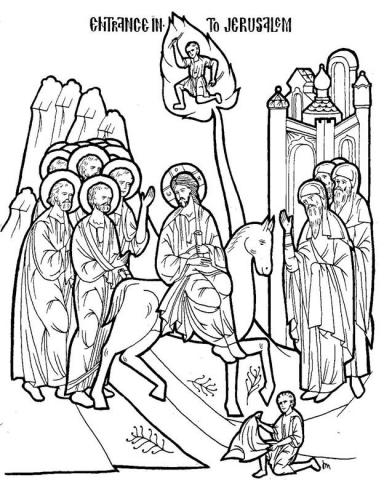
Pascha
PASCHA
Objectives:
- Children should know the Paschal greeting and response, in as many languages as possible.
- Children should know that on Pascha we celebrate Jesus rising from the dead.
- Children should recognize the icon and the figures in it.
Possible Lesson Plan:
- Open with prayer: Teach and sing the hymn, “Christ is risen from the dead, trampling down death by death; and upon those in the tombs bestowing life!”
- Review the story of Holy week – the Last Supper, the Garden prayer, the betrayal, the trial, the crucifixion, and the resurrection – all are in the children’s Bibles – pages 437-458 in the Beginner’s Bible. With older children you might even make a time line on the blackboard to put events in sequence. Who came to the tomb? Why are we so happy on Pascha? Use the icon to retell the story, pointing out each character. None of the storybooks tell all of the details we want to include;
Palm Sunday: Studied last week, begins Holy Week
Holy Thursday: Last Supper with Foot Washing and Institution of Eucharist
Holy Thursday Night: Jesus praying in the Garden of Gethsemane, betrayal by Judas with a kiss, Peter denying Jesus 3 times before the rooster crowed, Trial before the Sanhedrin and high priest Caiaphas
Holy Friday: Trial before Roman Governor Pontius Pilate and condemned to death, Scourging of Jesus with whips, making fun of Jesus with crown of thorns, Crucifixion with 2 thieves ("The Wise Thief"), Death, Burial by Joseph of Arimathea ("The Noble Joseph") and Nicodemus, Tomb sealed with huge stone and guarded by soldiers
Holy Saturday: Jesus descended into Hades and "trampling down death by death" freed those imprisoned there, including Adam and Eve, usually pictured on the icon.
Pascha, Easter Sunday: Stone rolled away by an angel, Jesus rose from the dead, Myrrh-bearing women (including Mary the Theotokos and Mary Magdalene and several more) found the tomb emtpy, Jesus appeared to Mary Magdalene, Mary told the disciples Jesus was risen, Peter and John run to the tomb and find it empty
- As you tell the story, consider making Easter Story Cookies:
Begin with oven at 300 degrees.
As you tell the story,
- take 1 cup pecans and put them in a baggie and beat them with a hammer when discussing the beating of Jesus.
- take 1 tsp vinegar and smell it – put it in a bowl as you discuss Jesus’s thirst
- take a pinch of salt, let each student a little, and add – Jesus’s tears
- Take 1 cup sugar and add to the bowl – the sweet love of Jesus shown in His death for us
- Take 3 egg whites and add and beat to stiff peaks – we are clean and free of sin
- Fold in nuts. Drop in lumps on cookie sheet covered with wax paper – the rocky tomb – each student could take his home
- Put cookie sheet in the oven and seal it with tape. Turn it off. Remind the children of the sealed tomb. They may even be sad to leave their cookies overnight, as the disciples of Jesus were sad. On Easter morning open the oven and give everyone a cookie. Note that the surface is cracked and the cookies are hollow – just like the empty tomb!
- True or False?
True False
Jesus rose from the dead on Pascha. Jesus rose from the dead on Palm Sunday.
Judas Iscariot betrayed Jesus. Jesus was crucified on Pascha.
Jesus was crucified on Holy Friday. Caiphas, the high priest, loved Jesus.
Two Marys went to the tomb. Mary and Mary saw a snake in the tomb.
The noble Joseph of Arimathea Peter never denied he knew Jesus.
buried Jesus’s body.
- Teach the Paschal greeting in several languages; the children can respond.
English: Christ is risen! Indeed He is risen!
Greek: Christos anesti! Alethos anesti!
Russian: Christos voskrese! Voistinue voskrese!
Arabic: Al-masi-kam! Haq an qaam!
- Decorate eggs for Pascha. You can use real eggs and dye, even crayons for resist Pysanky. But, easier is to use Leggs eggs; they’re nice and big for small hands. They can be painted, decorated with scraps of yarn and fabric, or even split in half for a small crucifixion diorama complete with toothpick crosses inside. Or make a giant egg from string or yarn dipped in glue and wrapped randomly around a balloon that has been greased with Vaseline or spray. Sprinkle with glitter. Af
 ter drying the balloon can be popped and the egg hung as an ornament.
Way too messy for a busy week? Then make cereal box triptychs. Take one cereal box for each child and cut away back, top, and bottom, and remove the cereal, of course. Now you have front and sides that will stand up by themselves very nicely. Print the Resurrection icon for the center panel and the two skinny panels for Palm Sunday and the Crucifixion for the side panels. Children can color and glue in place.
- Close again with the song and a prayer.
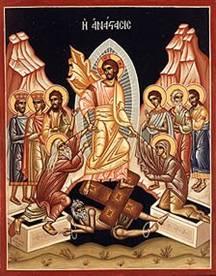
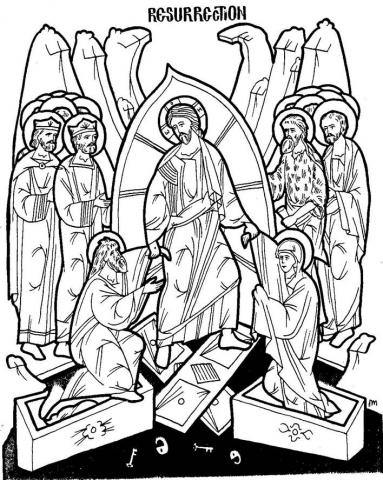
Divine Liturgy
DIVINE LITURGY
Objectives:
- Children should know the names of the common objects and people that are a part of the liturgy.
- Children should be familiar with the various parts of the liturgy and their purpose.
Possible Lesson Plan:
- Open with prayer.
- Have the children repeat until they can say correctly “divine liturgy”. Explain that this is the special service that we have to worship God.
- Review with the children the story of the Last Supper in the Beginner’s Bible, pages 442-445. Use the icon for your picture. Who’s sitting at the table? What are they eating? As you tell the story, sit around a table and give the children a piece of bread and a cup of grape juice. Explain that Holy Communion was begun at the Last Supper.
- Review the parts of the liturgy; children should be able to chime in with answers as they recognize the things they have heard and sung for years:
- Litany: Here we pray for the whole world. Who else do we pray for (travelers, prisoners, leaders of our country, bishops, priests, deacons, rain and sun, food to eat, and we especially remember Mary the Theotokos) What do we respond? (Lord have mercy. Grant it, O Lord.)
- Hymns of worship: 1st and 2nd antiphons, troparia and kontakia, Trisagion -- review these words. Try singing the antiphons we use each Sunday.
- Epistle and Gospel: Here we hear God’s word from the Bible. God speaks to us from His special book, the Gospel Book, which is kept on the altar table. The priest carries out the Gospel and tells us to pay attention to God’s word.
- Cherubic Hymn: God makes us His special guests, along with the seraphim and cherubim, His angels in heaven. The priest uses incense as he prays, reminding us that the prayers go up to God the same way the smoke rises. The discos holds the holy bread and the chalice the communion wine. The tabernacle on the altar holds communion for those who are sick and cannot come to church. The priest carries the chalice and discos in the Great Entrance, while praying for us all!
- Creed: We all recite the creed –review the writing of the creed by the Fathers of the Church in Nicaea under Constantine the Great.
- Preparation for Communion: Review the story of the Last Supper. Here the priest prays for the bread and wine to become the true body and blood of Jesus. We say “Amen” and bow to the altar.
- The Megalynarion: We honor Mary the Theotokos with a special hymn.
- The Lord’s Prayer: Can we say it together? Jesus gave us this prayer Himself.
- Holy Communion: Review crossing the arms, opening the mouth, kissing the chalice. Have the children practice this.
- Benediction: The priest blesses us and dismisses us. We all kiss the Cross.
- Take a “field trip” to the sanctuary with a deacon or priest. Look inside the altar and see the tabernacle, the diskos, the chalice, the gospel, the censer, the cross, and the icons.
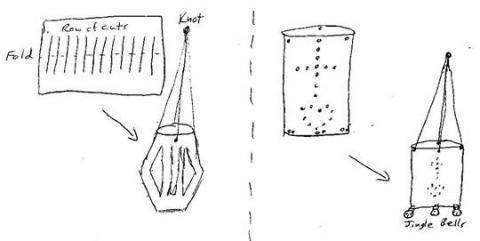 Craft idea: Color and cut out the pictures of the altar furnishings. Glue them on a piece of construction paper as if it were a table; label them. Or make a “censer” – either a paper lantern of gold construction or wrapping paper hanging from string or yarn or a metal censer (that can actually hold a candle or incense). Take a 16-ounce tin can for each child or even easier to use a foil pot pie pan. Remove one end. For smaller children, decorate with rick-rack or puffy paint or stickers. Punch holes with an awl at the top and hang with yarn or string or wire (or metal chains from the hardware store). You can even poke some holes near the bottom and use pipe cleaners to attach small jingle bells. For a more difficult punched pattern, fill with water the night before class and freeze solid. At class time, remove from freezer. Give the children each a large nail and a hammer and let them punch a pattern (e.g. cross) in the side of the can. Run it under warm water just long enough to pour out the ice and dry. Finish as before.
Alternate craft: Make a Liturgy Puzzle -- print the puzzle on cardstock and have students color and cut out -- can they recognize each part of the Liturgy and get the puzzle together with the pieces in order?
- Close with prayer, especially the Lord’s Prayer. Could the children each supply a line of litany in their own words, with the entire class responding in turn with “Grant it, O Lord”?
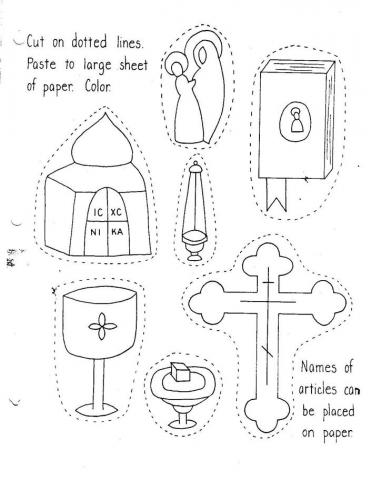
Marriage
MARRIAGE
Objectives:
- Children should know that marriage is the joining of a man and a woman to form a family.
- Children should be able to say that the two parts of the marriage ceremony are the betrothal and the crowning.
Possible Lesson Plan:
- Open with prayer.
- Discuss the Christian family. Let each of the children tell about their families. Do they have a mother and a father? How were the parents joined? (Marriage)
- Discuss stories in the Bible of families (Stories are in the children’s Bibles.):
Adam and Eve, Noah, Abraham and Sarah, Isaac and Rebecca, Ruth and Boaz, Zachariah and Elizabeth, etc.
- What liturgical items are used in an Orthodox wedding? Brainstorm what the children have seen and what these things might mean?
Two white candles – symbolizing the light of Christ
Rings (A picture of two rings will suffice.) – a circle that never ends
The crowns: either wreaths, (Greek tradition) or gold crowns
(Slavic tradition) – king and queen of a new home
The Gospel book – ordained by God in His Word
The common cup – This new home is part of the whole Church
Hand cross used by the priest – Christ is the center of the marriage
- The betrothal is the first part of the marriage ceremony. It means promise. The rings are blessed and exchanged. The crowning is the spiritual part of the ceremony. The priest prays for the couple and crowns each of them. What is a crown for? Let the children try to answer. Remind them of the crowns of kings and queens (in their new family), the crowns of martyrs (to suffer for their families and be willing to die for them), and the crown of the Kingdom (reminding us all that the Kingdom of God is much larger than our little world). The gospel lesson is about the marriage at Cana; review the story in the Children’s Bible. Then the bride and groom drink wine from a common cup and march 3 times around the center table. The crowns are removed and they are man and wife.
- Make a crown of construction paper, decorating it with gold glitter. Make a ring of gold pipe cleaner. Use these in your re-enactment.
- You can role play this with teacher as priest:
Priest (giving the rings): The servant of God (name) is betrothed to the handmaid of God (name). The handmaid of God (name) is betrothed to the servant of God (name).
All: Amen
Priest: The servant of God (name) is crowned to the handmaid of God (name) in the name of the Father, and of the Son, and of the Holy Spirit. Amen.
All: Thou hast set upon their heads crowns of precious stones.
(Bride and groom now drink from a common cup and march around the center of the room, carrying their candles, three times.)
Priest: Be exalted, O Bridegroom, and thou, O bride.
- Close with prayer – pray especially for each child’s parents.
Ordination
ORDINATION
Objectives:
- Children should be able to say “ordain” or “ordination” and know its meaning.
- Children should be able to identify deacons, priests, and bishops and their roles.
- Children should recognize the liturgical colors for each season.
Possible lesson plan:
- Open with prayer.
- Ask the children how someone becomes a priest or a bishop? Teach them the words “ordain” and “ordination”.
- Talk about a priest: He is God’s helper in taking care of us. What are some things he does? Let the children try to think of things: baptizes babies, marries people, serves the Divine Liturgy and gives communion, confesses us, prays for us, etc. What does a priest wear? His special clothes are called vestments. Who is our priest?
- Talk about a deacon: He is a priest’s helper. He helps in the Divine Liturgy and helps the priest by visiting the sick, praying for people, etc. Do we have a deacon?
- Talk about a bishop: When Jesus went to heaven, He left His disciples to care for the Church. They were the first bishops. The bishop is the leader of the Church. He carries a staff like a shepherd and leads his people.
- Talk about the liturgical colors. God has made the world with many beautiful colors. What colors are in a rainbow? The church uses different colors in the vestments the priest wears and in the covers of the tables and stands. We see gold in the fall, red during Christmas, Purple during Lent, White for Pascha, Green for Pentecost and the summer, and blue for any feast of the Theotokos. Make the Liturgical Colors Fruit Salad with:
- Red – cherries or strawberries
- Blue – blueberries
- Purple – purple grapes
- Green – Green apples, sliced
- White – Mini-marshmallows
- Gold – bananas
- There follow 3 ideas for priest/bishop crafts: a bishop’s mitre (hat), a paper doll priest, and seasonal priests to color with the liturgical colors. Make a class mural with the seasonal priests glued to a large rainbow. Do one or all!
Paper dolls not your thing? Mostly boys in the class? Make a set of frames for icons for your classroom in the 6 liturgical colors. The base is made with two sticks lined up parallel and a layer of sticks perpendicular to these forming a flat, square base. Then glue sticks across the corners of the base, then parallel to each side of the base, then corners, etc., each row a bit outside the previous for 3-4 rows, making an octagonal frame. Paint with acrylic paint, adding later a coat of Mod Podge or clear spray to finish the project when the paint is dry.
- Close with prayer – pray especially for our priest and bishop.
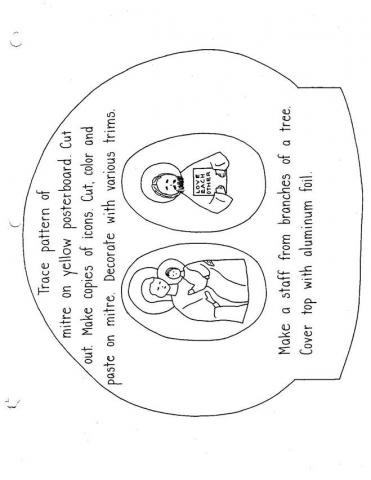
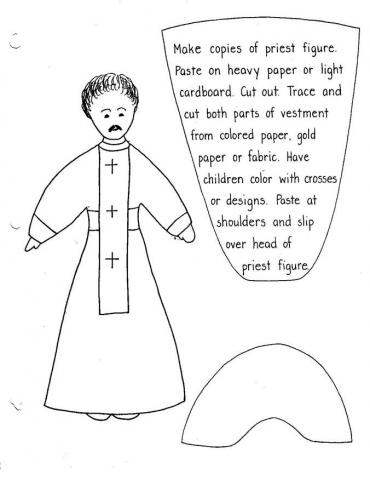
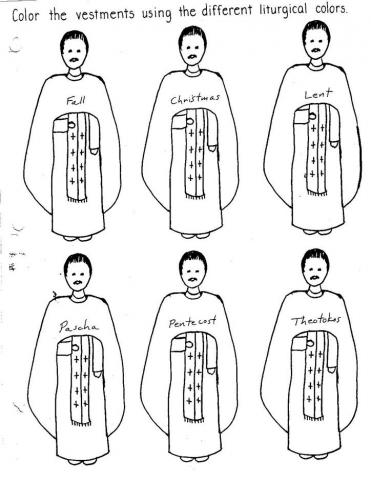
Ascension
ASCENSION
Objectives:
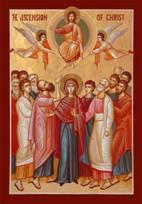 Children should be able to say “Ascension” and define it.
- Children should identify the characters in the icon and tell the story.
Possible Lesson Plan:
- Open with prayer. Remember especially Pascha and the Paschal hymns and greetings.
- Tell the story of Ascension. Read the story of the Ascension in the Beginner’s Bible, pages 466-472, the Children’s Bible Reader, page 267, or the Read with Me Bible, pages 402-403. Supplement with the Golden Children’s Bible, page 361, if desired. . Use the icon as a visual aid and identify the people as you tell the story. There is Jesus, Mary, angels, and 12 disciples. Can the older students name the disciples? Can all the students identify the people and tell the story?
- True or False?
True False
Jesus rose into heaven on Ascension. Jesus died on the cross on Ascension
Mary and the disciples were there. Noah rode him to heaven on an ark.
Jesus told the people that He would Jesus told everyone He hated them.
always be with them.
Jesus is still alive in heaven Jesus is dead and gone.
Jesus told his disciples to wait in Jesus told his disciples to go home
Jerusalem. and go fishing.
- Was this a sad or a happy story? What did Jesus promise? (That He would always be with us.) Why are Jesus’s hands spread? (He’s blessing us.) What did He tell His followers to do? (To go to Jerusalem and wait for a helper from God.) Where is Jesus now? (in heaven)
- Discuss the butterfly. Use pictures from the library or the encyclopedia. Show the caterpillar, the cocoon, and then the butterfly. Let the children crawl on the floor for a few minutes like caterpillars, then curl up very tight and still like cocoons, then leap up and fly like butterflies. Is this the same individual – the caterpillar, the cocoon, and the butterfly? So Jesus was born as a man, died, and rose into heaven – each a different form but the same God.
- Make a Stained Glass Butterfly: Just like with the Christmas pictures, Cut out wings of various colors, black or brown antennae, bodies of various colors, and various small circles, ovals, etc. for decoration. Let each child assemble his butterfly on a piece of wax paper; cover it with another sheet of wax paper, and iron lightly, sealing in the artistic creation as a “stained glass butterfly”. No iron? No problem. Cut out a butterfly outline with black posterboard or construction paper. Before class, cut shapes from the wings – circles, triangles, diamonds – and have the children glue pieces of colored tissue paper behind the shapes.
Alternate Craft: Jesus rising into heaven -- Print the cloud and the figure for Jesus on cardstock. Color if desired. Cut out. Take a short piece of paper or plastic straw and tape to back of Jesus. Use a piece of blue or white yarn about 2-3 feet long. Make loop in the center of the yarn at top and tape below the loop to the back of the cloud to hang on a doorknob. Thread both ends of yarn through the straw and tie a pony bead on each end. By pulling on the pony beads, with the top loop on a doorknob, Jesus will rise.
- Close with prayer.
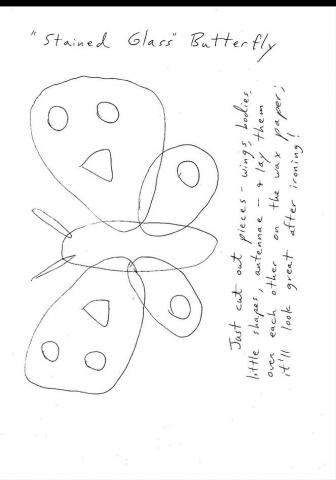
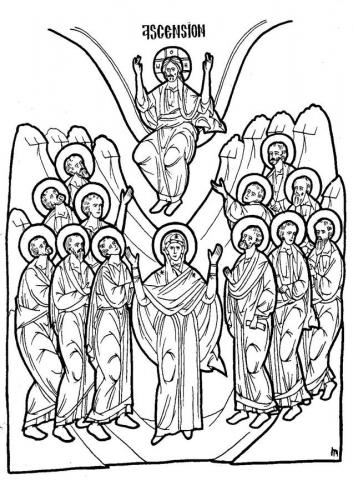
Pentecost
PENTECOST
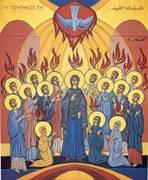 Objectives:
- Children should be able to say the word “Pentecost” and know that this feast is the birthday of the Church.
- Children should know that the Holy Spirit descended on Pentecost.
- Children should be able to identify the characters in the icon and tell the story.
Possible Lesson Plan:
- Open with prayer.
- Tell the story of Pentecost. Read the story of Pentecost in the Beginner’s Bible, pages 473-479, the Children’s Bible Reader, pages 268-269, or the Read with Me Bible, pages 404-407. Use the Golden Children’s Bible, pages 362-363, as a supplement, if desired. Use the icon as a storytelling aid, identifying the characters and their roles.
- True or False: True False
The Holy Spirit came down on Pentecost Jesus was born on Pentecost.
Mary and the disciples were in Jerusalem. Pentecost happened in Rome.
Tongues of fire appeared over the heads. Elephants appeared over their heads.
A great wind filled the room. The roof leaked and rain poured in.
The disciples spoke in many languages. The disciples crawled off and hid.
- Blow bubbles: Have the children blow bubbles, one by one or all together. What made the bubbles? Can you see the air that filled them? Where did the air come from? (inside us) Wind is like that. Where does it come from? Can we see the wind? Can we see what it does? Turn on a fan and watch their hair blow, pieces of paper move, etc. Can something invisible be very strong? When is the wind very strong? (tornado, hurricane, etc.) The Holy Spirit is like the wind. We cannot see it, but we can feel it. It is very strong. It is all around us and in us. So when the Holy Spirit came, the disciples could not see it, but they felt it and could hear it blowing and it changed their lives. Want to experience the invisible wind? Print the dove on paper, fold like a fan, and feel the breeze. The day when the Holy Spirit came down is called Pentecost; practice the word.
- When did each of us receive the Holy Spirit? (Chrismation)
- The Church was born on Pentecost. Even though Jesus had risen from the dead, the disciples were still frightened and didn’t know what to do. After the coming of the Holy Spirit, the disciples could speak many languages and they were no longer afraid. They went all over the world, telling people about Jesus. They began to love each other. They gave away their clothes and shared their food. Their whole lives were changed. But, they didn’t all do the same thing; the Holy Spirit came to each in a special way. What did some of the disciples do after Pentecost? (wrote gospels, traveled to far lands, baptized people, died for Christ) Have a Birthday Party for the Church, complete with cake and candles. How old is the Church?
- Make a Pentecost Candle: Print the coloring icon or use a simple colored one like the Coptic icon on the next page to the size needed for your jars. Mod-Podge to the outside of a jar, or perhaps a used liturgical candle holder. Add tealight and enjoy your own Pentecost flame. Really ambitious and love crafts? Print dove and disciples, cover jar with Mod-Podge red, yellow, and orange tissue paper, THEN add the dove at the top and disciples at the bottom.
- Close with prayer. Sing or recite “O Heavenly King”.
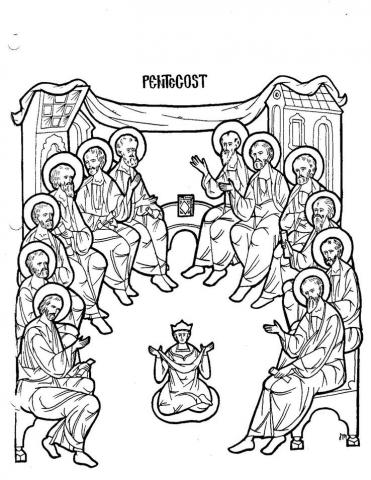
Holy Unction
HOLY UNCTION
Objectives:
- Children should know what is done when someone is sick. They should know the words “holy unction”.
- Children should be able to recall some of the miracles of Jesus.
Possible Lesson Plan:
- Open with prayer.
- Discuss the concept of illness with the children. Have they ever been sick? What do they feel like? How is that different from being well? What do their parents do to make them feel better and get well when they are sick? (go to the doctor, take medicine, special foods or special bed, etc.)
- Discuss the miracles of Jesus – Read the stories of Jesus’s healing miracles in the Beginner’s Bible, pages 340-350,371-374, 405-408, the Children’s Bible Reader, pages 188-189, 213, 221-222, or the Read with Me Bible, pages 308-311 and 350-353. Supplement especially with the Arch Book, “He Remembered to Say Thank You” or with the Golden Children’s Bible pages 369,372,373, 384, and 398. What did Jesus do? (Heal them.) Why? (He loved them.) Does Jesus also love us? Did the people remember to say “Thank you”? During the service of Holy Unction, the story of the Good Samaritan is read; review it now in the Beginner’s Bible, pages 379-384, the Children’s Bible Reader, page 202, the Read with Me Bible, pages 324-328 or the Golden Children’s Bible, pages 412-413. Was the man healed? How was oil involved?
- Say the words “holy unction”; have the children repeat it until they have learned it. What is holy unction? It is the anointing with blessed oil of a sick person in praying that Jesus will make him well. The book of James (Remember the mighty tongue?) tells us whenever we are sick, we should call the elders of the church and be anointed with oil. You can also role-play this, with teacher as priest, a student “sick” in bed, and the others as family members:
Priest: Blessed is our God always, now and ever and unto ages of ages.
All: Amen.
Priest: Thou Who didst save Daniel from the lions and the three children in the Persian fire, do thou have mercy on thy servant (name) and grant healing unto thy sick servant. What does it say in the book of James?
One student: Is any sick among you? Let him call for the elders of the church and let them pray over him, anointing him with oil in the Name of the Lord, and the prayer of faith shall save the sick.
Priest: Let us listen to the Holy Gospel. And a certain Samaritan bound up his wounds, pouring in oil and wine, and took care of him.
(Priest takes a cotton swab, dips it in oil, and anoints the “sick” student in cross form on the forehead, nose, cheeks, lips, chest, both hands) saying:
O holy Father, Physician of our souls and bodies, heal thou thy servant (name) from his illness.
All: Amen.
5. Make a “First Aid Kit” necklace: Begin with an empty pill bottle or similar and fill with First Aid items the children will recognize -- band-aids,
cotton balls, Alcohol prep – but be sure to include the phone number of the priest to remind them to call for prayer! After filling, paint the container (or cover with contact paper or duct tape), poke a hole through each side of the top just below the lid, and attach a string for wearing. Even easier than the bottle? Take a toilet paper tube, cover with duct tape, and fold each end to seal.
6. Alternate craft idea: Make a Healing Prayerbook – Cut the back and front from heavy paper and copy the pages and cut out; pattern is on the next 3 pages. Children can write in the names of people they want to pray for. They can decorate with stickers. To bind simply twist a pipe cleaner around the top.
7. Close with prayer, praying especially for anyone known by a student to be sick.
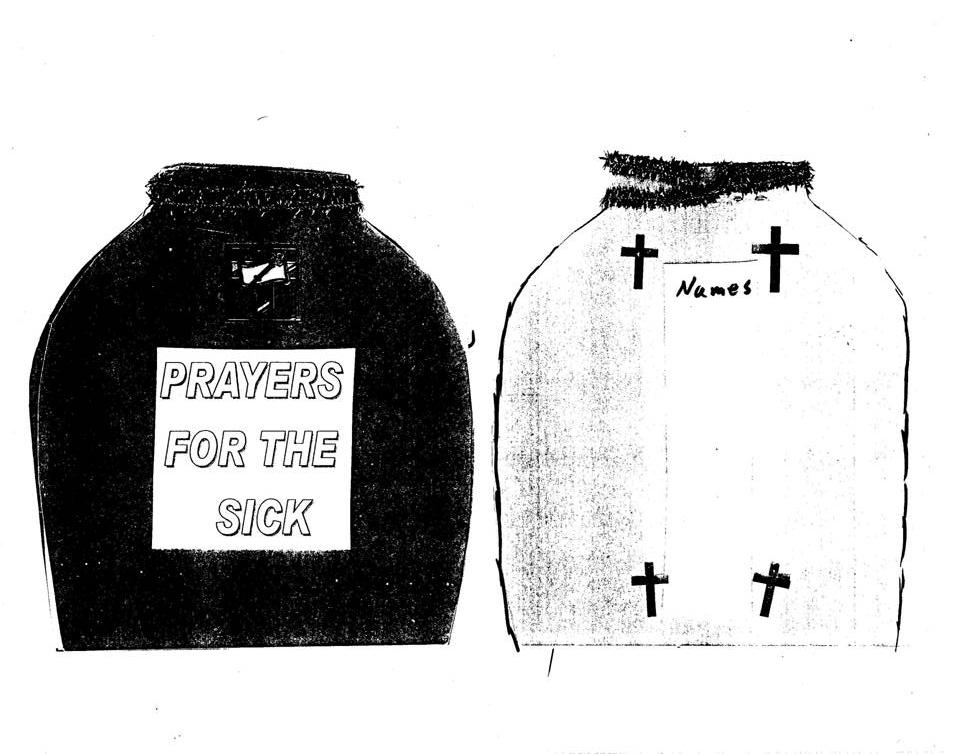
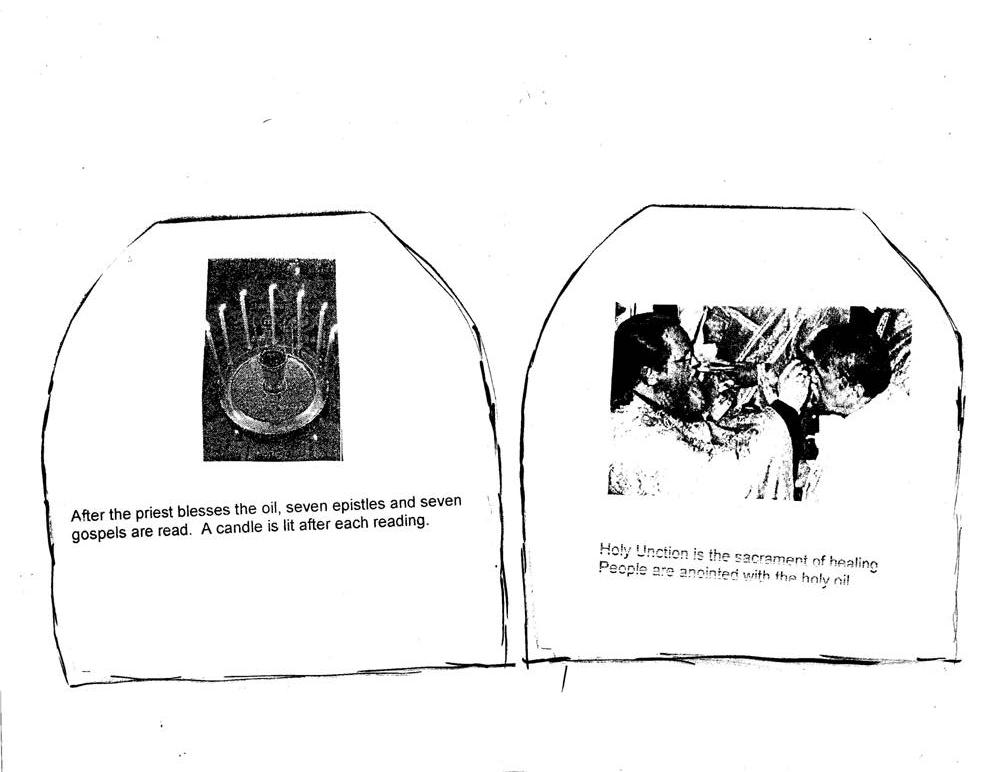
Requiem
REQUIEM
Objectives:
- Students should be able to say “requiem” and know what it means.
- Students should be able to sing “Memory Eternal”.
Possible Lesson Plan:
- Open with prayer.
- Discuss with students the meaning of death. Do they know anyone who has died? How did it make them feel? Why are they sad?
- What does the Bible say about death? Review the raising of Lazarus from the dead in the Beginner’s Bible, pages 418-422 or the Children’s Bible Reader, pages 227-229, and the resurrection in the Beginner’s Bible, pages 453-458, or the Children’s Bible Reader, pages 257-258. What does God promise? (That we will also rise from the dead, just as He did.)
- Review the song, “Memory Eternal”. Sing it with the children.
- Practice the word “requiem” with the children until they know it. Requiem means remembering. We sing “Memory Eternal” and ask God and everyone else to remember our friend forever. Have each child make a list of people in his family or friends who have died; we will give these to Father so he can pray for them next Sunday as he prepares communion. This lesson comes right around Memorial Day; remind the children of the “real” meaning of this holiday.
- Make “koliva” – a special memorial food made of boiled wheat (We’ll do this as a group class after Sunday School.):
The day before class, take 1 poind of wheat berries and soak them in water in a large pot. Then drain them and boil for 4 hours in fresh water. Drain again and spread on a large towel; bring them to class wrapped in the towel.
Empty the wheat berries into a mixing bowl. Have the children add:
½ cup confectioners sugar
1 tsp cinnamon
2 cups raisins
1 cup chopped walnuts
Pour onto serving tray and make a small hill. Cover with thick layer of confectioner’s sugar and decorate with a candle in the center, crosses of silver candies, and a border of candied almonds. It looks almost too good to eat!
- Have each child hold a candle, grouped around the koliva, in front of the class icon corner. Sing “Memory Eternal” together, each remembering someone special.
- Close with prayer, especially for those dead remembered by the children.
Transfiguration
TRANSFIGURATION
Objectives:
1. Children should recognize the figures in the icon, identifying Jesus, Moses, Elijah, Peter, James, and John
2. Children should remember the Old Testament stories of Moses and Elijah.
3. Children should be able to explain the reasons why we hold our hand the way we do when we cross ourselves.
Possible lesson plan:
 1. Open with prayer.
2. Show the icon of the Transfiguration. Read the story of the Transfiguration in the Children’s Bible Reader, pages 218-219, or the Golden Children’s Bible, pages 406-407. Review the stories of Moses and Elijah in the Children’s Bibles as well. Point out the figures in the icon: Jesus took 3 of His apostles – Peter, James, and John – with him up Mount Tabor. There Jesus changed His appearance. Transfiguration means “changing appearance”. His face shone and His clothes shone a bright white. Elijah and Moses appeared on each side of Jesus and a voice from heaven said, “This is my beloved Son, with whom I am well pleased. Listen to Him.” In this way, Jesus showed us all who He really was, truly God as well as truly man.
3. True or false:
True False
Jesus appeared with Moses and Elijah. Jesus appeared with Adam and Noah.
Transfiguration means changing appearance. Transfiguration happened on Mt. Sinai.
Jesus’s clothes became shining white. Jesus turned purple and pink.
Jesus is truly God and man. God said from heaven, “This is a nice man.”
Jesus took Peter, James and John to Jesus brought Judas, Andrew, and Matthew
Mt. Tabor. with him.
4. Practice making the sign of the cross:
The way we make the sign of the cross teaches us about Jesus and God. Holding the three fingers together reminds us of God is One in Three Persons, Father, Son, and Holy Spirit. Holding the other two fingers together reminds us that Jesus was both God and man.
5. Craft Idea: Make a Diorama
 You will need a cardboard box for each diorama, either a large one for a class project or a shoebox size for each child. Have the children make 6 people out of pipe cleaners, Jesus in white. The background can be blue construction paper with fluffy clouds made of cotton balls. Place Jesus in the center, with Moses (holding tablets made of construction paper) and Elijah on either side and the disciples bent over at his feet. A bit of tape will secure the figures to the box.
Way too hard for your time and space? How about a Mount Tabor Centerpiece? Take a brown paper grocery bag and let each child shape it to look like Mount Tabor. Glue to a paper plate so it will stay together. Now print the coloring icon on cardstock, one copy for each child. Cut out each of the people ahead of time. Let the children color the figures. Then tape them in place, Jesus top and center, with Moses and Elijah at His sides at the top of the mountain and the disciples below them. If you want, don't color Jesus at all but give Him a nice coating of silver or clear glitter glue. When it dries, He will shine indeed!
6. Close with prayer. Lord, may we also trust in You, as did Moses and Elijah, and do wonderful things in Your name.
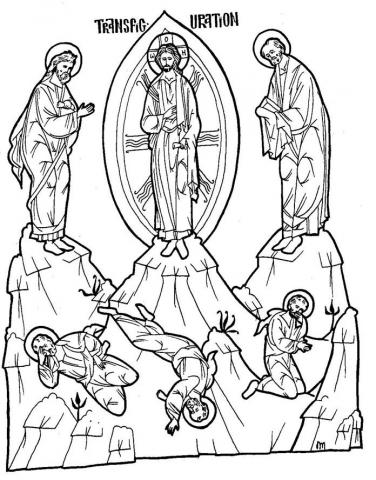
Dormition
DORMITION
 Objectives:
- Children should be able to tell the story of the dormition and to recognize the characters in the icon.
- Why do we bring flowers for the dormition?
Possible Lesson Plan:
1. Open with prayer.
2. Show the icon of the Dormition. Identify the characters and tell the story:
After the day of Pentecost, Mary stayed in the city of Jerusalem, living with the disciple John. She comforted and worked lovingly with the new Christian church.
When Mary was about 50 years old, she was sick and dying. At that time, all of the apostles were scattered around the world preaching the Gospel. When they heard of Mary’s death, they all returned to Jerusalem. All arrived in time for her burial except St. Thomas, also known as Doubting Thomas. The apostles are pictured on either side of Mary, St. Peter at the head of the bier and St. Paul at the foot of the bier.
Below the bier in the icon we see Antoninus the Jew. He was an enemy of the Christian community and tried to break up the burial of Mary by dumping over the bier. An archangel appeared and cut off the hands of Antoninus to keep him from dishonoring the Theotokos. Antoninus then knew that Jesus was the Lord and became a believer. His hands were healed.
When Thomas arrived, the other disciples took Thomas to the tomb in Gethsemane where Mary had been buried near her parents, Joachim and Anna. But the tomb was empty! The Church believes that Mary was resurrected bodily and taken to heaven, just as we all will be in the future.
- True or false:
True False
Dormition means “falling asleep”. Below the bier in the icon we see Jesus.
Sts. Peter and Paul are in the icon. Thomas arrived on time to see Mary.
The apostles returned for Mary’s death. Mary died in Rome.
Mary died in Jerusalem. Antoninus was Mary’s friend.
Doubting Thomas found Mary’s Mary lived to be 100 years old.
empty tomb.
- Discuss the association of flowers with this feast. According to tradition, when the apostles went to visit the tomb of Mary, instead of finding her body, they found only the burial cloths and the tomb was filled with the fragrance of flowers. We bring flowers to church to be blessed and place them at the icon of the Theotokos. We can then take home the flowers to give her fragrance to our homes.
- If the weather permits, gather some flowers. Make a bouquet and place it beneath Mary’s icon, or dry the flowers to be used later in candle decorating.
- Craft Idea: Mary Garden in a jar or pot – take jar or pot. Add dirt. Laminate icon of Dormition or Theotokos or allow children to color the icon of the Dormition or Theotokos. Decorate a rock to be a “Lady-Bug”. Then plant a flower or two that can represent the Theotokos. The nice, long icon below will go well around a jar, and the coloring icon of the Theotokos would work well on a popsicle stick inside the jar or pot. Some ideas include:
- Rose: The Queen of flowers
- Marigolds: Mary’s Gold
- Rose ”Mary”
- Lily of the Valley: “Mary’s Tears”
- Alyssum: with cross-shaped flowers
- Impatiens: also known as “Mother’s Love”
- Morning Glory: “Mary’s mantle” with its blue color
Simpler craft option: Gardens and dirt not fit with your space and time? Try making a 4-part card since this is the 4th and last feast of the Theotokos of the church year, and of her life. Take blue construction paper (Why blue?) and cut into 4-part “quadriptych”. Cut out scenes from icons of the Theotokos we’ve studied this year and glue into each of the 4 arches. Write the name of each feast in the arched top. Fold on the lines to make it stand up. Or, even simpler, just use one of the many ideas to make flowers.
Need something really simple for August lesson. Lots of ideas for flowers:
- Close with prayer.
