Ages 6-9 Overview (Schedule, Recipes, etc..)
OLD TESTAMENT
AGES 6-7
This file is provided as a resource for Church School directors. Feel free to plug in your own dates and your own teachers.
Teachers:
Schedule of Classes:
|
Date |
Teacher |
Lesson/Activity |
Special Notes |
|
September 13 20 27 |
|
Creation Adam & Eve/The Fall Noah |
|
|
October 3 4 11 17 18 25 |
|
Movie Night: Noah Tower of Babel Abraham Movie Night: Abraham Isaac Jacob |
Outdoors if possible
Social Hall after Vespers
|
|
November 1 8 15 21 22 29 |
|
Joseph #1 Joseph #2 Moses #1 Movie Night: Moses Moses #2 Balaam |
All Saint’s Party
Social Hall after Vespers Memory: 10 Commandments |
|
December 5 6 13 20 27 |
|
St. Nicholas Party Joshua Judges/Gideon Nativity Pageant Job |
Parish Wide
Social Hall and Nsg. Home
|
|
January 3 10 17 24 30 31 |
|
Ruth Samuel/Hannah Saul David/Goliath/Psalms Movie Night: David David |
3 Kings Party following
Memory work: Psalm 22 Social Hall after Vespers
|
|
February 7 14 21 27 28 |
|
Solomon Proverbs/Song of Songs Elijah Movie Night: Elijah Elisha |
Pack School Kits
Social Hall after Vespers |
|
March 7 14 21 28 |
|
Jonah Isaiah Jeremiah Ezekiel |
|
|
April 4 5 11 18 25 |
|
PASCHA Bright Monday Egg Hunt 3 Young Men in Fire Tobit Daniel |
No Class After Liturgy
Pack Health Kits
|
|
May 1 2 9 16 23 30 |
|
Movie Night: Esther Esther Minor Prophets No lesson: Camping Trip Minor Prophets Ezra/Nehemiah |
Social Hall after Vespers
Memory Work: Books of O.T.
Book Collection |
|
June 6 12 13 |
|
Maccabees Dress Rehearsal Closing exercises/play |
Book Collection Social Hall after Vespers Social Hall and Nursing Home |
Classroom supplies: Each class is supplied with the following items:
Paper plates, small and large Scissors Stapler/Staples
Paper, plain and construction Tape and dispenser Paper bags
Glue or glue sticks Crayons and/or markers
Popsicle sticks Chenille (colored pipe cleaners)
If you use the last of something, please either replace it or let me know so I can replace it. If you need special craft supplies for your lesson, submit the receipt to me for reimbursement.
Books are available for class use. While each child in the younger classes will have a copy of the Beginner’s Bible, and it’s always fun to start out in your very own Bible book, many times we must supplement with the teacher’s copies of the Children’s Bible Reader, Read with Me Bible, Golden Children’s Bible, Child’s First Bible, or other books. Watch the lesson plan for page numbers and details. Each has strengths and weaknesses: Children’s Bible Reader is Orthodox but no longer in print, First Bible has great pictures but not much content, Golden Bible has the most content and lovely pictures but way too long, etc. And not a one has ALL of the stories we need. You can also purchase flannelboard sets for many of our stories.
Teaching Schedule: We all know that there will be last-minute needs; trade with someone if you cannot teach on your assigned day and let the director know!
Insurance: Each of us must “apply” each year for our volunteer position of teacher. Please be sure not to send small children to the bathroom unattended and accompany your charges back to the Social Hall after class.
Opening Exercises: The Church School director will supervise this time, or delegate it when she is absent. Church School children and teachers are dismissed first from Liturgy; children come straight across for snack during opening exercises. These are an integral part of the curriculum – reviewing material from previous weeks, presenting additional Old Testament characters, rehearsing plays, hearing memory work, and playing quiz games.
Curriculum: With each lesson, I have included True/False questions. These can be used as a quiz or game (like Jeopardy). It gives you an idea whether anyone was listening! We also have a timeline figure for each Old Testament figure. Use the figures provided for the story, print on cardstock (one for the whole class or use it every week for your craft), decorate (color, glitter glue, wiggle eyes, yarn hair, etc.) and hang in order from a clothesline stretched along the room with clothespins or paper clips. Easy way to review past lessons and bring in the new.
Icons: Each lesson is now illustrated with an icon, gleaned from non-copyrighted websites on the Internet. Feel free to enlarge these and use to amplify your lesson.
Movie Nights and Parties: We will have pizza after vespers on Saturday night while showing a small children’s movie. Older children should bring a sleeping bag for a lock-in with “feature” presentation; we must have at least 2 adults at each overnight. We’ll leave it up to the parents to decide whether their child is old enough to spend the night or should go home after the “kiddie” movie.
Hand Outs: Feel free to use the coloring pages and puzzles in the Parents' Guide for take homes. Send home with children at end of lesson.
RECIPES
CLAYS PAINTS
SALT DOUGH FINGER PAINT (4 WAYS)
2 cups flour Use pudding with food coloring!
1 cup salt Mix liquid starch and food coloring.
about 1 cup water Mix 3 T sugar, ½ cup cornstarch, and
food coloring 2 cups cold water. Cook over
bath oil, vegetable oil, peppermint oil low heat, stirring, till thick.
Mix flour and salt. Add water Pour into muffin tin. Add
slowly and mix with your fingers until food coloring to each cup.
it makes dough. Knead in a few drops
food coloring and a splotch of oil (if SAND PAINT
desired). Store in air-tight container. Add dry tempera paint to corn meal. Sprinkle over areas
“painted” with thinned white glue for sand effect. Shake off excess
SELF-HARDENING CLAY
1 cup sand
½ cup cornstarch
1 tsp powdered alum PASTES
¾ cup hot water PRIMARY PASTE
Food coloring if desired Mix ½ cup water and 1 cup flour
Mix sand, cornstarch and alum in a bowl. Spoon into a jar
in large pot. Add hot water and stir or squeeze bottle to store.
vigorously. Add food coloring if
desired. Cook over medium heat PAPIER MACHE PASTE
until thick, stirring constantly. 3 cups water
After cooling, store in airtight container. 1 ½ cups flour
Mix flour with cold water until lumps are gone.
SAWDUST CLAY
2 cups fine sawdust Dip pieces of newsprint in paste and mold around
1 cup flour surface to be shaped. Air dry.
Mix sawdust and flour in bowl
or bucket. Add a little water at a time,
stirring till it is stiff but pliable. Knead
till it’s elastic and easy to shape. Store
in airtight container. Air dry.
CORNSTARCH DOUGH
2 cups cornstarch
4 cups baking soda
2 ½ cups water
Mix cornstarch and soda in large
pot. Add water. Cook, stirring, over medium
heat until thick like mashed potatoes. After
cool, knead on wax paper for 5 minutes. Store
in an airtight container. Air dry.
The Creation
THE CREATION
Objectives:
- Children should know that God created the world.
- Children should be able to tell the story of Creation and what was created on which day.
Possible lesson plan:
- Open with prayer.
- Read the story of the creation in the Beginner’s Bible (BB) pages 7-13 or Children’s Bible Reader, pp. 17-20. At the end, ask the children to name some things God created.
As you read the story make creation trail mix and eat it at the end:
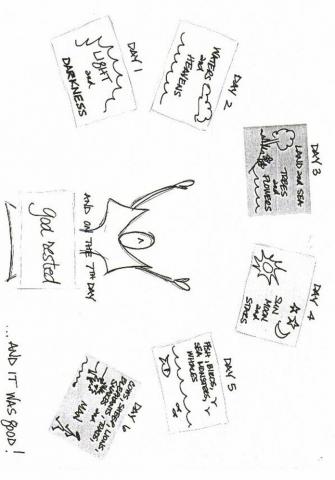
Day 1: Yogurt-covered raisins for light/dark
Day 2: Popcorn for clouds
Day 3: Dried apricot suns/dried banana stars
Day 4: Craisins for dry land and plants
Day 5: Goldfish crackers
Day 6: Animal crackers
Begin your timeline with the Creation. Color, decorate, and hang.
- True/false questions (Don’t do them in order!):
True False
On the 1st day, God made light and dark On the 1st day, God made animals.
On the 2nd day, God made the sky. On the 2nd day, God made whales.
On the 3rd day,God made water & plants. On the 3rd day, God made rainbows.
On the 4th day, God made the sun. On the 4th day, God made cars.
On the 5th day, God made birds & fish. On the 5th day, God made people.
On the 6th day, God made animals. God didn’t care about plants.
On the 7th day, God rested. God worked hard all on the 7th day.
Learning Game: Play "Creation Bingo" but be sure the students can name the day if they are to claim the space.
- Make a Creation Mural for the whole class to enjoy on your bulletin board. Take 7 pieces of construction paper. Assign one day of Creation to each student (or work in pairs if there are more than 7 students) and have them draw or paint the happenings of that day. Put them up, surrounded by bits of cotton to look like clouds, and with appropriate lettering.
- This is the first lesson of the new year; the first day of the new liturgical year is designated as environmental awareness day. Even the smallest children can take small steps to help care for the lovely world God has given us. Have the children think of some ways their family can care for God’s world. Do they throw litter out into the street to make the world dirty? Do they recycle in their homes? Have them brainstorm ways they can help to care for the world around them.
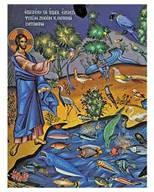 For each child to take home, copy the small mural on the next page and color. If you want, copy the small rectangle for each day on pastel paper and allow students to find the right place and glue them in.
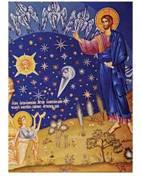
 OR, print the large semi-circle and two trees on cardstock; use white for background and green for trees (or use white and have children color). Cut out. Have lots of stickers and, as you review the days of creation, have them first receive the white background, then some clouds for sky, then add the trees, which will eventually allow the scene to stand up, then the sun, moon, and stars up in the sky, then bird stickers, and finally various animals and people.
- Close with prayer.
Adam and Eve and the Fall
ADAM AND EVE AND THE FALL
Objectives:
1. Children should be able to identify Adam and Eve by name.
2. Children should be able to tell the story of the Fall.
3. Children should identify Satan, the snake.
Possible Lesson Plan:
- Open with prayer.
- Tell the story of Adam and Eve from the Beginner’s Bible, pages 14-25, or the Children’s Bible Reader, pp.21-22.
Add Adam and Eve to your timeline.
- True/False questions:
True False
Adam and Eve ate the forbidden fruit. Adam and Eve always obeyed God.
God created Eve from Adam’s rib. An elephant told Eve to eat the fruit.
Satan as a snake told Eve to eat the fruit. God let Adam & Eve stay in Eden.
Adam and Eve were thrown out of Eden. God told Adam to eat anything at all
- Ask the children: Why did God create people? How can people help God?
Discuss disobedience: Do we ever disobey our parents? God? Why is it so easy to disobey when we know better? Why do we choose to disobey? What happens when we disobey?
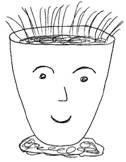
- Make Egg People: Take 2 L’eggs eggs for each student. These will be Adam and Eve. Give each student 2 hunks of modeling clay for bases. For each, remove the short, fat end of the egg and discard. Press the rounded end of the larger half into the base. Decorate the egg as a face with eyes, nose, mouth, and ears made of felt, beads, paper, etc. Fill eggs with potting soil. Add a scattering of grass seed on the top. Water. Place in sunlight and keep watered and the grass will sprout and become the hair!
- Alternate Craft idea: Tree and Serpent. Cut out trunk from brown construction paper and either use real fall leaves or cut leaves from the patterns. Have children glue to blue construction paper and add cotton ball clouds and Easter grass at the bottom. Add lifesaver fruit and a gummy worm serpent. Finally place Adam and Eve figures below the tree. You can either have each child draw a man and a woman OR use the figures from the icon above, enlarge, print, cut out, and glue on.

- Close with prayer.
Noah
NOAH
Objectives:
- Children should be able to tell the story of Noah and the ark.
- Children should identify the Great Flood and its significance.
- Children should know God’s meaning for a rainbow.
Possible Lesson Plan:
- Open with prayer.
- Tell the story from the Beginner’s Bible, pp 26-33, First Bible, pp 14-21, or the Children’s Bible Reader, pages 24-27.
Add Noah to your timeline.
- Instead of True/False, have several small stuffed animals, a rock, a pencil, and several other non-animal things. Have the children one by one choose something that Noah would have taken (i.e., an animal) and place it in a basket.
- Discuss storms; use pictures from the library if desired. Thunderstorms, hurricanes, tornadoes – all are scary. Ask the children what scares them: the wind? the rain? the thunder? the lightning? Imagine how Noah and his family might have felt during the 40 days of storm.
- Discuss rainbows: What did God say to Noah with the rainbow? Have they seen a rainbow? What colors are in a rainbow? Draw and color a big rainbow.
- Sing “Rise and Shine”:
- Lord said to Noah, “There’s gonna be a floody, floody,” (2x)
Get those children out of the muddy, muddy!” Children of the Lord.
Chorus: So rise and shine and give God the glory, glory, (3x)
Children of the Lord.
- So Noah he built him, he built him an arky, arky, (2x)
Made it out of gopher barky, barky, Children of the Lord.
- The animals they came on, they came on by twosies, twosies, (2x)
Elephants and kangaroosies, roosies, Children of the Lord.
- It rained and poured for forty long daysies, daysies, (2x)
Nearly drove those animals crazies, crazies, Children of the Lord.
- The sun came out and dried up the landy, landy, (2x)
Everything was fine and dandy, dandy, Children of the Lord.
6. Play animal Charades with pictures (since many are not yet reading well):
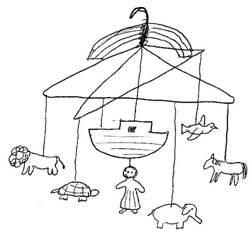 Make a Noah Mobile: Take 2 hangers and cross them as illustrated, securing with duct tape. Have children draw an ark, Noah,and several animals (or color them in a coloring book) Cut out. Punch a hole in each, tie a string, and tie to the mobile. draw a rainbow, cut out, and glue to the hanger crosspieces overtop. Hangers hard to find? Use a paper plate, glue the rainbow on the top, and punch holes for the strings to come through.
Alternate craft: Too time-consuming? Try this easier one. Print on cardstock and cut out ahead of time. Have children draw and color animals in the windows of the ark. Cut a sheet of blue construction paper with the waves or print on blue cardstock and cut out. Cut out the ark with its tabs. Cut the slits in the "ocean" and put the tabs through the blue construction paper and tape or glue on the back. Now the ark can move! Need an "icon ark"? Pick your favorite icon of the ark and add the tabs and cut out, or use the one here. Cut around the ark and people to remove the sky and sea.
- Close with prayer.
The Tower of Babel
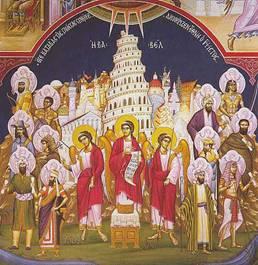 THE TOWER OF BABEL
Objectives:
- Children should be able to identify the Tower of Babel and tell its story.
- Children should identify the source of the many languages we have today.
Possible Lesson Plan:
- Open with prayer.
- Tell the story of the Tower of Babel from the Beginner’s Bible, pp 34-38, the Children’s Bible Reader, page 28, or the Read with Me Bible, 36-39.
Add the Tower of Babel to your timeline.
- Reenact the drama as the children tell you the story back while building a tower of blocks and finally knocking it down.
- True/False questions:
True False
The Tower of Babel was the tallest ever. God built the Tower of Babel
Men built the tower to reach heaven. God told people to build it.
God destroyed the tower. People always had many languages.
God confused the languages. The tower was made of wood.
- Do you speak another language? Many of the children have no idea what it is like to not understand what someone is saying; indeed, travel to a foreign country is one of the only ways to bring this lesson home. But, give it a try. Begin the lesson in another language, or give the instruction for the crafts in another language. Watch the blank stares and discuss their reactions.
- Make a craft-stick tower:
Begin with 2 sticks. Put glue on the ends of each, and add 2 more perpendicularly across. Then put glue on the ends of these and add 2 more just over the 1st 2. Keep adding until tower is tall enough. Glue on paper windows, door, etc. You can even make a flag for the top saying “Tower of Babel”.
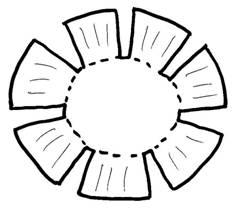
Have lots of paper towel tubes? Decorate one as the tower. Print the paper template and color. Add some people on the walkways??? Tape or glue or staple tightly the top section to top of the paper towel tube and then allow it to widen by taping or stapling the three bottom sections in the back to each other.
- Close with prayer.
Abraham
ABRAHAM
Objectives:
- Children should be able to tell the story of Abraham.
- Children should identify Abraham as the father of the Jewish people, chosen by God.
Possible Lesson Plan:
- Open with prayer.
- Read the story of Abraham from the Beginner’s Bible, pages 39-51, Children’s Bible Reader, pages 29-33, First Bible, pages 24-29, or the Golden Children’s Bible, pages 34-41.
Add Abraham to your timeline.
- True/False questions:
True False
Abraham was married to Sarah. Abraham was married to a camel.
God told Abraham to leave home. A king told Abraham to leave home.
Abraham traveled on a camel. Abraham traveled on a magic carpet.
Abraham’s son was named Isaac. Abraham’s son was named Noah.
- Discuss moving: Has anyone moved to a new house? What would you pack if you had to carry it all on a camel? Have you ever been camping, pitching a tent each night in a different place? What is it like?
- Have some fun with camels: What do they look like? What are their natures? Get a book from the library to show camels.
- Sing “Father Abraham!”
Chorus: Father Abraham had many sons; many sons had Father Abraham.
And I am one of them, and so are you, so let’s all praise the Lord:
- Right hand With each verse,
- Left hand add a body part,
- Right leg until you are marching
- Left leg around the classroom
- Head wagging your heads.
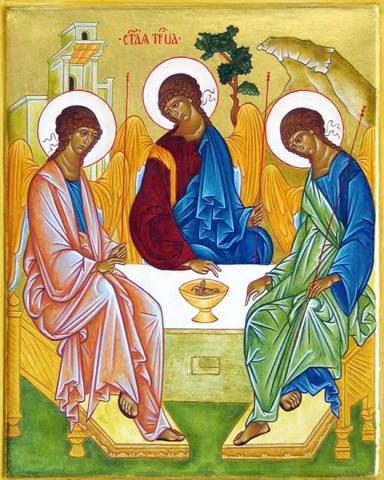
7. Make a Trinity icon: The story of the 3 men visiting Abraham is the source for
Rublev’s very well-known icon of the Trinity with the 3 Persons seated at a table. First have the students paint a wooden plaque about 5x7 (We have these in the closet.) a solid color with acrylic paint. While that’s drying, take a copy of the icon for each student about 3x4. Glue to the plaque, which should be dry now. Take them home and spray with clear spray after they dry overnight. Or, use Mod Podge to both glue the icon down AND then paint over the entire plaque to seal it.
Too messy? Print the icon coloring page on regular paper and color the entire paper with crayon, including all the background. Dip a cotton ball in vegetable oil and rub the entire picture for magical "stained glass" icon. Tape or hang inside a window to enjoy.
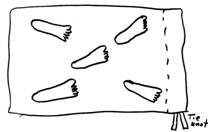
8. Alternate craft idea: Traveling Bag – Take a pillowcase for each child. Thread
a piece of clothesline through the open hemmed end to make a drawstring
closure. Dip feet in paint or draw around feet with fabric markers to decorate.
9. Close with prayer.
Isaac
ISAAC
Objectives:
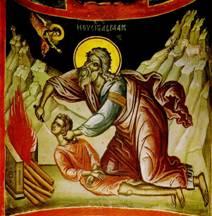 Children should be able to tell the story of Isaac – his birth, the sacrifice on the mountain, and his marriage.
- Children should identify Isaac as the son of Abraham and Rebekah as his wife.
Possible Lesson Plan:
- Open with prayer.
- Tell the story of Isaac from the Read with Me Bible 44-55. The Children’s Bible Reader leaves out the story of the sacrifice on the mountain, but does include the story of Rebecca on pages 34-36, as does the Beginner’s Bible on pages 52-57.
Add Isaac to your timeline.
- Feed the Elephant True/False questions:
True False
Isaac was the son of Abraham. Isaac was the son of Adam.
Rebekah was Isaac’s wife. Sarah was Isaac’s wife.
Abraham was ready to obey God. Abraham killed Isaac.
Sarah was Isaac’s mother. Rebekah was Isaac’s mother.
- Draw a family tree: Begin with Abraham and Sarah, add Isaac, then Rebekah. You can draw the children’s family trees as well to illustrate Daddy, Mommy, children.
- Do the children remember the story from the Gospels of the Woman at the Well? Rebekah gave the servant water to drink because he was thirsty. When Christ asked the Canaanite woman for a drink from the well, He told he that He is the Living Water, whoever drinks it will never thirst. So, the water from Rebekah’s well in the Old Testament is just normal water – people drink from it and are thirsty again. But, Christ, the Light of the World, the True and Living Water, gives everlasting nourishment.
- Make Rebekah’s Well: Begin with a milk or whipping cream carton, carefully washed and cut in half. Glue straws in the corners to hold up the roof. Cut holes in the roof for a straw or pipe-cleaner to hold the bucket. Attach a small condiment container or medicine cup to a string. Cover the milk carton with gray paper and decorate it like stones.
- Alternatively, make the well from a ball of clay or playdough, pinch a hole in the center, use a plastic knife to draw brick-like lines on the outside. Now place a tealight candle inside to remind the children that Jesus, the Light of the World, is the true living water!
- Close with prayer.
Jacob
JACOB
Objectives:
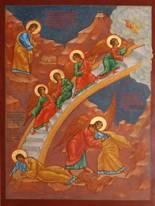 Children should be able to identify and name “Abraham, Isaac, and Jacob”.
- Children should be able to tell the stories of Jacob and Esau, Jacob’s ladder, and Jacob and Rachel.
- Children should recognize “Israel” as the name God gave to Jacob, later to be the name of God’s chosen people.
Possible Lesson Plan:
- Open with prayer.
- Tell the story of Jacob either from the Beginner’s Bible, pages 58-70, the Children’s Bible Reader, pages 37-49, or the Read with Me Bible 56-73.
Add Jacob to your timeline.
- True/False questions:
True False
Jacob and Esau were twins. Jacob and Esau looked alike.
Isaac was the father of Jacob. Rachel was the mother of Jacob.
Jacob saw angels on a ladder. Jacob saw elephants on a ladder.
God gave Jacob the name Israel. God gave Jacob the name Superman.
- Add Jacob and Esau to your family tree. Then add Leah and Rachel to Jacob.
- Discuss blindness: Jacob was able to cheat Esau because Isaac was blind. Would it be hard to identify things without seeing? Put 5-10 small objects in a pillowcase (paperclip, pencil, etc.) Can the children identify them by feel?
- Discuss lying and cheating: Did Jacob lie to Isaac to cheat Esau from his inheritance? Was this right? Was Esau happy with Jacob or angry? Have we ever lied? Has anyone ever lied to us or about us? How do we feel? What happened when Jacob returned to the land of Esau? Retell the story of the Prodigal Son: How is this like the return of Jacob to his homeland?
- Talk about angels: What are they? Where else do we see them in the Bible?
Who is Gabriel? Explain that angels are messengers from God. Show the icon of the Annunciation. Talk about guardian angels. How do they help us?
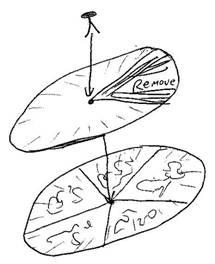
- Make a Story Wheel: Divide a paper
plate into 5 sections. Have each child
draw a picture in each section: Jacob
with Isaac, Jacob and the ladder, Jacob
marrying Rachel, Jacob with the spotted
sheep, Jacob meeting Esau. Take a 2nd
plate and cut out 1 section. Put over the other plate and secure with a brad. Now
tell the stories, one by one, as you turn the
upper plate and reveal the pictures.
Close with prayer.
Joseph and the Many Colored Coat
JOSEPH #1
Objectives:
- Children should know that Joseph was one of the twelve children of Israel.
- Children should be able to tell the story of Joseph and the many-colored coat and of Joseph sold into slavery.
Possible Lesson Plan:
- Open with prayer. Want an edible Joseph with his coat to eat while you tell the story? Make gingerbread men ahead of time. Children can ice with white and use mini-M&Ms to decorate.
- Tell the story of Joseph, either from the Beginner’s Bible, pages 71-77, the Children’s Bible Reader, pages 50-53, or from the Read with Me Bible 74-86.
Add Joseph to your timeline.
- True/False questions:
True False
Joseph was a son of Israel. Joseph was Jacob’s oldest son.
Joseph’s mother was Rachel. Joseph’s mother was Leah.
His father loved Joseph very much. His father hated Joseph.
Joseph was sold into slavery. Joseph’s brothers all loved him.
- Add Joseph and his brothers (Reuben, Simeon, Levi, Naphtali, Issachar, Asher, Dan, Zebulon, Gad, Judah, and Benjamin) to the family tree; Joseph and Benjamin will be under Jacob and Rachel, the rest under Jacob and Leah. Discuss how Joseph’s brothers treated him. Is that how God wants us to treat our brothers and sisters?
- Make a Many-Colored Shirt: Decorate T-shirts or old long-sleeved men’s shirts (to be painting smocks) with fabric paints or dipping in multiple colors of fabric dye. Mix the fabric dye, Rit or similar, in very hot water according to the directions. Put each color in a separate pail (or other container you don’t mind getting dyed along with the shirts). Let the children dip the shirts in the various dyes to make multi-colored shirts. Try not to overlap the colors too much or the shirts will lose clarity of color.
- Too hard? Try a paper bag puppet, decorating a white bag with water colors or markers, pieces of tissue paper, pipe cleaners, colored paper, yarn, buttons – whatever. Got a lot of baby wipes? Then make baby wipe (or wet coffee filter) tie dye. Put some rubber bands around the wipe and color each section with washable markers. Remove rubber bands. You can use the pattern on the next page if you prefer a more “finished” face for the paper bag. Just cut out and color and glue.
Prefer something 3D? Begin with baby wipe tie die. Take doll clothespin. Color face on doll clothespin with Sharpies. Cut small hole for head in center of wipie and dress your Josph with his new colored coat. Regular Elmer’s glue will hold the coat on. You can add pipe cleaner arms if desired, or even a colored piece of wipie for a Biblical headdress. Then let everything dry.
- Close with prayer.
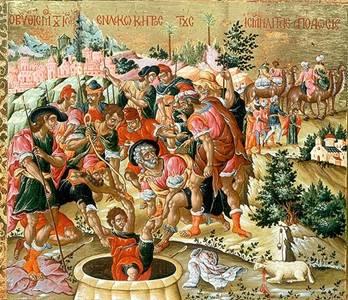
Joseph #2
JOSEPH #2
Objectives:
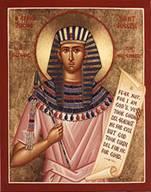 Children should be able to tell the dreams of the butler, the baker, and Pharoah.
- Children should know the story of Joseph’s forgiving his brothers.
- Children should know how the people of Israel came to live in the land of Egypt.
Possible Lesson Plan:
- Open with prayer.
- Review the story of Joseph from last week.
No one new to add to your timeline, but a good chance to review all the figures hanging from your clothesline.
- Read the story of Joseph either in the Beginner’s Bible, pages 78-91, Children’s Bible Reader, pages 54-71, or the Golden Children’s Bible pages 68-87.
- True/False questions:
True False
Joseph was a slave of Potiphar in Egypt. Joseph was taken to China as a slave.
The butler dreamed of grapes and a cup. The butler dreamed of apples.
The baker dreamed of bread and birds. The baker dreamed of apple pies.
The butler was freed by Pharoah. The baker was freed by Pharoah
Pharoah dreamed of fat and thin cows. Pharoah dreamed of fat elephants.
- Talk about slavery and prison: What would it be like? Are there slaves now? Prisoners? What did Jesus say about how we should treat slaves and prisoners?
- Talk about dreams: Do we have dreams? What kind of dreams? Are there other important dreams in the Bible? (Jacob’s ladder, Joseph and Mary)
- Make a Signet Ring: Take a piece of
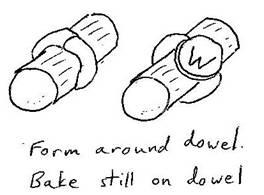 oven-hardening clay. Form a long snake
and a flattened circle and put together
as a ring. Inscribe with child’s name or
a symbol. Put them in the oven as per
directions on the package. While baking,
take some beeswax (Father has old
candles.) and melt it on the hotplate. Write a friendly card to a prisoner.
Use wax and ring to seal the card. Send
to the Orthodox Prison Ministry. Keep the
ring to use at home for cards and letters.
Too time-consuming? Make Joseph’s Egyptian collar, and perhaps a bracelet also, from paper plate, and cup. Cut to fit the child and decorate with markers, sequins, jewels, glitter glue, or even macaroni painted ahead of time for mosaic work.
- Close with prayer.
Moses #1 (early life)
MOSES #1
Objectives:
- Children should be able to tell the story of the baby Moses and his salvation on the Nile.
- Children should be able to tell the story of the burning bush.
Possible Lesson Plan:
- Open with prayer.
- Tell the story of the early life of Moses from the Beginner’s Bible pages 92-103, the Children’s Bible Reader, pages 73-78, or the Read with Me Bible pages 93-103.
We're adding Moses with the 10 Commandments next week, so the timeline gets a week off. Of course, many of you, because of time constraints, will be putting Moses into a single lesson anyway.
- True/False questions:
True False
Moses was of the people of Israel. Moses was an Egyptian.
Baby Moses floated in a basket. Baby Moses was found in a bush.
God spoke to Moses in a burning bush. God spoke to Moses in an apple tree
 Role-play the story of baby Moses: Put a baby doll in a basket. Hide it in the classroom. Have the children play Pharaoh’s sister and find the baby.
- Try some basket weaving: Cut the basket form out of a paper plate. Starting at the bottom, weave in and out with colored crepe paper twisted into thin “reeds”. Glue down at the start and finish of each piece of crepe paper. You can use more than one color. When you reach the top of the plate, glue the last round of twisted paper on top of the plate to hide it.
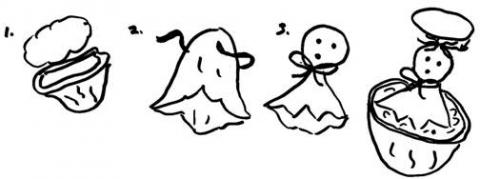
- Alternate craft idea: Baby Moses
Put a bit of cotton fluff in a half walnut shell (a tiny cup can be used instead).
Cut a circle of fabric. Put small bit of cotton in center of circle.Tie around neck to make baby’s head. Glue on yarn hair and fabric circle bonnet. Place baby in walnut shell basket.
7. Prefer to focus on the burning bush? Make a burning bush candle! Take the burning bush coloring page and size to fit your jars and print on regular copy paper. Color the entire page, including the areas you want to be white. Take a glass jar (great way to repurpose old jars) and cut picture to fit around the jar. Rub entire picture with a cotton ball dipped in vegetable oil to make it translucent, like stained glass. Now glue to the jar and use tealight to make the bush “burn”. You may need some masking tape to hold it until the glue dries.
 8. Close with prayer.
Moses #2 (later life)
MOSES #2
Objectives:
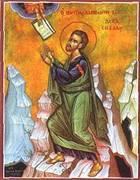 Children should learn the 10 plagues.
- Children should memorize the 10 commandments.
- Children should be able to name Moses as the writer of the books of the Torah, or Jewish law.
Possible Lesson Plan:
- Open with prayer.
- Read the story of Moses from the Beginner’s Bible, pages 104-127, the Children’s Bible Reader, pages 79-105, or the Read with Me Bible, pages 104-143. Add Moses to your timeline.
- True/False questions:
True False
Moses led God’s people to freedom. Adam led God’s people to freedom.
God gave Moses the 10 Commandments. God gave Moses 5 Commandments
God opened the Red Sea. God opened the Yellow Sea.
The last plague was death. Pharaoh loved and obeyed God.
- Play “Moses May I”: Give commands and permission based on the Commandments, for example:
Teacher: John, take 2 steps into the wilderness.
John: Moses, may I?
Moses (either the teacher, or an older student): Yes, you may.
Teacher: Judy, steal Jason’s hat.
Judy: Moses, may I?
Moses: Moses says no! Why not? (Class can answer.)
- Sing “God Gave Moses” to the tune of “Mary had a Little Lamb”:
God gave Moses 10 Commandments….This is what God said.
- We must worship only God, only God… This is commandment one.
- God said not to worship things… 7. God said we must honor marriage.
- God said not to use bad words… 8. God said we are not to steal…
- God said we must go to Church…9. God said we are not to lie…
- God said we must honor parents 10. God said we are not to envy…
- God said we are not to kill…
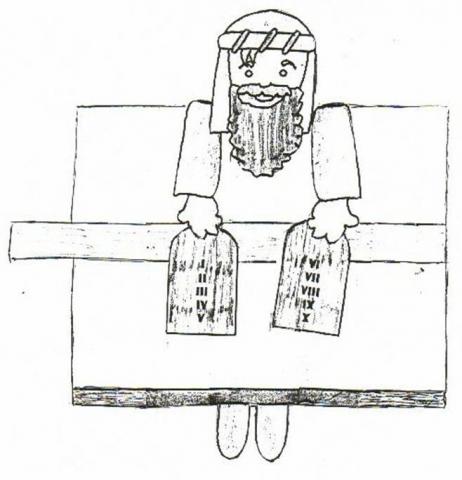
- Make Moses with a toilet paper roll. Copy the design on the next page. Cut out the lines around Moses’s headdress so his head will stand up. Have children color and glue to a toilet paper tube. Added value? Take a piece of blue construction paper, cut waves ahead of time on the long sides. Cut “path” about 4 inches wide of brown construction paper. Children can glue the brown path up the middle of the “sea”, decorate with fish and sea life stickers, and fold both sides longways towards the center. Open the folds to reveal the path for Moses to walk thru the sea, then close them for the Egyptians.

Alternate activity -- Make unleavened bread:
Mix together 1 cup cold water, 2T vegetable oil, 8 T honey, 1 ½ tsp salt, 3 T softened butter, 1 egg. Slowly add the flour and give each child a piece about the size of a ping-pong ball to knead till elastic. Be sure to oil hands before kneading. Grease cookie sheet, smash each ball like a hamburger patty, place on the sheet and poke lots of holes in each with a fork. Bake 400 degrees for 10-12 minutes until golden brown and enjoy.
- Close with prayer.
Balaam
BALAAM
 Objectives:
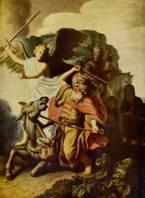
- Children should be able to tell the story of Balaam and the donkey.
- Children should understand the importance of obedience to God.
Possible Lesson Plan:
- Open with prayer.
- Tell the story of Balaam from the Golden Children’s Bible pages 164-169. Add Balaam to your timeline, with his donkey and the angel, of course.
- True/False questions:
True False
Balaam was a follower of God. Balak was a servant of God.
The donkey saw the angel first. Balaam saw the angel first.
Balak was king of Moab. Balak was king of Israel.
Balaam blessed the children of Israel. Balak loved the children of Israel.
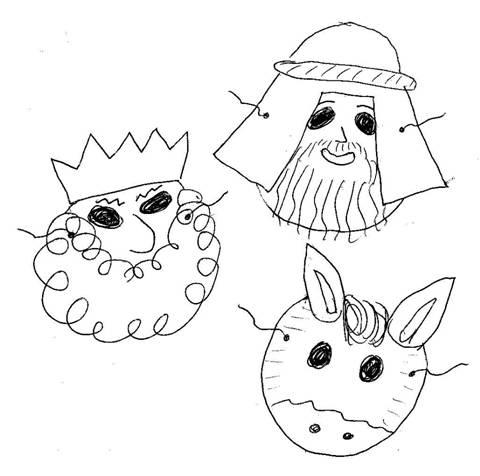 Have the students make paper-plate masks; assign the roles of Balaam,donkey, angel, Balak, and a bunch of messengers. Each student should make a mask for his character. Cut holes for the eyes and punch small holes for string to go around the head. Beyond that, be creative: yarn, fabric, felt, markers, construction paper, etc. After the masks are finished, tell the story with the students acting out their roles.
- Close with prayer.
Joshua
JOSHUA
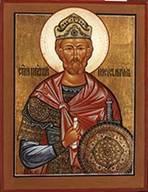 Objectives:
- Children should be able to identify Joshua as Moses’s successor.
- Children should be able to tell the story of the battle of Jericho.
- Children should identify Joshua as the person who said, “As for me and my house, we will serve the Lord.”
Possible Lesson Plan:
- Open with prayer.
- Read the story of Joshua in the Beginner’s Bible, pages 124-135, the Children’s Bible Reader, pages 106-109, First Bible, pages 68-73, or in the Read with Me Bible, pages 144-151.
Add Joshua to your timeline.
- True/False statements:
True False
Joshua led the Jewish people. Joshua went back to Egypt.
Joshua conquered the land of Canaan. Joshua was defeated in battle.
The walls of Jericho fell down. Joshua climbed the walls of Jericho.
- Try an old, but revamped, song or two:
Ring around the city, Jericho is falling down,
Trumpets in our handies, Falling down, Falling down,
Shout it! Shout it! Jericho is falling down,
The walls fall down! With Joshua’s army.
(Everyone falls down.)
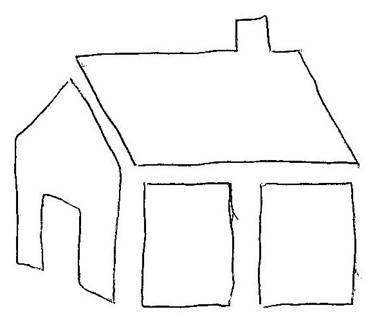
- Make a brick doorstop: Take a clean brick. Cut out the stencil of a house from tagboard or a manila folder. Have each student stencil with acrylic paint a house on the 2 larger sides of the brick. Cut paper to fit one long side and write on it Joshua 24: 15b (“as for me and my house…”). While doing this, review the meaning of the verse. Cut a piece of felt to fit the other long end of the brick. Use as a doorstop.
Not into bricks and paint too messy? Make a goat’s horn trumpet or Shofar: Take 3 toilet paper tubes and one plastic birthday horn. Cut all the way across one roll lengthwise. Remove all but the noisemaker from the plastic horn. Wrap the cut cardboard tube tightly around the plastic noisemaker. Fasten cardboard to plastic noisemaker securely with duct tape. With the other two rolls fold the edge to make a pleat in the bottom side. You are making the bottom small enough to fit inside another roll. This will give the Shofar a nice curve. Place the tubes inside each other and wrap the toilet paper rolls with colored duct tape, perhaps the children’s favorite color or perhaps tan or brown to be more like a real goat’s horn.
- Close with prayer.
Judges/Gideon
JUDGES/GIDEON
Objectives:
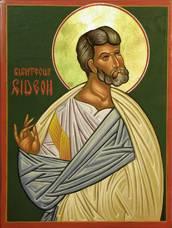 Children should be able to tell the story of Gideon – the meat offering, the fleece, the choosing of the men, and the battle.
- Children should understand the need to trust in God in all things.
Possible Lesson Plan:
- Open with prayer.
- Tell the story of Gideon from the Beginner’s Bible, pages 140-145, Children’s Bible Reader, pages 109, 112-114, + the Golden Children’s Bible, pages 192-194 and the Read with Me Bible, pages 152-155. Use all especially to hear about the fleece, which is in the Golden Children’s Bible.
Add Gideon to your timeline.
- True/False questions:
True False
God spoke to Gideon with a fleece. God spoke to Gideon with a crystal ball.
Gideon chose the men who lapped. Gideon took all the men for his army.
God sent fire to the meat and cakes. God rained on the meat and cakes.
Gideon won the battle with lamps. God killed the Midianites with lightning.
- Give each child a bowl of water. How would he drink without lifting it?
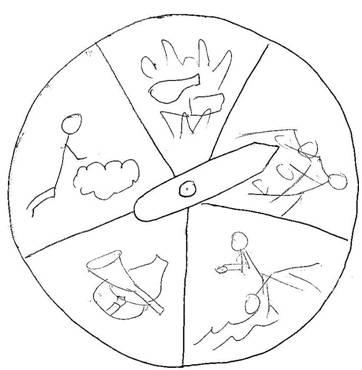
- Make a Story-Spinner:
Take a paper plate. Divide it into 5 sections. In each section, have the child draw the stories of Gideon: the burning of the meat and cakes, the destruction of Baal’s altar, the fleece, the choosing of the men, the attack on the Midianites. Make a spinner out of tagboard or another plate, or just a paperclip on a brad. Attach the spinner to the first plate with a brad; it will spin better with a small bead between spinner and plate but works fine either way. Spin the spinner, and tell the story that goes with the picture.
- Close with prayer.
Job
JOB
Objectives:
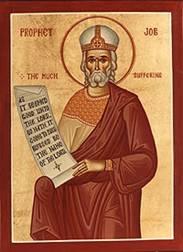 Children should be able to tell the story of Job – his losses and his struggle with Satan.
- Children should know that Job did not curse God.
Possible Lesson Plan:
- Open with prayer.
- Read the story of Job from the Arch Book on Job. It’s not in our storybooks. Or use this condensed version: There was a man in the Old Testament in the Bible named Job and he lived in UZ. He was faithful to God. Job was married and had 7 sons and 3 daughters. He was considered very wealthy and had 7,000 sheep, 3,000 camels, 500 yoke of oxen, 500 female donkeys and a very large household.
One day, Satan told God that the only reason Job was faithful was because he had so much and he had an easy life. God told Satan that he could do anything to Job, except lay a hand on him.
Soon after that, a servant came to Job and told him that while the oxen were plowing and the donkeys were eating beside them, the Sabeans came and took them and killed all the servants except for him. While that servant was talking, another servant came and told Job that a fire came from heaven (probably lightening) and burned up the sheep and those servants, all except for the one that came to talk to Job. While the servant was talking, the Chaldeans took the camels and killed all the servants, except for the one that told Job what happened. Again, while that servant was talking, another servant came and told Job that all his children were eating a meal and a great wind (probably a tornado) came and killed everyone, except for the servant talking.
Job stood up and tore off his robe and shaved his head. He fell to the ground and said "The Lord gives and He takes away, blessed be the name of the Lord." No, Job didn’t get angry and shout at God for his misery! He didn’t blame God for what happened either.
Satan spoke to God again and said that Job was faithful because those things (the servants, animals, and his children) that were taken away didn’t hurt him physically. So, God told Satan that he could do what he wanted except kill Job. The first thing Satan did was put painful boils all over Job, from his feet to the top of his head. Job used a broken pot to scrape himself!
Then, Job’s wife began to tell Job to curse God because of what happened to him. Job told her that sometimes there’s good in life and sometimes there’s bad; but Job would not curse God or sin. When his 3 friends went to see Job, they didn’t even recognize him! They ate with Job for 7 days and nights and they didn’t even talk! They did talk after that and Job stayed faithful and didn’t blame God. But Job did have questions for God. (38:1) and God answered Job out of a whirlwind. Job said “I know You can do anything (42:2).
When Job prayed for his friends, God gave Job back all that Job had lost, He even doubled it! (42:10) God blessed the last days of Job and gave him (42:1212-13):
- 14,000 sheep
- 6,000 camels
- 1,000 oxen
- 1,000 female donkeys
- 7 sons & 3 beautiful daughters
Add Job to your timeline.
- True/False questions:
True False
God allowed Satan to hurt Job. God hurt Job.
Job loved God. Job hated God.
God rules all the world. Satan rules all the world.
God gave Job a new family and riches. Job died sick and poor.
- Talk about sickness and sadness: Have we ever been sad or sick? How do we feel? How should we treat others who are sick or sad? Did Job’s friends show love for him? Make “Get Well” cards for a hospital or nursing home. Who will deliver them?
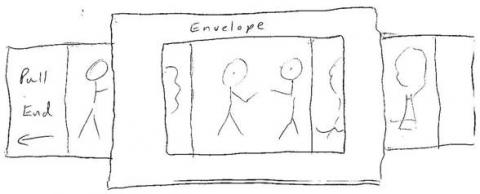
- Make a Bible Movie: For each child, take a business-size envelope. Seal it and cut off the ends. Cut a window like a TV screen in the front. Cut a strip of paper wide enough for the envelope and about 18 inches long. Divide it into sections like a comic strip, leaving the first and last 3 inches blank. Have the students draw the story of Job like a comic strip in the spaces. Then pull it through the envelope like a movie, telling the story as you go.
- Close with prayer.
Ruth
RUTH
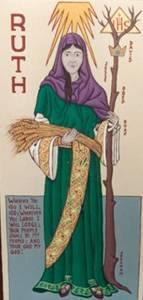
Objectives:
- Children should be able to tell the story of Ruth.
- Children should know that Ruth was from the tribe of Moab, not Israel. The Moabites were the descendants of Lot, Abraham’s nephew.
- Children should know that Ruth was a direct ancestor of Jesus.
Possible Lesson Plan:
- Open with prayer.
- Tell the story of Ruth, either with the Beginner’s Bible, pages 152-155, the Children’s Bible Reader, pages 118-119, or the Read with Me Bible, pages 164-166, or the Golden Children’s Bible pages 211-215 (in that order since the Read with Me Bible is too scanty).
Add Ruth to your timeline.
- True/False questions:
True False
Ruth was from the tribe of Moab. Ruth was from the people of Israel.
Ruth’s mother-in-law was Naomi. Ruth’s mother-in-law was Eve.
Ruth married Boaz. Ruth married Noah.
Ruth went to the land of Israel. Ruth went to the land of Egypt.
- Discuss the customs of marriage – in ancient Israel and today. Why did Ruth stay with Naomi? What is the role of the mother-in-law, then and now? How did Ruth meet Boaz? Why was Ruth in the fields? What custom made Boaz Ruth’s husband? How do we choose a husband today? Who cares for the widow and the elderly today?
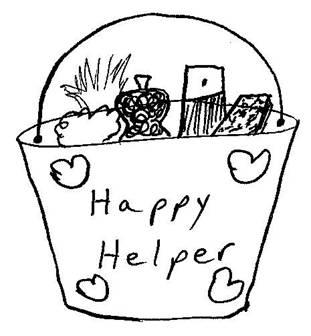
- Ruth was a willing helper.
Make a Happy Helper kit with
each child. Take a bucket (KFC
or a paint store may donate.) Add
a handle of clothesline of there is
no handle. Put in it a dust rag, dish
soap, sponge, window cleaner, paper towels, Fantastic, Pledge, gloves –
whatever you want. Cover the outside
with paper saying “Happy Helper”.
Have each child donate himself to
someone this week. Write a coupon
for service and present it to your
chosen recipient.
Close with prayer.
Hannah/Samuel
- HANNAH/SAMUEL
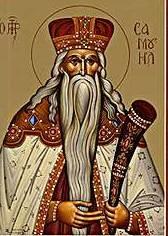 Objectives:
- Children should be able to tell the story of Samuel’s birth and his childhood in the temple.
- Children should understand that God spoke to Samuel and called him to his life work, and He will do the same for us.
Possible Lesson Plan:
- Open with prayer.
- Tell the story of Hannah and Samuel either from the Beginner’s Bible, pages 156-163, the Children’s Bible Reader, pages 120-122, the Golden Children’s Bible pages 216-217 plus the Read with Me Bible pages 167-170.
Add Samuel to your timeline.
- True/False questions:
True False
Hannah was given a son by God. Hannah had lots of children.
Hannah’s son was named Samuel. Hannah’s son was named John.
Samuel’s father was Elkanah. Samuel’s father was Eli.
Samuel lived in the temple. Samuel lived in the desert.
Eli was the priest in the temple. Noah was the priest in the temple.
God spoke to Samuel. Samuel hated God.
- Talk about other mothers and sons from the Bible: Sarah and Isaac, Rebekah and Jacob. Review their stories. Who else was old and prayed for a son? Do you remember the stories of Anna and baby Mary, Elizabeth and John, and Mary and Jesus from the New Testament? Who else gave her child to be raised in the temple?
5. Make Samuel’s Mat: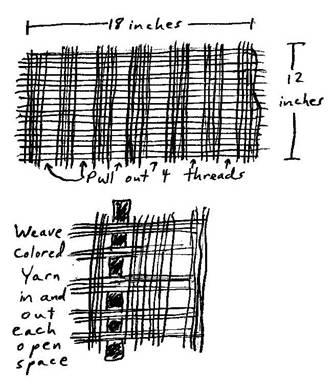
Take a piece of burlap.
Cut a 12x18-inch section
for each child. Along the
long edge, remove 2-3 short
strands several times, spaced
evenly. Now, give the children
colored yarn and have them
weave in and out of the length-
wise remaining fibers. If they
desire, they can remove one or
two strands from each side, making
fringe. This can be a placemat.
All right -- too hard? Use 12x18 cardstock or construction paper, cutting slits in one direction and weave with strips of paper of a different color. Use Contact paper to waterproof, or spray with clear spray. You can also use foam, large sheets in the same way -- more expensive but don't have to be waterproofed. Kits are sold with the slits and strips already done and ready to assemble.
6. Close with prayer.
Saul
SAUL
Objectives:
- Children should be able to identify Saul and the first king of Israel and Samuel who anointed Saul.
- Children should know the story of Saul’s disobedience to God.
Possible Lesson Plan:
- Open with prayer.
- Tell the story of Saul from the Beginner’s Bible, pages 164-168, the Children’s Bible Reader, pages 122-125, or the Read with Me Bible pages 171-172 plus the Golden Children’s Bible pages 225-227. Again, we can start with the children’s own Bibles, but need a bit more meat to the story.
Add King Saul to your timeline.
- True/False questions:
True False
Samuel anointed Saul. Eli anointed Saul.
Saul was the first king of Israel. Moses was the first king of Israel.
Saul disobeyed God. Saul always obeyed God.
Saul’s son was named Jonathon. Saul’s son was named Boaz.
- Discuss forms of government (in simplified form). How is your family “governed”; i.e., how are decisions made in your family? How was Israel governed in its early years? (with prophets and judges chosen by God for a specific task) Who were some of the people God used to lead His people? (Abraham, Joseph, Moses, Joshua, Gideon, etc.) Review their stories briefly. Why would people want a king? Did other countries have kings? Is it easier to trust a good-looking and smart king or to trust the invisible God?
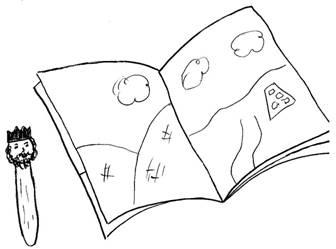 Begin your Book of Samuel Storybooks: Take several pieces of heavy paper. Actually, wallpaper is perfect for this and wallpaper stores will often give you old books of samples for free. If not, use construction paper or cardstock. A pale color, light blue or cream (or light-colored wallpaper with a minute pattern) is good for the pages. Punch three holes in each page; and 3 holes in a piece of tagboard for front and back covers. The front cover should have a pocket stapled in for figures -- or buy folders with pockets and prongs. Now, bind your books with yarn or string. Begin today making figures of Saul and Samuel and mounting with glue on craftsticks as puppets. Decorate the first 2 pages for the anointing of Saul and his sin against the Lord; what kind of scenery do you need? Grass or flooring can be made of appropriate-colored wallpaper or construction paper glued on the bottom of the page. Other things – trees, chairs, altars, etc. – can be cut out and pasted on. Tell the story, but we’ll add to the book next week. Not into books? Just print the figures on cardstock, cut out, color, add popsicle stick to the back for the puppets.
- Close with prayer.
David (to Goliath)
DAVID (to Goliath)
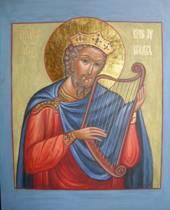 Objectives:
- Children should know the story of David – his anointing, his shepherd childhood, and the story of David and Goliath.
- Children should identify David as the author of many of the Psalms.
- Children should begin to memorize the 23rd Psalm.
Possible Lesson Plan:
- Open with prayer.
- Read the story of the childhood of David in the Beginner’s Bible, pages 169-180, the Children’s Bible Reader, pages 126-128, First Bible 86-92, or the Read with Me Bible 173-185. If you use the Read with Me Bible, be sure to discuss the fact that David wrote Psalms, songs to the Lord, and played the harp. The Psalms are in the Beginner’s Bible 190-193, Children’s Bible Reader 132-135 or the Read with Me Bible 218-221.
Add David to your timeline.
- True/False questions:
True False
David was the son of Jesse. David was the son of Saul.
David was a shepherd. David was a fisherman.
David killed Goliath with a sling. David killed Goliath with a spear.
David played the harp. David hated music.
David wrote Psalms to God. David didn’t know God at all.
4. Optional learning game: Slingshot practice. Cut a circle and add eyes and mouth to make Goliath's head target and tape to wall, or, on a nice day, go outside. Then give children slingshots with rubber balls or "disc shooters", both cheaply and easily available. See who can even hit the target...Hard, isn't it?
5. Work again on your Book of Samuel Storybooks. This time add David the shepherd boy, the anointing of David, and David and Goliath pages to your book, again with appropriate scenery. Add the figures of David and Goliath, Jesse, and David’s brothers to your collection of figures.
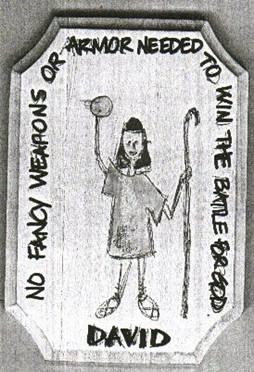
Alternate craft idea: take a small wooden plaque or blank switchplate. Draw a figure of David on it with hand upraised and add the lettering saying “NO FANCY WEAPONS OR ARMOR NEEDED TO WIN THE BATTLE FOR GOD” and “DAVID” around the edges. Take a field trip looking for a small rock. Color the switchplate or plaque and glue the rock into the circle on the hand of David. Add adhesive magnet strips to the back for refrigerator mounting.
- Close with prayer.
David and Jonathon
DAVID AND JONATHON
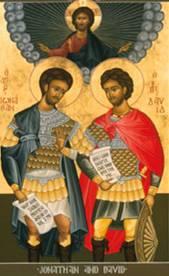 Objectives:
- Children should identify David as King after Saul.
- Children should identify Jonathon as Saul’s son.
- Children should be able to tell the story of David and Jonathon.
Possible Lesson Plan:
- Open with prayer.
- Read the story from the Beginner’s Bible, pages 181-189, Children’s Bible Reader, pages 129-131, or Golden Children’s Bible, pages 236-241, 252-253.
No one new to add to the timeline today, but review all the people studied so far.
- True/False questions:
True False
Jonathon was David’s friend. Saul always loved David.
Jonathon was the son of Saul. David was the son of Saul.
Jonathon saved David’s life. David was killed by Saul.
- Discuss friendship: What is a friend? Who are your friends? What qualities make a good friend? Was Jonathon a good friend to David? Are you a good friend to your friends?
- Take a small, toy bow and arrow set. Go out in the yard and practice shooting at a target. Can you make it miss like Jonathon?
- Now finish your books. Add Jonathon to your figures in the pocket. Add Saul’s tent and the archery field to your pages. Now, can you tell the whole story, from Saul all the way to David and Jonathon?
Still not into books? Make Jonathan’s bow and and quiver full of arrows. Take a large craft stick, notch it ahead of time with a knife or Exacto. Soak it through Liturgy in water. Children can decorate and add string. Arrows are Q-tips with one cotton end removed. Decorate a toilet paper tube to be a quiver. Now you can practice shooting at a target with your very own bow and arrows.
- Close with prayer.
Solomon
SOLOMON
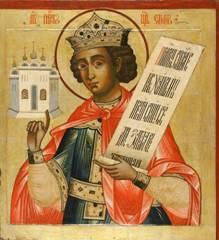 Objectives:
- Students should identify Solomon as David’s son.
- Students should know that Solomon chose wisdom as his gift.
- Students should know that Solomon built the great temple in Jerusalem.
Possible Lesson Plan:
- Open with prayer.
- Read the story of Solomon in the Beginner’s Bible, pages 194-200, the Children’s Bible Reader, pages 136-139, First Bible, pages 104-111, or the Read with Me Bible, pages 186-193.
Add Solomon to your timeline.
- True/False questions.
True False
Solomon was the son of David. Solomon was the son of Jonathon.
Solomon asked God for wisdom. Solomon asked God for riches.
Solomon found the mother of the baby. Solomon cut the baby in two.
Solomon built the temple in Jerusalem. David built the temple in Jerusalem.
- Re-enact the scene of the 2 women with the baby before King Solomon: Have a baby doll, 2 girls (with tunics and towels on their heads as costumes) and one boy (with a crown). Who was the real mother and how did Solomon know this?
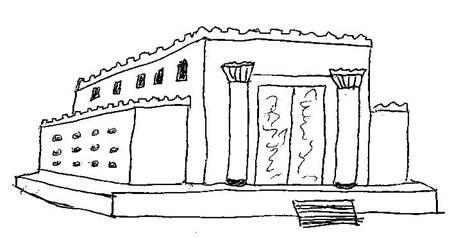
- Read a description of the temple. Then, with as much accuracy as possible, make a temple out of sugar cubes or play dough. Discuss the purpose of the outer court, the inner court and the Holy of Holies. You might even want to make a tiny ark of the covenant from play dough with a tiny 10 commandments to put in the Holy of Holies, with a piece of cloth or felt hanging from a pipe-cleaner or craft stick as a curtain over the door. When dry, the creations can be spray-painted gold, but go lightly with the gold paint if you’re using sugar cubes (They’ll melt!)
6. Close with prayer.
P
Proverbs and Song of Songs
PROVERBS AND SONG OF SONGS
Objectives:
- Children should identify Solomon as the author of these books and also Ecclesiastes.
- Children should identify Proverbs as a book of wise sayings.
- Children should identify Song of Songs as a love poem of Solomon.
Possible Lesson Plan:
- Open with prayer.
- There are some Proverbs in the Children’s Bible Reader, pages 139-140. Read the Arch Book on Proverbs. Have each child pick a favorite Proverb and write that proverb on a small piece of paper for him.
- Discuss the love of God: Does God love us? Why? How does He show His love for us? How did He show His love for Solomon? For Noah? For David? For Hannah? For Ruth? For Moses? Do we love God? How do we show our love for God? How did Solomon? How did Noah?… Sing “Jesus Loves Me”.
- This lesson should fall around the time of St. Valentine's Day in February, and Song of Songs is Solomon's love song. Make a Valentine… for God? For one of His children in a hospice or orphanage or hospital? Use red and pink paper hearts, doilies, stickers, etc.
- Make a Proverbs Banner:
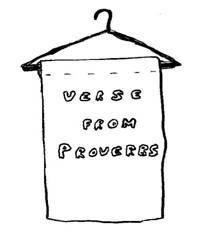
Take a 12x18-inch piece of felt.
Fold over one short end around a hanger and staple. Write the child’s chosen verse from Proverbs on the banner with marker, or cut
out or buy letters to glue on.
 Have the children read their banners to each other and memorize their verses.
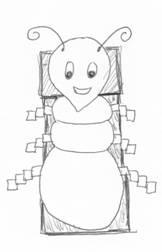
- Alternate craft: Ant paper bag puppet. Read what Proverbs has to say about the remarkable ant, especially Proverbs 6. Then cut a head out of red or yellow construction paper, color eyes and mouth, attach pipe-cleaner antennae, and glue to fold-over of paper bag. Cut body from black and make legs from folded strips of paper or pipe cleaners. Glue to main part of bag. Insert hand and make ant talk, telling about its life and hard work!
The ant is fine but too big or takes too much time? Use one black or red plastic spoon, 3 pipe cleaners, and 2 google eyes to make a really cute, little ant. Still discuss the remarkable ant.
- Close with prayer.
Elijah
ELIJAH
Objectives:
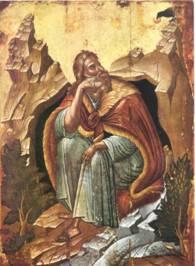 Children should be able to tell the story of Elijah – his feeding by the ravens, his meeting with the prophets of Baal, the “still, small voice”, and the fiery chariot.
- Children should identify Ahab and Jezebel as an evil king and queen.
- Children should identify Elijah’s student and disciple, Elisha.
Possible Lesson Plan:
- Open with prayer.
- Read the story of Elijah from the Beginner’s Bible, pages 201-221, the Children’s Bible Reader, pages 141-144, First Bible, pages 112-117, or the Read with Me Bible pages 194-209 plus the Golden Children’s Bible 276-277. Be sure to identify Jezebel as the queen of King Ahab, since she is left out of the Children’s Bible Reader. This would be the time to discuss with the children the split among the Jewish people that occurred around 900 BC, dividing the land into Israel in the north with its capital of Samaria and Judah in the south with Jerusalem its capital. Elijah lived in the north and Ahab and Jezebel were king and queen of Israel.
Add Elijah to your timeline.
- True/False questions:
True False
Elijah was fed by ravens. Elijah was fed by a dove.
God sent fire from heaven. Baal sent fire from heaven.
Elisha was the disciple of Elijah. Noah was the disciple of Elijah.
Jezebel was a wicked queen. Ruth was a wicked queen.
Elijah was taken by a fiery chariot. Elijah died and was buried.
- Talk about prayer: How does God speak to us? How did He speak to Elijah? In a voice of thunder (as He did at Jesus’s baptism)? In an earthquake? In a wind (as He did at Pentecost)? Or does He speak when we are quiet in a still, small voice? Have the children practice being quiet before God.
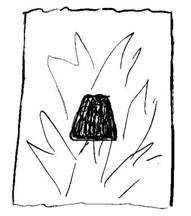
- Make a “Fire from Heaven”
Stained glass window: Give each child
a piece of wax paper 18 inches long.
Cut out an altar from black construction
paper and place in the center of the
waxed paper. Cut out flames from
yellow, orange, and red tissue paper
(in the cabinet) and lay all around and
over the altar. They can overlap a little.
Take to the teacher. Place another
piece of waxed paper over the
whole picture, and iron on low
to melt the wax. Hang in your window.
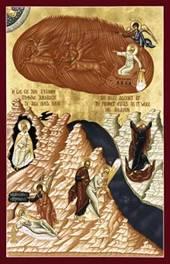
- Alternate craft: Irons not a great option? Try this one instead, remembering that Elijah was taken up to heaven in a flaming chariot. Print the icon on cardstock. Cut out Elijah in his chariot, the two angels, and little Elisha in the corner. Take a piece of blue construction paper and glue the two angels in the sky and Elisha at the bottom. Add cotton ball clouds if desired. Now cut a slit near the top of the paper. Tape or staple Elijah to one end of a long strip of matching paper and fit the other end through the slit. You can make Elijah rise into heaven by pulling on the strip in the back!
- Close with prayer: This time in silent prayer with the children practicing their silence!
Elisha
ELISHA
Objectives:
 Children should identify Elisha as the disciple of Elijah.
- Children should be able to tell the stories of Elisha and Naaman.
Possible Lesson Plan:
- Open with prayer.
- Tell the story of Elisha from the The Beginner’s Bible, pages 222-234, First Bible, pages 118-123, or the Read with Me Bible pages 208-215.
Add Elisha to your timeline, here pictured with Elijah going up to heaven.
- True/False questions:
True False
Elisha was the disciple of Elijah. Jezebel was the disciple of Elijah.
Naaman was a leper. Naaman had the flu.
Elisha told Naaman to dip in the river. Elisha told Naaman to cut his hair.
Gehazi was the servant of Elisha. Gehazi was the servant of Naaman.
Gehazi lied to Elisha. Gehazi was honest and truthful.
- Discuss the importance of obedience: God spoke to Naaman through Elisha. Did Naaman want to obey God? Or did Naaman think that what Elisha asked of him was silly? Who else obeyed God, even though it made him look silly? Noah building the ark? Moses holding his staff over the Red Sea? Joshua marching around Jericho? Gideon with his lamp pots and trumpets? David with his sling against Goliath? Do we always understand why we should obey our parents? God? Or do we always ask, “Why?” and miss the miracle.
- Make a Naaman Popsicle Puppet Cup: Print the double puppet on cardstock, color, add sores to the body on the side with the sad face. Fold in the middle and staple or glue to a popsicle stick. Cut slit in the bottom of a blue paper cup. How many times did Naaman have to dip before he was healed? Re-enact with your puppet cups.
- Close with prayer.
Jonah
JONAH
 Objectives:
- Children should be able to tell the story of Jonah.
- Children should identify another reason for disobedience – dislike of the command.
Possible Lesson Plan:
- Open with prayer.
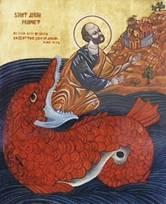
- Read the story of Jonah in the Beginner’s Bible, pages 257-264, the Children’s Bible Reader, pages 148-151, or the the Read with Me Bible, pages 244-249. Remember that Ninevah was the capital of the Assyrians, who were poised to conquer the entire land of Israel.
Add Jonah to your timeline.
- True/False questions:
True False
Jonah was a prophet of God. Jonah was a king of Israel.
God told Jonah to go to Ninevah. God told Jonah to go to Egypt.
God sent a storm to Jonah’s ship. Jonah’s ship had clear, blue sky.
Jonah was swallowed by a big fish. Jonah was eaten by a lion.
- Discuss disobedience again: Why did Jonah disobey God? Did he think the command was silly? Did he have trouble hearing God? Or did he dislike the command? Are you ever asked to do something you dislike? What? What were the consequences to Jonah for disobedience? What happens to you?
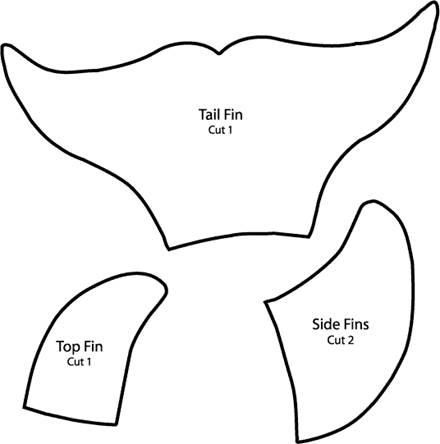 Game: Big Mouth Paper Plate Fish – Color the eating side of two paper plates pink. This will be the inside of the fish’s mouth. Color the other side blue or gray for the outside of the fish. Cut the tail and fins from card stock or poster board or another paper plate. Turn the plates over and place one on top of the other. This one will be the top of the fish. Staple the top to the bottom including fins and tail as shown, leaving a wide area for the mouth. Cut a slit at the edge of the paper plate just behind both side fins and glue in side fins. Glue on some googly eyes. Fill the fish with some things he might have swallowed, along with a tiny picture of Jonah below. Things might include a bone, paper clip, shell, feather – all kinds of things. Have children take turns removing one thing from the fish blindfolded and with a tweezers – winner is the one who removes Jonah!
 6. Make a Fish Vomiting Out Jonah: Make a large fish out of a paper plate, cutting out a triangle and stapling it on for the tail and mouth. Decorate with markers, pieces of tissue paper, google eyes, as desired. Then, take a party blower – the kind that unwinds like a long tongue when you blow and rolls back up when you stop blowing – and attach behind the whale just inside the mouth with heavy tape. Cut out the figure of Jonah from cardstock, color, and tape or staple to the end of the blow toy. Blow on the toy and Jonah will fly out of the mouth of the fish.
Paper plate fish not your idea of fun or forgot to buy the party blowers in time? But, you have clothespins at home? Try a clothespin Jonah instead:
- Close with prayer.
Isaiah
ISAIAH
Objectives:
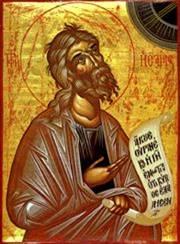 Children should know that a prophet is someone who speaks for God.
- Children should identify Isaiah as a prophet to the kingdom of Judah, the southern kingdom centered around Jerusalem.
- Children should know the story of Isaiah’s calling.
- Children should know that Isaiah prophesied about the coming of the Messiah.
Possible Lesson Plan:
- Open with prayer.
- Tell the story of Isaiah from the Children’s Bible Reader, page 145, or the Golden Children’s Bible, pages 292-293. This would be a good time to mention again the split between Israel and Judah and that Isaiah was an advisor to the kings of Judah. During Isaiah’s lifetime, the kingdom of Israel in the north would be captured by the Assyrians and utterly destroyed. The story of King Hezekiah is in the First Bible, pages 128-129.
Add Isaiah to your timeline.
- True/False questions:
True False
Isaiah was a prophet. Isaiah was a king.
Isaiah lived in the land of Judah. Isaiah lived in the land of Israel.
Isaiah was touched by a burning coal. Isaiah was touch by poison ivy.
Isaiah wrote the book of Isaiah. Isaiah wrote the book of Psalms.
- Discuss the role of a prophet: What are some other ways God can speak to us? What did prophets speak about? (the future, yes, but also advice for the kings of their day and words of warning. Do we have prophets today? Paul talks of prophets in his epistles as an existing ministry.Who might be a prophet today?
- Make a tuna can incense burner. Have a tuna can for each child. Freeze the can full of water and bring to church and place in freezer during Liturgy. Use hammer and nails to produce a pleasing design on the sides. Remove ice. Punch 3 holes along the top rim and cut a length of wire for each. Twist wires to attach to can and to each other to make a hanger. You can actually burn incense and charcoal with this in your icon corner at home.
Freezer and hammers a bit too much? Take a foil pot pie pan. You can first decorate it by etching a design in the bottom with a simple skewer or knitting needle, or punch holes with a needle, or even decorate with markers. Then punch holes around the edge, 3 or 4 for hanging wires and 5 or 6 for jingle bells. Use wire for the hanging and also twisted for the jingle bells so all will be fireproof. Don’t need fireproof and young children? Then just use pipe cleaners – whole ones for the hangers and quarters for the jingle bells.
6. Close with prayer.
Jeremiah
JEREMIAH
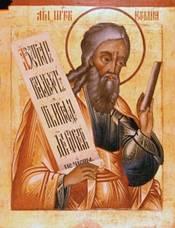 Objectives:
- Children should again identify a prophet as one who speaks for God.
- They should identify Jeremiah as a prophet who lived in Judah.
- Children should identify Jeremiah as author of the book of Jeremiah and of the Lamentations.
- Children should know that Jeremiah prophesied the fall of Jerusalem to the Babylonians and lived to see that fulfilled.
- Children should identify Nebuchadnezzar as King of Babylon.
Possible Lesson Plan:
- Open with prayer.
- Read the story of Jeremiah and the fall of Judah in the Children’s Bible Reader, pages 146-147, First Bible, pages 132-133, or the Golden Children’s Bible, pages 298-303.
Add Jeremiah to your timeline.
- True/False questions:
True False
Jeremiah was a prophet of Judah. Jeremiah was King of Judah.
Nebuchadnezzar was King of Babylon. Nebuchadnezzar was a prophet.
Jeremiah wrote the Lamentations. Jeremiah wrote the Proverbs.
Jerusalem was conquered by Babylon. Jeremiah defeated Babylon in battle.
- Make Jeremiah’s Girdle:
 A girdle was actually a belt worn to keep their flowing robes from billowing out too much. Make this one out of felt. Cut a 6x36-inch piece of felt for each student. Punch several holes in each of the short ends. Cut out a 4x4 square of felt also for each student. Staple or glue the “pocket” in the middle of the back of the girdle. Tie yarn in each of the holes as fringe. Alternatively, use fleece and make it large enough to actually be used as a scarf – a longer reminder of the story each time it’s worn. Just cut the edges to fringe.
- Close with prayer.
Ezekiel
EZEKIEL
Objectives:
- Students should identify Ezekiel as a prophet during the Babylonian captivity.
- Students should identify Ezekiel as the author of the book of Ezekiel.
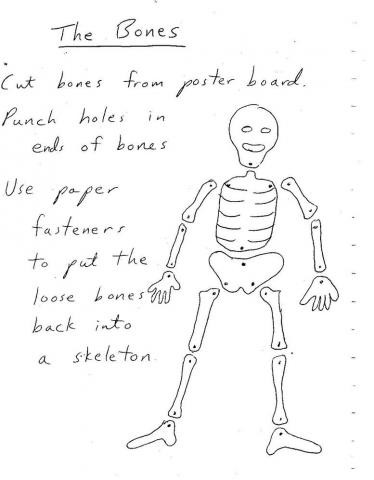
- Students should know at least one of his major visions – the bones.
Possible Lesson Plan:
- Open with prayer.
- The story of Ezekiel is not in any of our storybooks Tell the children the story as follows:
Ezekiel was a prophet of the Lord. God gave Ezekiel a scroll with God’s words on it to eat and told him to tell the people these words; when Ezekiel at the words of God, the scroll tasted sweet like honey.
Break class for just a few minutes here to make honey scrolls for the children to eat at the end of class or make the scrolls ahead of time and let the children eat them while finishing the story. Take crescent roll squares of dough, add a dab of honey, roll up each like a scroll, and bake. Add a twizzler tie and sprinkle with sugar on the outside if desired.
Ezekiel saw many visions and the Lord told him their meaning. One of his visions was about wheels; another was about huge beings with four wings and four faces. He talked to God’s people about building walls and vines and sheep. He saw visions of eagles and cherubim. But one of his most famous visions was of a valley of bones!
One day the Spirit of the Lord took Ezekiel to a valley. The valley was full of dried up bones – all kinds of bones. The whole valley seemed to be full of bones. And God asked Ezekiel if these bones could ever be alive again; Ezekiel answered that God was the only one who knew the answer.
So God told Ezekiel to speak to the bones. Ezekiel told the bones that God was going to make them alive again. This would surely show the power of the Lord. And as Ezekiel spoke, there was a great rattling and the bones all came together! They joined into bodies – head to back to arms to legs to hands and feet. Soon they had muscles and skin. But there were still not alive.
And God told Ezekiel to tell the bones that God was commanding the breath of life to come into their bodies. And suddenly the breath came into the bodies and they were alive! They stood up on their feet – a great army for God.
Ezekiel told God’s people that the vision of the bones was a message from God for them. When there seems to be no hope, God can make life again through His Spirit. We can trust our Lord no matter how terrible the things that happen!
Add Ezekiel to your timeline.
- True/False questions:
True False
Ezekiel was a prophet of God. Ezekiel was a bone.
Ezekiel saw a valley full of bones. Ezekiel saw a valley full of trees.
The bones came alive again The bones blew away in the wind.
- Review with the children the bones in their bodies and their arrangement.
- When do we hear this story in Church? Every year during Holy Week!
- Make an Ezekiel’s Bones Puzzle: Before class, cut the skeleton on the next page out of white paper. Give each child a set of bones in an envelope and a piece of black construction paper. Have him glue the bones into a coherent skeleton on his construction paper. Then cut the entire piece of paper into puzzle pieces. Put the pieces back in the envelope. Have fun!
- Close with prayer.
Shadrach, Meshach, and Abednego
SHADRACH, MESHACH, AND ABEDNEGO
Objectives:
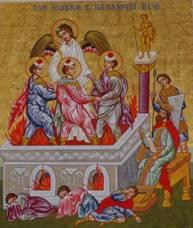 Children should be able to identify Shadrach, Meshach, and Abednego as the three young men in the fire.
- Children should be able to tell the story of the three young men.
- Children should identify Nebuchadnezzar as King of Babylon and the Jewish people as his prisoners.
Possible Lesson Plan:
- Open with prayer.
- Read the story in the Beginner’s Bible, pages 247-250, the Children’s Bible Reader, pages 151-153, or the Read with Me Bible, pages 223-229. Remind the children that Jesus saved the 3 young men and that the story of Shadrach, Meshach, and Abednego is told over and over during Holy Week as a foreshadowing of Jesus’s escape from the flames of hell and resurrection.
Add the Three Youths to your timeline.
- True/False Questions:
True False
Shadrach was a Jewish boy. Shadrach was a Babylonian.
Nebuchadnezzar was King of Babylon. Nebuchadnezzar was king of Israel.
Jesus was in the fire. Nebuchadnezzar fell in the fire.
- Before class, lightly spray sugar cubes from a box with gold paint. In class, have the children build a statue of Nebuchadnezzar from the gold cubes. Ask the children for the characteristics of God – is He all-powerful, able to help us in all times of need? Then ask them if this golden statue can save them from troubles? What troubles can they think of in their own lives? For each problem the children mention, pour a little water on the statue. Watch the statue crumble! Just as the 3 young men knew, no statue is a true god. Review the stories of Noah, of Joseph, of Moses, etc. to show that the one true God can help us in even the worst circumstances. How did he help Shadrach, Meshach, and Abednego?
- Make Popsicle Puppets. Print figures on cardstock, cut out, color, tape popsicle stick to the back. Can students retell the story with their puppets?
6. Close with prayer.
Tobit
TOBIT
Objectives:
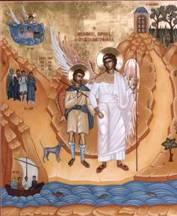 Children should be able to identify the Archangel Raphael and know that angels are heavenly beings. .
- Children should be able to tell the story of Tobit.
Possible Lesson Plan:
- Open with prayer.
- Tell the story of Tobit (use highlighted words for the game board):
During the sad days when the Jewish people were held as slaves by
the Babylonians, there lived a man named Tobit. Tobit had a son named Tobias. Tobit and Tobias, even though they were captives of the Babylonians, helped their fellow-Hebrews whenever they could. Because of this, the king Esarhaddon did not like Tobit and Tobias and made their lives hard. Finally Tobit became blind; he could not see at all. Life seemed hopeless, and Tobit prayed to God that he should die.
At the same time, in Ecbatana, there lived a Hebrew girl named Sarah. She was also praying to God. Seven times she was married; and seven times the demon Asmodaeus killed her new husband on their wedding night.
One day, Tobit sent his son Tobias to Media to collect ten silver coins; they needed the coins to live since Tobit could not work. He hired a man named Azariah as a traveling companion, but Azariah was really the angel Raphael, sent by God to heal both Tobit and Sarah. As they traveled by the river Tigris, Tobias caught a fish. Azariah told him to save the heart, liver, and gall of the fish. Soon Tobias arrived in Ecbatana. There he met Sarah. They were cousins! Tobias fell in love with Sarah and they decided to get married. On their wedding night, Tobias burned the heart and liver of the fish; the awful smell drove the wicked demon away to Egypt. Sarah and Tobias were saved!
Tobias returned home to his father. What rejoicing! He had been gone so long that Tobit had thought he had been killed. Tobias rubbed his father’s eyes with the gall of the fish. Tobit could see again! They thanked God for His faithfulness and goodness in sending the angel Raphael to help them.
Add Tobias with Raphael to your timeline.
- True/False questions:
True False
Tobit was a Jewish man in Babylon. Tobit was a Babylonian.
Tobias was the son of Tobit. Raphael was the son of Tobit.
Azariah was the angel Raphael. Azariah was a demon.
Sarah married Tobias. Sarah married Tobit.
- Make a story spinner. Print the pictures from the story. Color and glue in 4 sections to paper plate. Make a spinner from a brad and a paperclip. Can you tell the story with the pictures?
Alternate craft, a bit more difficult. Make glove puppets of Tobit, Tobias, Sarah, Raphael, and the demon:
Take one glove for each student. Fill each fingertip with a bit of cotton.
Tie below the cotton with a piece of yarn.
Decorate with hair, eyes, hats, etc.
Put wings on the angel and horns on the demon
5. Play a game of Blindman's Bluff. Discuss what it might be like to be blind for real.
6. Close with prayer.
Daniel
DANIEL
Objectives:
- Children should identify Daniel as a prophet.
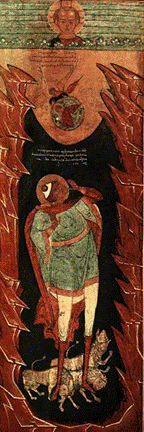
- Children should identify Daniel as the author of the book of Daniel.
- Children should be able to tell the story of Daniel in the lion’s den.
- Children should identify Belshazzar as the last king of Babylon and to tell the story of the handwriting on the wall.
Possible Lesson Plan:
- Open with prayer.
- Read the story of Daniel in the Beginner’s Bible, pages 251-256, Children’s Bible Reader, pages 154-157, First Bible, pages 140-143, or the Read with Me Bible, pages 230-243.
Add Daniel to your timeline, with the lions of course.
- True/False questions:
True False
Daniel was a prophet of God. Daniel was king of Babylon.
Daniel lived in Babylon. Daniel lived in Jerusalem.
Daniel wrote the book of Daniel. Daniel wrote the book of Psalms.
King Darius was a friend of Daniel. Daniel hated King Darius.
- Review angels: How did they appear to other people in the Bible? How did they help Daniel here?
- Make a Diorama:
Begin with a small box like a shoebox for each child. Cut out the front panel. Cut a piece of construction paper to fit the back; color it as scenery and glue in place inside the box. Now make figures for Daniel, Darius, the wicked advisors, and the lions out of pipe cleaners. Use modeling clay as a base to stand the figures and place them in the diorama. OK, shoeboxes hard to come by. Take a large paper plate and fold in half. One half will be the ground, decorated as grass, and the upright half decorated with scenery and sky.
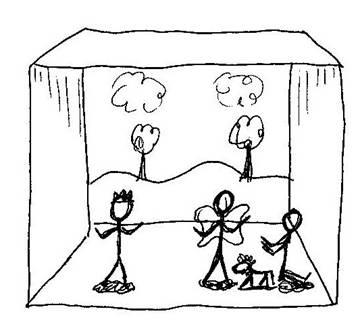
OK, even easier and faster? Print the icon on cardstock and cut out the figures of Daniel and the lions with their little bases. You can even use the cave and the little Habakkuk with the angel as the background scenery, gluing them on. Bend the bases back on the figures, place them as desired, and tape or glue in place.
6. Alternate craft idea, a bit easier and quicker: Make a Lion Roarer. Cut 3 rectangles out of paper; decorate one with the face of a lion. Fold the long one into four sections like a fan. Then place it on the undecorated rectangle and put glue where labeled. Place the lion section on top. When it dries, blow into the side for a roaring sound!
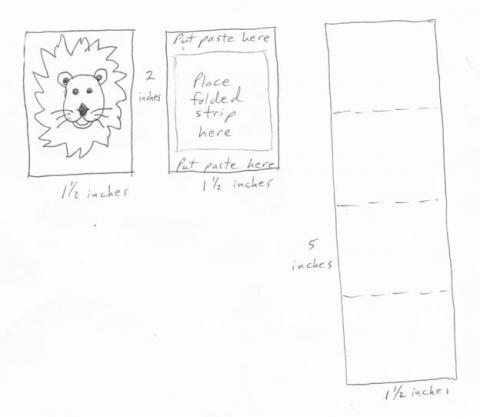
7. . Close with prayer.
Esther
ESTHER
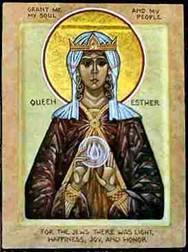 Objectives:
- Children should be able to identify Esther as Queen of Persia.
- Children should be able to identify her husband Ahasuerus and Mordecai and Haman.
- Children should be able to tell the story of Esther.
Possible Lesson Plan:
- Open with prayer.
- Begin by making some sort of noisemaker -- a couple of small paper plates stapled together with beans inside and a craft stick handle stapled on make a great rattle. The children can decorate the plates. Or take an plastic Easter egg, put some beads or beans in it, close it, and use duct tape to surround it with 2 plastic spoons, making handle. Decorate the duct tape or use colored tape.
- Read the story of Esther in the Beginner’s Bible, pages 240-246. As you read it, have the children shake their noisemakers and boo every time the villain, Haman, is named. This is exactly the way Purim, the holiday commemorating Esther, is celebrated in a Jewish synagogue to this day.
Add Esther to your timeline.
- True/False questions:
True False
Esther was a Jewish girl. Esther was a Persian girl.
Esther became Queen of Persia. Esther became queen of Israel.
Mordecai was Esther’s cousin. Mordecai was King of Persia.
Ahasuerus was King of Persia Ahasuerus was Esther’s father.
Haman was Esther’s enemy. Haman was Esther’s friend.
- Talk about the victories of other Old Testament people over evil – the 3 men in the fire, Daniel, Joseph, David and Jonathon, etc. Talk about our own victories over evil: Were we ever tempted to lie but didn’t? Did we obey our parents when we didn’t want to?

- Make Esther Glove Puppets:
Take a white or beige gardening glove for each child. Decorate each finger with little bits of fabric, lace, felt, beads, and markers to be the major characters of the story: Haman on the thumb, Queen Vashti on the little finger, and Esther, Ahasuerus, and Mordecai on the other fingers. Tell the story, killing first Vashti and then Haman by bending down the fingers. You can decorate the palm as a palace with fabric paint or markers if desired.
No gloves or too involved for the time available. Then print finger puppets on cardstock, cut out, color, and tape. Then tell the story.
- Close with prayer.
Minor Prophets -- Amos
MINOR PROPHETS: AMOS
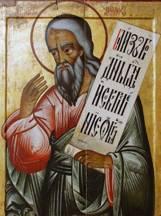 Objectives:
- Children should identify Amos as a shepherd from the land of Judah.
- Children should be able to tell of his message to the people of Israel.
Possible Lesson Plan:
- Open with prayer.
- Tell the story of Amos. There is a brief summary in the Golden Chldren’s Bible, page 291. For more detail: Amos was a shepherd and grower of sycamore figs. He was not the son of a prophet or had any schooling in prophecy. He was called by God from his home in the southern kingdom of Judah to speak to the northern kingdom of Israel. The land was rich and peaceful. The people of Israel were enjoying riches they had not had for centuries. But they did not care about God. They went to the city of Samaria to offer sacrifices to God but continued to do wicked deeds. They did not care for the poor or helpless. Amos told them that God would punish them if they did not return to following God’s commandments and worshipping God in their hearts and caring for the poor. This did not make Amos popular with the rulers. They told Amos he could not speak anymore. So, Amos wrote down his prophecies, often on pieces of broken pots. He knew that God had told him to speak and that God’s word would not be lost but saved for people to read later.
Add Amos to your timeline.
- True/False questions:
True False
Amos was a shepherd. Amos was a king.
Amos was a prophet of God. Amos hated God.
Amos spoke to the people of Israel. Amos spoke about Baltimore.
- Review sheep and shepherds (Remember David?) What are sheep like? Why do they need a shepherd? What is the life of a shepherd like? What dangers does he face? How is God like a shepherd?
Review figs: Amos also grew syacamore figs. Snack time? Try some figs. Many will never have tasted them!
- Sing “Amos Had a Little Lamb”
- Amos had a little lamb…whose name was Israel.
- Amos had a little lamb…whose fleece was black with sin.
- Amos said to Israel…”You must obey God.”
- Amos said to Israel … “Your fleece will then be clean.”
- Make a Sock-puppet sheep:
Each child gets a white sock. Show child how to put socks on his hand and press in for a mouth. Glue red felt tongue in mouth. cGlue on felt, pompom, or wiggle eyes. Make black felt ears and glue in place. Glue several cotton balls on top of Head.
- Close with prayer.
Minor Prophets -- Haggai
MINOR PROPHETS: HAGGAI
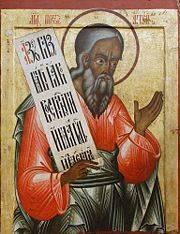 Objectives:
- Children should be able to identify Haggai as a prophet who spoke for God.
- Children should know that Haggai lived just before the time of Esther.
- Children should know that Haggai told the people to rebuild His temple.
Possible Lesson Plan:
- Open with prayer.
- Tell the story of Haggai: After living in Babylon for 70 years, God’s people were home! A group had returned to Jerusalem to rebuild God’s temple. They had started the work, but their neighbors didn’t want them to rebuild the temple, so they stopped building. The people made excuses. “Maybe it isn’t the right time to rebuild the temple,” they said. They thought that because the task was difficult, maybe God didn’t want them to do it. Instead, the people worked on their own houses. They built nice houses for themselves, but God’s temple sat unfinished. This made God angry. God wants His people to put Him first.
God sent a message to His people through the prophet Haggai (HAG igh). Haggai went to Zerubbabel the governor and Joshua the high priest to tell them God’s message. “You live in beautiful houses,” said the Lord, “while My house lies in ruins.” Was it right for God’s people to put themselves first? No, their actions did not honor God. God told them to think about what was happening. “You plant seeds, but you gather only a few crops. You have food to eat, but you are still hungry. You have clothes to wear, but you are still cold.” This was happening because the people put themselves first. God did not bless their work because they did not put Him first. God told them to get wood from the hills and finish rebuilding the temple of God.
Zerubbabel, Joshua, and all the people listened to Haggai’s message from God. They chose to obey God and honor Him. “The Lord says, ‘I am with you,’ ” Haggai said. All of the people were excited and encouraged. They began the work on the temple again. A little time passed, and then God spoke to Haggai again. He told Haggai what to say to the people of God. This is what the Lord said: “Do you remember what the first temple looked like? What do you think? Was the first temple more beautiful?” God said, “Zerubbabel, don’t be discouraged! Joshua, don’t be discouraged! All you people, don’t be discouraged! Keep working hard. I am with you.” Then God said that something big was going to happen. He said that other nations were going to give gifts for the temple—silver and gold! God said, “This temple will be greater than first. My glory will be here, and I will bring peace to this place.” God promised to bless the people because they chose to obey Him.
Add Haggai to your timeline.
- True/False questions:
True False
Haggai was a prophet of God. Haggai was a soldier.
Haggai lived in the land of Judah. Haggai lived in the land of Babylon.
Haggai said to rebuild the temple. Haggai said to build your own house.
- Consider with the children the importance of having a church to worship in. Do we have a church? What do we do in church? Do we have houses? What do we do in our houses? What can we do in both? How are the two different? How important is it to have a church to worship in?
- Review the prophecies about the Christ: Isaiah? (born of a virgin, a Nazarene, suffering and death); Micah? (born in Bethlehem); Jeremiah? (the slaying of all children under two); Zechariah? (riding on a donkey).
- Make Hebrew people, one per child:
Take a toilet paper tube for each person. Cut a strip of white paper for the face, colored paper for the clothing, and make a hat of tinfoil or cloth. Draw in the features. Glue on colored paper arms with white hands. Play with the people, helping them to build God a temple. Use the model of the temple made by the teens if you want.
- Close with prayer.
Ezra and Nehemiah
EZRA/NEHEMIAH
Objectives:
- Children should be able to identify Ezra as the priest who brought the law back to Jerusalem.
- Children should identify Nehemiah as the Jewish governor who rebuilt the city wall.
- Children should identify Cyrus and Darius as the kings of Persia who allowed the work.
Possible Lesson Plan:
- Open with prayer.
- Read the story of the rebuilding of Jerusalem from the Golden Children’s Bible, pages 324-331.
Add Ezra and Nehemiah to your timeline.
- True/False questions:
True False
Ezra was a priest. Ezra was a king.
Nehemiah was governor of Jerusalem. Nehemiah was a priest.
Cyrus and Darius were kings of Persia. Cyrus was king of Babylon.
Darius sent the captives back. Darius killed all the Jewish people.
- This is a good time to review this very difficult period in Jewish history. Remind the children of the line of kings from Saul to David to Solomon and the glory of the temple in Jerusalem. Review the split of the people into the northern kingdom, Israel, with its capital in Samaria and the southern kingdom, Judah, with its capital in Jerusalem. With older children, you can make comparisons with our own Civil War. God was not happy! He sent prophets to both kingdoms – Elijah and Elisha to Israel and Isaiah, Amos, Micah, and Jeremiah to Judah. Review the fall of Israel to the Assyrians and of Judah to the Babylonians. Who was the king of Babylon? (Nebuchadnezzar). Who were some of the prisoners taken back to Babylon? (Shadrach, Meshach, Abednego, Daniel, Ezekiel) Review their stories from captivity. Now Nebuchadnezzar’s heir Belshazzar has fallen to Cyrus of Persia (He sneaked into Babylon in the sewers!) and Cyrus and his heir, Darius, are allowing the Jewish people to return to Jerusalem under Ezra and Nehemiah. Many remained in Persia, however, including Esther.
- Make “Ezra’s Scroll of the Law”: Take a piece of brown wrapping paper. Write on it the 10 Commandments. Roll into a scroll and tie with a ribbon. Review the Commandments to be sure they’re still memorized.
- Alternate Craft, or perhaps do both: Feast of Booths. Nehemiah and Ezra discovered the Feast of Booths, or Sukkoth, in the books of the Torah. When Ezra finished reading the scroll to the people, they realized they had not celebrated this feast, required by the law, for many, many generations. The feast remembers the time that the people of Israel lived in tents when traveling to the Promised Land with Moses. It was the time of year for the feast and the people wanted to celebrate it right away. So, they all built booths, almost like homemade treehouses, but on the ground. The feast is celebrated every year by the Jewish people; in fact, the apostles were in Jerusalem for this feast at the time of Pentecost. We can each build an edible booth, perhaps not large enough to live in. Provide graham crackers, pretzels, candies, etc. and, almost like a gingerbread house, icing to use as mortar to hold them together. Let the children be their own engineers; the structures built by Jewish families are fun and all different. Be sure to include some greens for the roof.
- Close with prayer.
Maccabees
MACCABEES
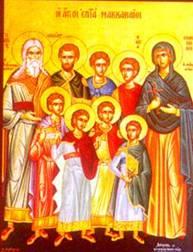 Objectives:
- Students should be able to identify Judah Maccabee as the hero and Antiochus as the wicked king.
- Students should know that the story of Maccabees is the basis for the Jewish feast of Hanukkah.
- Students should understand the meaning behind the 8 candles of the Hanukkah menorah.
Possible Lesson Plan:
- Open with prayer.
- Tell the story of Judah Maccabee and his brothers:
Church School will start a bit late today, because I’ll use my tape, “The Story of Hanukkah” to tell the story for everyone during opening exercises. Don't have a tape or short movie to show. Use this version:
Our story begins thousands of years ago, in the second century BCE or around the year minus 200. At this point in history there was a massive nation called the Greeks and they had formed this military empire and had taken over so much of the known world that they're one of the largest empires, in terms of land mass and history. Now one of the territories they had taken over was called Jerusalem and it is the holy city of the Jewish people.
The Greeks decided that everybody that lived under Greek rule had to follow Greek laws and even worship Greek gods. As a result of this decision, they started smashing the Jewish temples and churches called synagogues. This was very unpopular and pretty mean; if you worshipped your own gods or went by your own rules, you were punished by the Greeks.
So one day a brave, brave man named Judah Maccabee stood up and said, “Hey that's enough!”
Judah Maccabee gathered all the Jewish men and taught them very quickly how to use a spear and a shield and they formed a military group called the Maccabees, a super cool tribe of freedom fighters who were ready to stand up and fight for their rights. Now the Maccabees and Judah, they marched out of Jerusalem to go fight the Greeks - drive them off and regain their land and their temple. After many battles, the tiny group of Maccabees defeated the Greeks. They had won! They'd won this military victory against a much larger army, which in itself is a miracle.
But, when the arrive at the holy Temple, all is in ruins. They tear down the Greek gods and begin cleaning. They find only one small bottle of holy oil with which to light the great menorah. And, it would take 8 days to prepare more holy oil. They lit the menorah with the tiny amount of oil, only enough for one day and it burned for all 8 days. And, to this day, the Jewish people celebrate the 8 days of the miracle of the holy oil that burned for 8 days. They eat foods fried in oil, like jelly donuts and potato pancakes. They burn candles, one for each day, in each home, and give presents each day. And they play games with a special spinning top called a dreidl, with letters on each side remembering that “a great miracle happened there.”
Add Judah Maccabee to your timeline.
- Feed the Elephant True/False questions:
True False
Antiochus was a Macedonian king. Antiochus was an Egyptian pharaoh.
Judah Maccabee led the Jewish people. Antiochus led the Jewish people.
The lamp burned for 8 days. There was plenty of oil for the lamp.
- Play with a dreidl: You can get one of these from at any party store. Each letter has a meaning. Each child starts with about 20 raisins. Each puts one raisin in the center of the table. They take turns spinning the dreidl. If it lands on Nun, they get nothing. If it lands on Shin, they have to give a raisin to each player. If it lands on Heh, they get half of the raisins in the center. And if it lands on Gimmal, they get all the raisins in the center. When you decide time is up, the child with the most raisins is the winner, and each gets to eat his raisins.
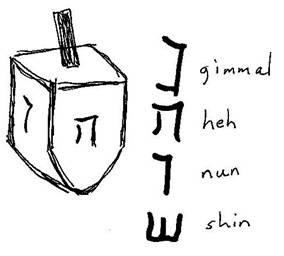
- Make your own dreidl:
Use self-hardening clay to shape the dreidl. Engrave one of the letters on each side. Embed a spinner from a toothpick or a piece of dowel or wooden skewer. Allow to dry and enjoy! Or, make the paper dreidl on the next page.
Not into dreidls? Alternate craft: Make Judah Maccabee's shield. Take a royal blue paper plate. Use duct tape on the back to form the arm strap. Decorate the front with a star of David from glitter glue and paper flames.
- Close with prayer.
